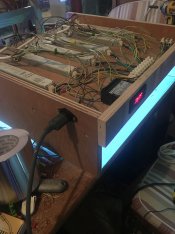
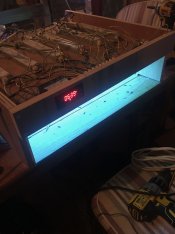
UV fluorescent tubes are very convenient and last a long time. I'd definitely recommend them.
When I was in the UK I bought 18W T8 UV tubes here:
https://www.lightbulbs-direct.com/product-type/specialist-bulbs/ultraviolet/. You need enough to cover the surface of your print, with centre lines spaced about 5cm apart. The area of the tubes should be larger than the area of the print to avoid fall-off at the edges. Roughly the same distance out from the print area as they are vertically separated should be about right.
The light fixtures you can probably buy from a DIY store, but alternatively here are some RS part numbers (
https://uk.rs-online.com/web/):
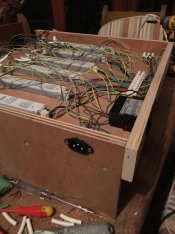
- Ballasts = 714-1420 Check the data sheet to make sure they are the correct wattage for your tubes. These ones support 2 tubes per ballast and have wiring diagrams printed on them.
- Lamp Holder = 270-1569 If you buy this style then you will need two per tubes
Make sure you use wire suitable for the current drawn by the tubes. It can get quite hot under the lights and you don't want your cables to overheat. I used 0.5mm2 which is typically rated about 2A. This is overkill for an individual 18W tube but has lasted well with 16 of them.
I hope this helps.


 south Florida.