Building a Drying Cabinet for Negatives...Ideas?

The Gap

H
The Gap

  • 2
  • 2
  • 31
Ithaki Steps

H
Ithaki Steps

  • 2
  • 0
  • 62
Pitt River Bridge

D
Pitt River Bridge

  • 4
  • 0
  • 68

Forum statistics

Threads
199,002
Messages
2,784,405
Members
99,764
Latest member
BiglerRaw
Recent bookmarks
0

photobizzz

Member
Joined
Jan 3, 2008
Messages
565
Location
El Paso, Tex
Format
35mm
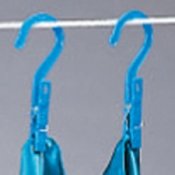
Well due to a mishap with a 4X5 negative I developed yesterday I decided to build my own drying cabinet. I am using a nicer quality 12X15X20" Rubbermaid style tote. I will be using 1/4" binder clips (the type with folding chrome handles used for clipping together 25 or so pieces of paper) to hold the negatives by the corner for drying. I will be suspending two rows of 4 clips horizontally inside the tote on either twine or maybe a galvanized photo frame wire. I have purchased two 120mm computer case fans that have 3 speed switches so I don't have a tornado going on inside my drying cabinet. I have an extra power supply from replacing the power supply in my computer with a larger one to power my video card to power the fans.

So basically I have the plan worked out, my problem is how to filter the air. :confused: I have thought of using coffee filters but am thinking that they will be too restrictive. Does anyone have experience with building one of these that can help with my issue? Even if you haven't built one and have a commercially built drying cabinet maybe you can tell me what yours uses.

I appreciate any ideas on how to filter my air. Thanks all!
 
Last edited by a moderator:

ic-racer

Member
Joined
Feb 25, 2007
Messages
16,552
Location
USA
Format
Multi Format
Heat, blowers, motors, filters are not needed as long as the door does not seal like a refrigerator door and your darkroom humidity is 55% or less. Overnight the negatives will be clean and dry.
 

michaelbsc

Member
Joined
Dec 18, 2007
Messages
2,103
Location
South Caroli
Format
Multi Format
Heat, blowers, motors, filters are not needed as long as the door does not seal like a refrigerator door and your darkroom humidity is 55% or less. Overnight the negatives will be clean and dry.

55%? Man, that must be nice. Where I live the humidity rarely gets below 80%, and that's on an exceptional day. You can't get a static shock with lambs wool bedroom slippers in the dead of winter.
 
OP
OP
photobizzz

photobizzz

Member
Joined
Jan 3, 2008
Messages
565
Location
El Paso, Tex
Format
35mm
I will check out HEPA filters, maybe for a vacuum cleaner type filter would work, might have a rubber gasket too. I will take the advice to have the air sucked in through the filter, rather than blowing on the negatives. I will install the filter first with no fans and see how that works, I bought the fans already but they were only $16 for both off the auction site so not a huge loss and I am sure I can use them for something else if I never install them in the cabinet. I like the size of the one John suggested by I already have limited space and since I move every 2-4 years in the Army I also need to keep my setup as mobile as possible. If I don't like the setup without the fans I will try one first. On the lowest speed it is pretty small amount of air and if sucked through a HEPA filter I don't think it would hurt the negatives. I never really have any issues with water spots; I use a few drops of Kodak Photo-Flo at the end of my final wash and the water just slides off (pretty much) .

Thanks all, I appreciate your ideas, any others are still appreciated!

Edit: As for the humidity, I live in AK so it is pretty dry air here and my house has built in humidifiers/dehumidifiers. Both bathrooms have a knob where you can set the humidity, I keep my darkroom (downstairs bathroom) set at 50% so I am good in that aspect.
 
Last edited by a moderator:

Shadowtracker

Member
Joined
Apr 4, 2010
Messages
265
Location
St. Louis
Format
Multi Format
Colin, The filter on top, the exhaust near the bottom; if the air intake is at one end on the top and the exhaust on the opposite end near the bottom, you can get a cross-wind that is not too strong. If the fan is too gentle on low, and too strong on medium, then you can make a simple baffle so the air has to 'go around' a corner or two internally - this slows the air flow down. Personally, I like having the film 'on edge' to the direction the air is flowing as opposed to having the surface of the film blocking the air flow. A HEPA filter is a real good investment and it doesn't have to be a big one. If that's too expensive, look for the smallest micron filter you can find that still allows air to actually flow. I don't add heat and sometimes you may not need the fan at all. Another idea that I have used is to have a close-able hole on the opposite end of the container from where the filter is. That way, the moisture has a way to escape and I don't have to turn the fan on - it just evaporates off the film after the main amount of water drips off but is still in a 'dust free' container. Makes it more versatile though it takes a little more time to put baffles in. I just cut the end off a plastic box and glued it in place as a wind baffle. Seems to work pretty well for me.
 

Anscojohn

Subscriber
Joined
Dec 31, 2006
Messages
2,704
Format
Medium Format
Heat, blowers, motors, filters are not needed as long as the door does not seal like a refrigerator door and your darkroom humidity is 55% or less. Overnight the negatives will be clean and dry.
******
I'm with IC. Natural drying is the most trouble free, provided you can keep the dust away. If you live in the desert, an 11x14 tray with a wet towel at the bottom of a drying cabinet might be needed to provide the humidity needed to keep down static electricity and too fast drying. Otherwise, K.I.S.S.
 
OP
OP
photobizzz

photobizzz

Member
Joined
Jan 3, 2008
Messages
565
Location
El Paso, Tex
Format
35mm
I will use the crosswind method, good idea; I can see the benefit. I found some HEPA filters that filter down to 3 microns and are 3X3.5X.5" and have a rubber seal all the way around so I can cut a hole to make the rubber seal in securely. I think one fan will be sufficient either on low or medium but will make that decision once the fans get here. If a baffle is needed I will install one if the wind is too strong.

Thanks to all who have provided intelligent opinions you have helped build a better mousetrap. That is what I love about this forum, bounce an idea off the members and outside of the people who tell you to avoid doing it any way but the way it has always been done; I always get good information and ideas!

If I build a better mousetrap I will try to keep it simple stupid.
 

richard ide

Member
Joined
Nov 8, 2005
Messages
1,217
Location
Wellington C
Format
Multi Format
I would suggest using wooden clothes pins so that steel which rusts will not contact your film. I tried many different types of clips and the only thing which I like more are stainless steel film hangers which are probably not easy to find now. I also vote for natural drying. Far easier to set up.
 
OP
OP
photobizzz

photobizzz

Member
Joined
Jan 3, 2008
Messages
565
Location
El Paso, Tex
Format
35mm
I have read multiple posts where people have had problems with wooden clothes pins not holding well - I see no chance of rust on a painted surface that isn't really going to be getting wet anyway, it will be holding a 2mm corner of the 4X5 negative which will be pretty much dry, maybe a little damp when it is clamped on. If one does start to rust then I may think of changing to something else but the binder clips will not let go and need very little surface area to hold on tight.
 

Monophoto

Member
Joined
Aug 27, 2004
Messages
1,689
Location
Saratoga Spr
Format
Multi Format
I built my drying cabinet from MDF, with 1/8" plexiglass inserts in the doors so that I could see what is happening inside.

I used a computer-style muffin fan to move air. The fan is mounted on the side wall and pulls air into a chamber at the top of the box. I put a sheet of air-conditioning filter material over the opening in the side of the box. There is a second filter that is mounted at the bottom of the air chamber just above the rack from which the film hangs. This is a standard air filter - I chose the spun glass variety simply because that's what I found in the size I wanted, but the pleated paper variety does do a better job of filtering the air.

There is a louver at the bottom of the box through which air exits the unit.

There is a 200w light bulb just below the second filter and above the film rack. This bulb lets me see what is going on inside the box, and also throws off a lot of heat that helps dry the film.

The rack is a scrap of Closet-Maid wire shelving. Never throw anything away!

I attached a set of 's hooks' to the rack, and then hang film clips from those hooks. I have a variety of clips - some are purpose-made film clips, while others are plastic clothes pins (better than wood because they won't absorb chemical residues).

You can see a picture of the unit Dead Link Removed.
 

Dan Henderson

Member
Joined
Feb 6, 2005
Messages
1,880
Location
Blue Ridge,
Format
4x5 Format
like Monophoto, I made a cabinet from MDF, in my case the kind with the white plastic surface on both sides and one end. Only trouble is, when I built it I was shooting 120 film so made it rather narrow to fit in an unused corner of the darkroom. It is too narrow to comfortably fit the 4x5 negatives I am now shooting.

I had trouble with dust in the darkroom so had purchased a small HEPA filter unit that blows a very gentle stream of filtered air, which I ducted into the cabinet with some vent holes in the other end.
 

Mike Wilde

Member
Joined
Aug 10, 2006
Messages
2,903
Location
Misissauaga
Format
Multi Format
I'm with the lot who built a tall MDF/Plywood cabinet. Mine is tall enough to hang 135-36, if I clip the light struck leader off when first attaching the top film clip.

I salvaged a turkey rack from an old roasting pan, and use it, screwed on offset spacers to the inside top of the cabinet to make a rack with rails to hang film clips on.

The heat in it comes from an exterior grade floodlight that sits in the bottom of the cabinet. It does not crack if the odd drop of water hits it.

Air movement comes from a quite small computer style muffin fan that exhausts from the back at the top. The inlet is at the front at the bottom below the door. Both are filtered with furnace filter material to discourage dust entry. The door is sealed with screen door weather stripping to help keep dust out too.

There is a furnace fan relay. a 24V control transformer for the relay coil, thermostat and humidistat scavenged from when I upgraded my furnace to control the heater and fan.

Before I put film in, I set the humidistat to shut off and just be on the verge of turning on for the ambient humidity at the time. The thermostat is permanently set at 26C.

I put the pitcher of working strength photoflo/lfn containing the wet film on the floor in front of the cabinet, and clip on the top clip, and draw it up and hang it on the top of the cabinet to minimize the amount of dust it might find on the way to the cabinet, then add the weighting clip.

There are also horizontal bars that can be placed mid way up the cabinet if I am drying more 4x5 than 135 or 120.

My clips for roll film are stainless steel for the first 6 rolls. After that I use modified clothes pegs that I also use for 4x5.

Only after all films are hung is the power turned on. The heater relay clunks on and off as drying proceeds, and the fan starts to run after a short while, and finally shuts off once the films are dry.

If I have the time and it is a low humidity time of year (winter or the summer when the A/C is on for where I live), my preference is to hang them and leave the power off and just let them hang to dry with no air movement. They are all dry the next night to be filed or printed.

My clothes pegs clips set up I think I saw in an Ansel inspired sketch somewhere.

You take a wooden spring clip apart, saw off a portion of the usual part that grips the clothes, and then re-assemble them with the spring reversed so the former smooth finger part is now the part that grabs the film.


A rigid wire (from a paper clips) run though the srping center and is formed to make a hook to allow the clip to be hung from a line or rack bar.

They are great. I wish I had discovered this years ago before shelled out the student wages at the time money for the stainless steel clips bought way back when.
 

36cm2

Member
Joined
Aug 19, 2008
Messages
645
Location
Northeast U.
Format
Large Format
I know it's not quite what the OP started with, but I've been incredibly happy using a clear plastic garment storage bag like this:

Dead Link Removed

I rigged a couple more hanging bars from the top to permit hanging of more film. It's worked great. No dust spots ever since using it. Film dries a bit slowly (1-2 days), but I've never been too concerned with that. Don't know if it helps, but I thought I'd mention it, since I found the idea here elsewhere months ago and it was so helpful to me.

Best of luck whatever you do.
 

mike c

Subscriber
Joined
Jan 5, 2009
Messages
2,863
Location
Los Angeles
Format
Multi Format
Use a small wattage 25watt light bulb at the bottom, shielded for drips off film from above. Set of vents at bottom and top covered with filter material .Dries my film quickly.

Mike
 

John Koehrer

Subscriber
Joined
Apr 3, 2004
Messages
8,277
Location
Aurora, Il
Format
Multi Format
Use an automotive or motorcycle air filter pretty much any size you want for not a lot of money. Something in the 5X8 range would work fine.
 

Rick A

Subscriber
Joined
Mar 31, 2009
Messages
9,942
Location
Laurel Highlands
Format
8x10 Format
I know it's not quite what the OP started with, but I've been incredibly happy using a clear plastic garment storage bag like this:

Dead Link Removed

I rigged a couple more hanging bars from the top to permit hanging of more film. It's worked great. No dust spots ever since using it. Film dries a bit slowly (1-2 days), but I've never been too concerned with that. Don't know if it helps, but I thought I'd mention it, since I found the idea here elsewhere months ago and it was so helpful to me.

Best of luck whatever you do.
I'm with you on that, except mine came from Wallworld for cheap.
 
OP
OP
photobizzz

photobizzz

Member
Joined
Jan 3, 2008
Messages
565
Location
El Paso, Tex
Format
35mm
Wow, you guys really have taken it to a science! I do like the cabinets, especially the one that Monophoto has but I have to keep it small, I rarely shoot over 6-8 shot at a time since all I have is 4X5. So moving air is not a bad idea, and a lot of people are using the same kind of fan for a PC so I think this will work out well. Once I retire from the Army and can build my actual permanent darkroom I will definitely have a larger cabinet like you all have built, and using the AC filters is a great idea, keeps the dust out and cheap! Thanks for the time you spent showing me your rigs!
 

MattKing

Moderator
Moderator
Joined
Apr 24, 2005
Messages
53,097
Location
Delta, BC Canada
Format
Medium Format
I use white coloured versions of these clothespins for the top of the film:

I use cheap spring loaded clamps for the bottom - the ones with magnets that you can put on to your fridge.

For 4 - 6 of each, about $2.00 - $4.00 at the dollar store.

The big hook on the clothespins makes it much easier to handle the film when it is being transported to and from the dryer.

EDIT: If you can design your dryer in a way that would easily permit extending it's length (so it can be used for roll film) you may appreciate the flexibility.
 

Attachments

  • clothes_pins.jpg
    clothes_pins.jpg
    27.4 KB · Views: 107
Last edited by a moderator:
Joined
Jan 17, 2005
Messages
1,355
Location
Downers Grov
Clean the dark room and use a room air filter and you will not need a drying cabinet. I use two Hunter HEPA units, one for the wet room, one for the enlarging room.
 
OP
OP
photobizzz

photobizzz

Member
Joined
Jan 3, 2008
Messages
565
Location
El Paso, Tex
Format
35mm
I have a bathroom for my darkroom, I can't do all that with building ect, I have to keep it small. I used to just hang up my negs with weighted clips but I dont shoot any roll film at all anymore, just 4X5 so I need a small alternative and since my archival washer is in the bathtub and my Beseler 45 MXT enlarger across the back of the tub I cant even turn on the shower real hot to get steam in the room. I dont think I would want to do that anyway with electronics in the room. I have to keep it small, I live in a 1500sqft condo with my wife and 6 & 9 year old sons. The condo cost $234K already, a house in this area is close to $400K! And I have to sell it in a few years when the Army decides to move me again so I am stuck with this type of setup until I retire in about 10 years, or at least until my last duty station before I retire if I plan on staying there. Alaska is expensive unless you want to drive an hour to work each way, and I wanted my family to live in the nice part of town so I take the hit for now.
 

mike c

Subscriber
Joined
Jan 5, 2009
Messages
2,863
Location
Los Angeles
Format
Multi Format
Thats good you have a great consideration for your family,it'll repay you hundred fold in the future.
 
Photrio.com contains affiliate links to products. We may receive a commission for purchases made through these links.
To read our full affiliate disclosure statement please click Here.

PHOTRIO PARTNERS EQUALLY FUNDING OUR COMMUNITY:


Ilford ADOX Freestyle Photographic Stearman Press Weldon Color Lab Blue Moon Camera & Machine
Top Bottom