darkosaric
Member
So,
My wife wanted to have one big print in our living room, and last weekend I just made my first print bigger than 50x60cm.
I have roll of Fomaspeed that is 1,08 meter wide and 10 meters long, so for start my print is around 65x95 cm. Later I will try 1x1,5 meter.
Shoot was taken with old Elmar 5cm f3,5 - but is shows small amount of grain nevertheless, even in close inspection (Kodak TP ).
).
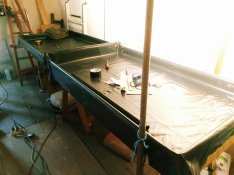
Developer and fixer I did with a sponge, since I don't have so big trays.
Anybody has better idea in a lack of big trays?
Thanks,
My wife wanted to have one big print in our living room, and last weekend I just made my first print bigger than 50x60cm.
I have roll of Fomaspeed that is 1,08 meter wide and 10 meters long, so for start my print is around 65x95 cm. Later I will try 1x1,5 meter.
Shoot was taken with old Elmar 5cm f3,5 - but is shows small amount of grain nevertheless, even in close inspection (Kodak TP
).Developer and fixer I did with a sponge, since I don't have so big trays.
Anybody has better idea in a lack of big trays?
Thanks,