Best Way to Confirm Movement is Within the Circle of Coverage for my Lens?

CK341

A
CK341

  • 0
  • 0
  • 25
Plum, Sun, Shade.jpeg

A
Plum, Sun, Shade.jpeg

  • sly
  • May 8, 2025
  • 0
  • 0
  • 32
Windfall 1.jpeg

A
Windfall 1.jpeg

  • sly
  • May 8, 2025
  • 2
  • 0
  • 31
Windfall 2.jpeg

A
Windfall 2.jpeg

  • sly
  • May 8, 2025
  • 1
  • 0
  • 30
Marsh, Oak Leaves.jpeg

A
Marsh, Oak Leaves.jpeg

  • sly
  • May 8, 2025
  • 0
  • 0
  • 29

Recent Classifieds

Forum statistics

Threads
197,610
Messages
2,761,918
Members
99,416
Latest member
TomYC
Recent bookmarks
0

analog65

Member
Joined
Jan 24, 2014
Messages
175
Format
Large Format
I am looking for the best way to ensure I have proper coverage for my film after I make some desired movements (rise, fall, shift, etc.) in the field.

I want to avoid vignetting, etc.

Assume I am using a proper lens with enough image circle.

Thank you !!
 

RobC

Member
Joined
Nov 5, 2007
Messages
3,880
Location
UK
Format
Multi Format
the lens specification should tell you the lens angle of coverage and from that you can work the size of the image circle and from that how much movement you have for your film format in any direction.

Which lens and model is it? You may get more helpful answers if you provide that information.

Note that for a single focal length lens the angle of coverage can vary according to lens design so its not specific to focal length.

If the corners of your ground glass are clipped off, you can look through each corner and see if there is any vignetting. Also you may be able to see vignetting (darkening of corners) of ground glass if it particularly bad.

Also note that the closer you focus, the larger the lens extension and hence the larger the projected image circle which means the amount of shift/fall/rise available will increase as you focus closer. The quoted figures for any lens are usually at @ infinity. i.e. with zero lens extension from infinity setting.
 
OP
OP

analog65

Member
Joined
Jan 24, 2014
Messages
175
Format
Large Format
Hi, I didn't list a lens or specific camera, because I am looking for a method to apply it to any lens on any large format camera.

Is there a way that I can check that I have adequate coverage in the field after applying movements? That is what I am looking for. Hope this is more clear.

Thanks!


You did not state the lens you were using.
 
OP
OP

analog65

Member
Joined
Jan 24, 2014
Messages
175
Format
Large Format
Hi Rob, thanks for the reply. Your suggestion about looking through the corners of the ground glass is what I am looking for. I want to be able to have a method that works for me in the field no matter what lens I am using.

I exposed a couple sheets this week and did not notice any vignetting on the ground glass. I always check all the way around the edges on my ground glass every time. Then when I saw the vignetting on the negative, I realized there must be a way to detect this other than looking on the ground glass.

Thanks for your help and I look forward to any other techniques that may help.


the lens specification should tell you the lens angle of coverage and from that you can work the size of the image circle and from that how much movement you have for your film format in any direction.

Which lens and model is it? You may get more helpful answers if you provide that information.

Note that for a single focal length lens the angle of coverage can vary according to lens design so its not specific to focal length.

If the corners of your ground glass are clipped off, you can look through each corner and see if there is any vignetting. Also you may be able to see vignetting (darkening of corners) of ground glass if it particularly bad.

Also note that the closer you focus, the larger the lens extension and hence the larger the projected image circle which means the amount of shift/fall/rise available will increase as you focus closer. The quoted figures for any lens are usually at @ infinity. i.e. with zero lens extension from infinity setting.
 

480sparky

Member
Joined
Nov 28, 2014
Messages
602
Location
Corn Patch USA
Format
Multi Format
Once you have all the movements set, look through the lens and see if you can actually view the corners of your groundglass.
 

ic-racer

Member
Joined
Feb 25, 2007
Messages
16,486
Location
USA
Format
Multi Format
I am looking for the best way to ensure I have proper coverage for my film after I make some desired movements (rise, fall, shift, etc.) in the field.

I want to avoid vignetting, etc.

Assume I am using a proper lens with enough image circle.

Thank you !!

Clip the corners of the ground glass. None of your large format books mention that?
 
OP
OP

analog65

Member
Joined
Jan 24, 2014
Messages
175
Format
Large Format
I am not asking about any specific lens. It is a general question about a method or technique to check after I make movements in the field. I am not sure how else to say this.


Still never told us the lens.
 
OP
OP

analog65

Member
Joined
Jan 24, 2014
Messages
175
Format
Large Format
Thanks, I appreciate your help. I suppose I was asking a question that wasn't valid.


I'm trying to answer your question, but not connecting. It's more a matter of knowing your lens rather than a magic fit-all system. Just because you have a circle of light of such-and-such diameter, doesn't mean that the whole circle is useful. there is light fall-off with the best of lenses, such that just because you've reached the "sharp edge" of the circle doesn't mean you didn't have falloff long before you got there, which of course shows up in the print.
If you require a "system", then using a ground glass, like the old Calumet with the edges cut off is it. Not very reliable. I'd rather know the lens and I know how much movement I can get away with. Or buy a Symmar, like a 210 for 4x5 and you'll have all kinds of space to move. A little press lens like an Optar 135mm will give practically none. A Tessar design doesn't give much circle.
 

MattKing

Moderator
Moderator
Joined
Apr 24, 2005
Messages
52,017
Location
Delta, BC Canada
Format
Medium Format
If I understand the OP correctly, he/she is looking for a reliable field test that will enable him/her to either confirm the coverage of lenses where the published information is either suspect, unclear or contradictory, or to determine the coverage when there is no such information.
 

Andrew4x5

Member
Joined
Mar 9, 2007
Messages
56
Location
Australia
Format
4x5 Format
Further to 480sparky's comment: "Once you have all the movements set, look through the lens and see if you can actually view the corners of your groundglass". Before you view the image in the corners, stop down to your working aperture (or lower) — for some reason, vignetting becomes more obvious at higher f-stops. For example, if you want to use f16, set the lens to f32 and check for any vignetting — if there is none, then you can be sure there won't be any at f16.
 

tih

Subscriber
Joined
Sep 12, 2006
Messages
187
Location
Norway
Format
Multi Format
If the corners of your ground glass are clipped off, you can look through each corner and see if there is any vignetting.

Specifically, you want to observe the diaphragm through those clipped-off corners, with the lens stopped down to the f-stop you're going to use, and verify that you can see its entire circumference. If it is not all visible, because some non-glass part of the lens is in the way, this will cause vignetting. You can then try stopping down further. If you can stop down the diaphragm enough to get the whole opening visible through all corners of the ground glass, you're within the image circle at the new f-stop.
 
Joined
Sep 10, 2002
Messages
3,568
Location
Eugene, Oregon
Format
4x5 Format
Of course, observing the ground glass at taking aperture will show any lack of coverage. The problem here is that the image is often too dark to easily tell if one or more of the corners are being vignetted. Other methods are easier in this case.

The methods below work for any lens with any circle of coverage.

If your camera has a ground glass with clipped corners, stop the lens down to taking aperture and see if you can see the entire aperture from each of the corners (in practice, you only need to look through the corners at the extremes of the image circle). If you see a half-circle or the aperture is otherwise partially blocked, you'll get significant fall-off, but still a bit of image. Note that with very short focal-length lenses, the entire aperture will appear an an elipse.

Alternately, and especially if your ground glass doesn't have clipped corners, you can look back through the lens at taking aperture and make sure you can see all four corners clearly from the far edge of the aperture (again, only the corners at the extremes really need to be checked).

Note that it is important that you do the above checks at taking aperture. Believe it or not, with extreme movements, stopping down can actually increase the likelihood of vignetting.

@APUGuser19: The above work for all lenses; any focal length, any size image circle.

Best,

Doremus
 
Joined
Sep 10, 2002
Messages
3,568
Location
Eugene, Oregon
Format
4x5 Format
... Before you view the image in the corners, stop down to your working aperture (or lower) — for some reason, vignetting becomes more obvious at higher f-stops. For example, if you want to use f16, set the lens to f32 and check for any vignetting — if there is none, then you can be sure there won't be any at f16.

Andrew,

See my post above. With extreme movements stopping down can actually increase vignetting, especially with shorter focal-length lenses. Check for vignetting at the aperture you want to use taking, not smaller.

Best,

Doremus
 

Dan Fromm

Member
Joined
Mar 23, 2005
Messages
6,789
Format
Multi Format
Interesting discussion that I've followed since it started. Most of the suggestions seem to use "illuminates" as a synonym for "covers." Outside of this discussion some of us think that "covers" means "puts good image in the corners."

The first definition can sometimes be applied when looking at the image on the ground glass or when looking at the lens' exit pupil through a clipped corner of the GG. This is more easily done when the lens is wide open than when it is at shooting aperture. It has never worked well for me. Once upon a time the late Charlie Barringer and looked at the image his 1.75"/2.8 Elcan (made to cover 6x6, not LF but the lesson it taught us is relevant) put on a 2x3 Graphic's ground glass and convinced ourselves that it covers 6x9. The VM says it covers 6x7. I bought one, shot with it. Film, which sometimes lies, told us that it barely illuminates 6x7 and that the circle of good definition might be as large as 80 mm if we weren't too demanding about good definition.

In my experience evaluating how good an image a lens produces by looking at the image it puts on the GG is problematic and is more so at shooting aperture than with the lens wide open. Basically it doesn't work.

OP, which definition do you prefer? If the first (illuminates), guess away. If the second (good image in the corners), use the model (move a square representing the format around in a circle representing the circle covered) that lens' manufacturers use to give advice on how much movement their products will allow.

Vignette has been used in two senses in this discussion. Mechanical vignetting (at some distance off-axis something, usually the rear of the lens' barrel blocks light) and optical vignetting (good old cos^4). I have a 45/9 CZJ Goerz Dagor that covers 6x9 (good image in corners) but that suffers badly from mechanical vignetting (corners darker that predicted by cos^4). And I have other very wide angle lenses whose optical vignetting is very visible but can be cured somewhat by a center filter.

Some lenses, mostly modern but also WF Ektars, have field stops that cut off illumination outside of their circles of good definition.

OP, which sense of vignette matters more to you?
 
Joined
Sep 10, 2002
Messages
3,568
Location
Eugene, Oregon
Format
4x5 Format
Interesting discussion that I've followed since it started. Most of the suggestions seem to use "illuminates" as a synonym for "covers." Outside of this discussion some of us think that "covers" means "puts good image in the corners." ... [snip] ... Some lenses, mostly modern but also WF Ektars, have field stops that cut off illumination outside of their circles of good definition. OP, which sense of vignette matters more to you?

Dan brings up a good point, which I neglected to take into account.

For those of us that use more modern lenses with optical field stops, the circle of illumination and the circle of acceptable sharpness are about the same, if not identical. With these lenses, the checks through the corners of the gg or back through the aperture work just fine.

Older lenses, however, often illuminate a lot more than they render sharply. This isn't a problem if the out-of-focus areas are, say, clear blue sky or the like, but detail will suffer at the edges of illumination with these lenses. I only regularly use one lens with this characteristic (my 203mm Ektar) and I've learned not to go to the extremes of the circle of illumination with it. If the OP is using lenses like this, then he'll just have to learn the hard way...

As for vignetting: I've always made the distinction that a mechanical blocking of the light, completely or partially equals vignetting. The reduction in illumination in the corners resulting from the different distances between center and edges ("good old cos^4") I've always referred to as "fall off." This seems more logical to me...

Dan, as an aside: I've shown in another thread how stopping down short-focal-length lenses can often make mechanical vignetting worse. What happens is that a corner gets partially illuminated by the far side of the wide-open aperture (the near side of the aperture being mechanically vignetted). On the gg this often looks alright when one isn't looking carefully, especially if the blockage is slight. However, when the lens gets stopped down, the far side of the aperture disappears entirely or almost so, leaving the corners completely black. That's why I always check at taking aperture.

Best,

Doremus
 
Last edited by a moderator:

Dan Fromm

Member
Joined
Mar 23, 2005
Messages
6,789
Format
Multi Format
Dan, as an aside: I've shown in another thread how stopping down short-focal-length lenses can often make mechanical vignetting worse. What happens is that a corner gets partially illuminated by the far side of the wide-open aperture (the near side of the aperture being mechanically vignetted). On the gg this often looks alright when one isn't looking carefully, especially if the blockage is slight. However, when the lens gets stopped down, the far side of the aperture disappears entirely or almost so, leaving the corners completely black. That's why I always check at taking aperture.

Best,

Doremus

Doremus, I have a few lenses that suffer from mechanical vignetting, either because their rear tubes are too narrow/rear elements too small or because I hang them in front of a shutter. In both situations stopping down reduces mechanical vignetting. This because the tube cuts off light from the near side of the exit pupil and stopping down reduces the size of the exit pupil. As the angle off-axis increases the tube first blocks the near side of the exit pupil, then more and more of the exit pupil until eventually it blocks all of it. The smaller the exit pupil the farther off-axis the tube firsts blocks its hear side.

Are you sure you're not somehow turned around?

Cheers,

Dan
 

tih

Subscriber
Joined
Sep 12, 2006
Messages
187
Location
Norway
Format
Multi Format
Are you sure you're not somehow turned around?

I believe Doremus is observing how the gradient at the edge of the image circle changes with aperture. If a corner of your ground glass is slightly past the center of this range, it will have visible illumination (albeit with some mechanical vignetting) while the lens is wide open, but will go black when it is fully stopped down, and the gradient becomes narrow and steep.

As for the difference between optical and mechanical vignetting, and between image circle and circle of good definition, I would point out to the OP that anything one can do to observe, in the field, the effect of movements, without reference to knowledge about the characteristics of the particular lens being used, must be limited to observing the mechanical vignetting of the illuminated image circle. Techniques for doing this have been described. If one wants to know how much fall-off in brightness and image quality one is getting near the corners, one must calculate their angles from the center line, and compare this with data about the given lens.
 

Ian C

Member
Joined
Feb 8, 2009
Messages
1,238
Format
Large Format
The usual starting point is the lens maker’s stated image circle diameter at a given aperture. If we know the specific lens name, focal length and aperture we can usually find the lens maker’s stated image circle diameter at a given aperture with an Internet search.

When we view to compose and focus a lens we generally do so with the aperture fully open for the brightest view. The full-diameter illuminated circular projection has usable definition in the central part of the circle, but is too poor for practical use further outward radially with the aperture at its largest setting.

The aperture must be closed to a smaller size to expand the circle of good definition to a larger portion of the projected circle. The practical infinity-focus image circle is generally given at f/22 for large-format lenses but might be given at f/16 for some 4” x 5” format wide-angle lenses.

Here’s how Nikon states this for its large-format lenses.


Nikkor-W 210mm f5.6

Focal length 210mm

Maximum aperture ratio 1:5.6

Minimum aperture f/64

Lens construction 6 elements in 4 groups

Covering power (f/5.6) 60°

Covering power (f/22) 70°

Image circle (f/5.6) 243mmφ

Image circle (f/22) 293mmφ (6 1/2” x 8 1/2”)


Nikkor-SW 75mm f4.5S

Focal length 75mm

Maximum aperture ratio 1:4.5

Minimum aperture f/45

Lens construction 7 elements in 4 groups

Covering power (f/4.5) 80°

Covering power (f/16) 106°

Image circle (f/4.5) 126mmφ

Image circle (f/16) 200mmφ (120mm x 165mm)


Schneider lists the available axis shifts for its large-format lenses here in the table titled “Angle of View, Image Circles, and Lens Displacements."

https://www.schneideroptics.com/pdfs/photo/LensCharts.pdf

For lenses for which we know the infinity image circle diameter at the given aperture, but for which we can’t find the lens displacement tables, we can calculate the maximum shift from the neutral (lens centered over film) position.

Available Shift Based on Image Circle and Format Dimensions

I = lens maker’s stated infinity-focus image circle diameter at a stated aperture

C = chord length (format dimension touching image circle at limit of movement)

A = shifted-axis format dimension perpendicular to C

Axis shift = ( SQRT(I^2 – C^2) – A)/2


For example, for the 75/4.5 Nikkor SW at f/16 I = 200mm. Suppose you had the long dimension of the 4” x 5” film oriented vertically and you want to shift upwards to capture the tops of some tall trees. Assume that you start with the lens centered over the view screen. How far could you raise the lens board upward and keep the corners inside or just touching the image circle?

The image area on a 4” x 5” film is about 95mm x 120mm.

So I = 200mm, C = 95mm, A = 120mm

Long-axis shift = (SQRT((200mm)^2 – (95mm)^2) – 120mm)/2 = 28mm

Short-axis shift = (SQRT((200mm)^2 – (120mm)^2) – 95mm)/2 = 32.5mm


For a 6.9/90 Super Angulon with I = 216mm at f/22 we get

Long-axis shift = 37mm

Short-axis shift = 42mm

which agrees with entries in the the Schneider Lens Displacement Table for this lens.
 

RobC

Member
Joined
Nov 5, 2007
Messages
3,880
Location
UK
Format
Multi Format
The simplest solution is to make sure you know what the manufacturers shift/rise/fall limits for the lens at infinity are before you buy it. Then if you stick within those limits you won't have a problem.

If you just a buy a lens expecting it to have loads of shift/rise/fall then you will probably be disappointed.
The easiest way is to buy lenses which you know will cover the next format up from the one you are using and then you are unlikely to run into problems.

But how much shift/rise/fall do you think you will ever need anyway.
 

Maris

Member
Joined
Jan 17, 2006
Messages
1,549
Location
Noosa, Australia
Format
Multi Format
Once you have all the movements set, look through the lens and see if you can actually view the corners of your groundglass.

Yes! Walk around to the front of the camera and look through the lens when it is set to the working aperture. If you can see all the corners of the format frame (= ground glass) then the ground glass can "see" you and everything else in the outside world. Trying to spot the exit pupil of the lens somewhere in the darkness of the camera by peering obliquely past the clipped corners of a ground glass can involve the most exquisite physical contortions....especially with wide angle lenses.
 

DREW WILEY

Member
Joined
Jul 14, 2011
Messages
13,735
Format
8x10 Format
Clipped glass corners are the easiest method for me. Otherwise, a bit of practice with your lenses will do the trick. And if you can use rear tilts or swings instead of front, do that. Ultrawide lenses are a pain in the butt, esp if the bellows gets pinched into the image area - a risk beginners are often unaware of. As Maris suggests, you could look through the lens itself, backwards, but that might not be such a good idea if you have you camera peering over the edge of a cliff (like I have often done), or on the side of the road with a big semi coming, pulling a mobile home. Anyway, with a bit of practice, one simply gets accustomed to what one's chosen lenses will or won't do. Fussing with published image circle data might be helpful when one is shopping for a lens in the first place, but it won't help much in the real world when various camera movements potentially come into play in the same shot.
 
Joined
Sep 10, 2002
Messages
3,568
Location
Eugene, Oregon
Format
4x5 Format
Doremus, I have a few lenses that suffer from mechanical vignetting, either because their rear tubes are too narrow/rear elements too small or because I hang them in front of a shutter. In both situations stopping down reduces mechanical vignetting. This because the tube cuts off light from the near side of the exit pupil and stopping down reduces the size of the exit pupil. As the angle off-axis increases the tube first blocks the near side of the exit pupil, then more and more of the exit pupil until eventually it blocks all of it. The smaller the exit pupil the farther off-axis the tube firsts blocks its hear side.

Are you sure you're not somehow turned around?

Cheers,

Dan

I believe Doremus is observing how the gradient at the edge of the image circle changes with aperture. If a corner of your ground glass is slightly past the center of this range, it will have visible illumination (albeit with some mechanical vignetting) while the lens is wide open, but will go black when it is fully stopped down, and the gradient becomes narrow and steep. ...


Dan,

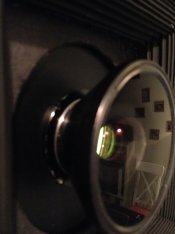
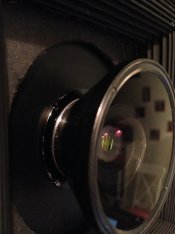
tih has described exactly what I'm talking about. Here are the pictures from my SA showing what I mean. As you can see, the front of the lens blocks some, but not all of the image-forming light when wide open. Stopping down kills it all but completely.

BTW, I have experienced this in the field, i.e., getting what I thought was enough illumination when observing the ground glass wide open, then stopping down and discovering vignetting only after developing. Now I check at taking aperture :smile:

Best,

Doremus
 

Attachments

  • 1-90SAOpen-lightSliver.jpg
    1-90SAOpen-lightSliver.jpg
    104.7 KB · Views: 108
  • 2-90SAStopDwn-Vingetted.jpg
    2-90SAStopDwn-Vingetted.jpg
    109.2 KB · Views: 104

AgX

Member
Joined
Apr 5, 2007
Messages
29,973
Location
Germany
Format
Multi Format
the lens specification should tell you the lens angle of coverage and from that you can work the size of the image circle and from that how much movement you have for your film format in any direction.

What actually counts in this respect is not the angle of coverage, but the circle of coverage.
And this varies with image magnification. (Keep in ind that with LF one easily gets into the macro-range.)
 
Photrio.com contains affiliate links to products. We may receive a commission for purchases made through these links.
To read our full affiliate disclosure statement please click Here.

PHOTRIO PARTNERS EQUALLY FUNDING OUR COMMUNITY:


Ilford ADOX Freestyle Photographic Stearman Press Weldon Color Lab Blue Moon Camera & Machine
Top Bottom