• Welcome to Photrio!
    Registration is fast and free. Join today to unlock search, see fewer ads, and access all forum features.
    Click here to sign up

Arrgh...! Curly prints rant....! ;(

Recent Classifieds

Forum statistics

Threads
202,093
Messages
2,835,011
Members
101,111
Latest member
gil9002
Recent bookmarks
0

Helinophoto

Member
Joined
Aug 19, 2011
Messages
1,091
Location
Norway
Format
Multi Format
Hi

Been tinkering in my rudimentary darkroom the last 2-3 weeks. (Just got an enlarger and the chemicals for paper printing).

A lot of trial and error indeed, but when I finally get a print that I like, I find it almost impossible to dry it so it will stay straight, it curls up like crazy, looking pretty amateurish if I frame it.

Procedure:
- Wash
- Dry for a bit on clothes pins (like 20-30 minutes).
- Ironing it between two sheets of linen.
- Further drying after placing the print inside a magazine, placing books and such on top.

Check after 24 hours...

Curly around the edges (like small waves).

Papers I've tried so far, is Ilford, Foma, Tetenal Work.....all becomes curly after drying.
I really don't have room for a big, heated paper presser in my small apartment (already ruined my classy bathroom with the trays and enlarger =) ).

Any old school trickery someone would like to share to help me out? =)
 

Jesper

Subscriber
Joined
Mar 29, 2009
Messages
882
Location
Sweden
Format
Multi Format
You could try RC papers.
They don't curl

Fibre papers need a dryer if you want them flat.
 

tomalophicon

Member
Allowing Ads
Joined
Feb 7, 2010
Messages
1,568
Location
Canberra, AC
Format
Sub 35mm
Put them under a big pile of books for a week. I like to do it while they are ever so slightly damp.

BTW, you can use a print dryer with a canvas press that is no bigger than a computer screen.
 
OP
OP
Helinophoto

Helinophoto

Member
Joined
Aug 19, 2011
Messages
1,091
Location
Norway
Format
Multi Format
Ugh, sorry, I didn't see the sticky thread.

I'll read up on it on that other thread (thanks for the link).
I use FB papers for now, I do have some batches of RC papers as well though, but the FB are the ones that I have problems with.

Thank you all for the useful information =)
 

faustotesta

Member
Allowing Ads
Joined
Sep 18, 2008
Messages
186
Location
Above the Hi
Format
35mm
I use mosquito netting mounted on a sort of big wooden frame.
After washing put the wet sheets of paper (no need to dry them) with the printed side facing the netting.
Let them dry (i usually let the on the net for one day. But i think 1/2 a day is ok) and then place them under a pile of heavy books for a while (1 or 2 days). This should work with no problem. Please let us know.
 

Rick A

Subscriber
Allowing Ads
Joined
Mar 31, 2009
Messages
10,038
Location
Laurel Highlands
Format
8x10 Format
I used to squeegee my fiber prints onto a sheet of glass to let them dry. When they popped up on their own I would place them in a blotter book and weight it down for a few weeks prior to mounting.
 

gandolfi

Member
Allowing Ads
Joined
Jan 28, 2005
Messages
1,820
Location
Denmark
Format
Large Format Pan
I used to squeegee my fiber prints onto a sheet of glass to let them dry. When they popped up on their own I would place them in a blotter book and weight it down for a few weeks prior to mounting.

:wink:

I have a problem here.. I know how to dry fiber based papers totally flat, but I am in need of english words to describe it...

Bacically you do as said up here..

Place the wet papers on a piece of glass - sqeegee the surface water off.
Then use a special tape to tape the papers to the glass.
I don't know the english word for this tape, but it is a paper tape - you get them in big rolls. They are non sticky, but when you wet them on the "emulsion side" they get very sticky. This tape is great in use. Be careful not to have air bubbles and too many rinkles before leaving to papers to dry.

When a fiber based paper gets wet, it expands - when drying up , it retracts again, but not perfectly. Hence the curling.
The tape prevents the fibers to retract as much as the "want", leaving the paper totally flat.
When dry, just use a sharp knife to cut the photo free - leave the small bit og tape on the pitcure - then you'll get a slightly stiffer image (not so receptable to bending), and you have something to hold on to: not so many finger prints...

EDIT: I found an image of the tape in question..(called paper tape (in danish)) see attachment..

Good luck

EDIT2: make sure the glass is lying horizontally the first couple of hours - if standing up, you risk some glur to ooze down under the image and thereby gluing the image to the glass - that's not a good thing....
 

Attachments

  • tape.jpg
    tape.jpg
    160.7 KB · Views: 87

MDR

Member
Allowing Ads
Joined
Sep 1, 2006
Messages
1,402
Location
Austria
Format
Multi Format
Gandolfi paper tape is the English term as well.

Dominik
 

Rick A

Subscriber
Allowing Ads
Joined
Mar 31, 2009
Messages
10,038
Location
Laurel Highlands
Format
8x10 Format
Thanks Gandolfi, I forgot about that method, I use a print drying drum these days. I put it on low and leave for a couple of hours, no curls.
 

Sirius Glass

Subscriber
Joined
Jan 18, 2007
Messages
50,856
Location
Southern California
Format
Multi Format
I can't remember the product name and it is on the West Coast, but I bought a bottle of "print flattener" at FreeStyle.
 

kerrpanda

Member
Allowing Ads
Joined
Oct 29, 2007
Messages
59
Format
35mm
I dry them on screens until slightly damp, then press them under heavy books for a few days. As soon as I can, I put them in archival pages and into the bottom of the print storage box. Works like a charm!
 

Jon Shiu

Subscriber
Allowing Ads
Joined
Dec 2, 2003
Messages
3,299
Location
Mendocino, California
Format
Plastic Cameras
Several years ago the Harman/Ilford company announced they were coming out with a fiber based paper that stays flat. Not sure if it ever was made. but might be worth researching.

Jon
 

PVia

Member
Allowing Ads
Joined
Oct 3, 2006
Messages
1,057
Location
Pasadena, CA
Format
Multi Format
Dry face down on screens or lint free towels after squeegeeing...then inside/under heavy books.
 

Mainecoonmaniac

Member
Allowing Ads
Joined
Dec 10, 2009
Messages
6,297
Format
Multi Format
I find that slow drying helps to keep prints flat. Also try sandwiching prints that are almost try in blotter books with weight on top. RC prints are flat, but I like the look of fiber paper better.
 

gandolfi

Member
Allowing Ads
Joined
Jan 28, 2005
Messages
1,820
Location
Denmark
Format
Large Format Pan
my point is, that using "my" method, where the image is free of touching anything during drying, the surface glow improves a lot...

I have tried heating - drying press - books and so on, but I like the surface glow so much more with this old fashioned way..

Am I wrong, or is it imagination from my part? any thoughts?
 

tomalophicon

Member
Allowing Ads
Joined
Feb 7, 2010
Messages
1,568
Location
Canberra, AC
Format
Sub 35mm
my point is, that using "my" method, where the image is free of touching anything during drying, the surface glow improves a lot...

I have tried heating - drying press - books and so on, but I like the surface glow so much more with this old fashioned way..

Am I wrong, or is it imagination from my part? any thoughts?

Gandolfi,

Do you put the tape on the emulsion side then?
If I wanted to remove the tape from the print, is there any way without damaging the tape?

And... Do you ever have a problem with dust settling on the print surface while it's drying?
 

Edward_S

Subscriber
Allowing Ads
Joined
Dec 7, 2006
Messages
77
Location
London (UK)
Format
35mm
I never had much luck with the paper tape method - the prints seemed to shrink sufficiently to pull the tape off the glass and still ended up crinkled. Perhaps they dried too quickly. So I got some polycarbonate sheets and cut rectangular windows in them, larger than the print area but smaller that the paper area, and place these over the print instead. The edges of the polycarbonate sheets can then be weighted down with books. Alternatively, you can cover the whole thing with a book and the print will still dry because the polycarbonate sheet has channels in it through which the air can circulate.
 

sly

Subscriber
Allowing Ads
Joined
Nov 12, 2006
Messages
1,675
Location
Nanaimo
Format
Multi Format
I hang up my prints back-to-back, with clothes pegs at all 4 corners. I started doing this for large prints, but now do it for all my FB prints. They then get placed between the pages of a large sketch book, and weighted under a few big books for a couple of days.

The clothes pegs need to be plastic ones with little grippy teeth right at the end.
 

Rick A

Subscriber
Allowing Ads
Joined
Mar 31, 2009
Messages
10,038
Location
Laurel Highlands
Format
8x10 Format
If you want your FB print to glow, steam it after drying, and just prior to mounting. Do any spotting first, and the steam will help blend the spotting. I use a cheap clothing steamer.
 

Jim Jones

Member
Allowing Ads
Joined
Jan 16, 2006
Messages
3,740
Location
Chillicothe MO
Format
Multi Format
The fiber prints stored tightly packed face to face and back to back in the original paper boxes long ago are flat. Storing them all facing in one direction leads to curling.
 

ROL

Member
Allowing Ads
Joined
Oct 27, 2005
Messages
795
Location
California
Format
Multi Format
Fiber, no?
  1. Hang prints from corner until all surface water has dripped off (a minute or two, depending on size).
  2. Squeegee as much as possible, without injuring the print (optional).
  3. DRY SLOWLY (on print screens). Some ambient humidity is desirable.
  4. Place dry prints under flat melamine board, plywood, etc. and weight.
  5. WAIT... after a couple of weeks the print(s) will be quite nearly, and frequently just, as flat as those pressed.

No ranté...!
 
Last edited by a moderator:
OP
OP
Helinophoto

Helinophoto

Member
Joined
Aug 19, 2011
Messages
1,091
Location
Norway
Format
Multi Format
Ok, but when you guys say you hang them to dry "back to back", does that mean that the two papers are "glued together" while they dry, or do you place something between the papers while they hang like that?

Also, how long do you let them hang before you put them under books/pressure?
 

gandolfi

Member
Allowing Ads
Joined
Jan 28, 2005
Messages
1,820
Location
Denmark
Format
Large Format Pan
I never had much luck with the paper tape method - the prints seemed to shrink sufficiently to pull the tape off the glass and still ended up crinkled. Perhaps they dried too quickly. So I got some polycarbonate sheets and cut rectangular windows in them, larger than the print area but smaller that the paper area, and place these over the print instead. The edges of the polycarbonate sheets can then be weighted down with books. Alternatively, you can cover the whole thing with a book and the print will still dry because the polycarbonate sheet has channels in it through which the air can circulate.

I "always" do it right....:wink:
I don't think your images dry too quickly, but it is really important not to make the tape too wet, and on the other hand make sure the dampness is equally spread on the tape.

Also, you have to have at least 1/2cm - 1 cm space to put the tape on (the image). When I print FB papera I always leave space for this space.

Finally; if the paper (image) is too wet - if you havn't got the surface water off, then you have a high risk of the tape not to adhere in time - making weak spots which will destroy the tape during drying time...

To sum up: take you time - be patient, and make sure you do this carefully. Then the paper tape will do the stuff for you.
(Also, if you're impatient, you can heat the glass from behind, using a hair dryer...)

This is a very easy and in my opinion quite beautiful way of drying FB papers. The hanging methods have never worked for me...

______
QUOTE:Gandolfi,

Do you put the tape on the emulsion side then?

yes.

If I wanted to remove the tape from the print, is there any way without damaging the tape?

no! but it is not the tape you should worry about - it's the image..:smile: 
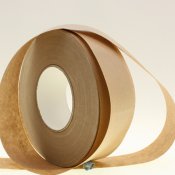
I always leave the dry tape on the image - a kind of framing and protection against the image to bend/crack - and if you frame it later (with matt), then you'll cover it anyway.

The tape comes in white and brown, so there's a choise.

And... Do you ever have a problem with dust settling on the print surface while it's drying?

no. a little dust can be blown away later..

If you see images by the Czeck photographer Jan Saudek, you'll see big images - most with the brown tape framing them. And with colouring and writing on that tape. He makes this a part of his images.
I kind of like that..
 
Photrio.com contains affiliate links to products. We may receive a commission for purchases made through these links.
To read our full affiliate disclosure statement please click Here.

PHOTRIO PARTNERS EQUALLY FUNDING OUR COMMUNITY:


Ilford ADOX Freestyle Photographic Stearman Press Weldon Color Lab Blue Moon Camera & Machine
Top Bottom