Anyone ever fabricate archival print washer?

The Urn does not approve...

D
The Urn does not approve...

  • 2
  • 2
  • 42
35mm in 616 test

A
35mm in 616 test

  • 0
  • 1
  • 64
Smiley

H
Smiley

  • 0
  • 1
  • 46

Recent Classifieds

Forum statistics

Threads
197,482
Messages
2,759,898
Members
99,385
Latest member
z1000
Recent bookmarks
0

harlequin

Member
Joined
Apr 30, 2008
Messages
239
Location
Los Angeles/San Antonio
Format
Medium Format
looking at prices of even used zone6 or calumet print washers made of clear acrylic, was wondering if anyone on apug fabricated one DIY mostly for 8/10 size and below, does not have to look like alistar ingless model from Canada, but was trying to build one if possible, maybe someone can share their experience either positive or negative, and what materials?

When I was a teenager I remember seeing one from Patterson, but it looked complicated....

Many Thanks!

Harlequin
 

removed account4

Subscriber
Joined
Jun 21, 2003
Messages
29,833
Format
Hybrid
hi harlequin

there used to be a website called fine art photo supply run by a guy in rochester NY named Anthony Guidice .
for years he had instructions on his website for converting a fish tank into a print washer.
basically what you do is you get a fish tank and then you buy pvc tubing and plexiglass sheets...
you put the tubes at each end and you cut slots in them where you will set the plexiglass sheets. you basically fill the tank with water and let the prints soak
then you siphon the water out and refill it again for another soak.. its a pretty good system and cheap.
here is a link on the LF site that explains "stuff"
https://www.largeformatphotography.info/forum/showthread.php?6910-Fine-Art-Photo-Supply
 

Lucid

Member
Joined
Jun 18, 2018
Messages
102
Location
England
Format
Multi Format
Hi Harlequin,

It depends what you want to get out of building it yourself. A practical tool or some darkroom jewelry. If you're keen to build it yourself to save some money you'll be hard pressed to do so once you cost your time and tooling. Though, if it's all about the learning experience then go meshuga. That's what I've been doing with some acrylic, Tensol, and a couple clamps, and it's worked ok for me. There are plenty of online suppliers which will cut your perspex to order. If you require the plastic to be modified or machined, then there are websites where you can post a "job" and machinists and fabricators can bid against each other for the work.

I've used both a Zone VI and Nova, and prefer the Nova as it's more space efficient. (I also hear Nova's new processors will have some features like the Zone VI, such as risers to keep the print away from the hypo which will sink to the bottom, and will be a modular setup with will allow you to develop and wash in a single temperature controlled vessel, and that sounds pretty nifty to me.) Maybe hold out to see if this new product meets your requirements.

In all honesty a rectangular tub big enough for a Paterson print rack (or similar) to fit in will work just dandy. Fill it up with water and let your prints soak for an hour or so. You could then add some hoses if you want to cycle the water, though if your making less than a dozen 8x10 prints in one session then filling up the tub with something like 10 litres or more of water and emptying it out at the end of the session should be sufficient.

Good luck and happy building!

Lucid
 

Neal

Subscriber
Joined
Dec 3, 2004
Messages
2,011
Location
Chicago, West Suburbs
Format
Multi Format
Dear Harlequin,

Material cost can be the deciding factor. This place has great prices. I built this using scrap 1/4" Lexan using a table saw with a dado blade and a home drill press. The center panels slide out for cleaning and it is held together with clear RTV labeled for aquarium use.

Good luck,

Neal Wydra PrintWasher1.jpg PrintWasher2.jpg
 

jim10219

Member
Joined
Jun 15, 2017
Messages
1,632
Location
Oklahoma
Format
4x5 Format
Not my video but this may give you some ideas.


I made one similar to this, only I used a clear, flexible hose to connect it to my shower head. I bought a diverter for the shower head so all I have to do to hook it up is screw the hose onto the diverter, pull the knob on the shower head arm, and run the shower. It drains out into the bathtub. The clear hose comes in through the top and has some holes drilled in it to fill the slots. The end of the hose is plugged. I used acrylic sheets for the dividers, and glued them to the PVC tubes with PVC glue. I don't remember what it cost me, but it probably wasn't much more than $50, and I can do something like 15 11x14's at a time. It took maybe two days to make (glue had to dry), only required a miter hand saw, and works like a champ!
 

bsdunek

Member
Joined
Jul 27, 2006
Messages
1,611
Location
Michigan
Format
Multi Format
Mine is a galvanized wash tub about 24 in. in dia. and 10 in. deep. It has a short spray bar at the top that keeps the water swirling and a bottom drain with a hose to adjust the water level. Hypo is heavier than water, so it must drain from the bottom. I don't know if it's "Archival", but I've been using it for nearly 40 years. I have prints from the 60's that look a good as they day they were made.
Works for me.
 

MattKing

Moderator
Moderator
Joined
Apr 24, 2005
Messages
51,952
Location
Delta, BC Canada
Format
Medium Format
Hypo is heavier than water, so it must drain from the bottom.
Bruce's design for a washer sounds like it would be exceptionally effective, but I'm afraid that the portion of his post that I have quoted reflects an idea that was once generally understood, but is now generally discounted. I think Fred Picker had a hand in the idea becoming popular.
A stationary quantity of fixer laden water is slightly heavier than a stationary quantity of fixer free water, but as soon as you mix them, they will remain mixed unless and until you leave them stationary for a very long time.
The biggest reason to have the drain at the bottom is that you don't have to pump the water up to where it drains out.
 

jim10219

Member
Joined
Jun 15, 2017
Messages
1,632
Location
Oklahoma
Format
4x5 Format
And, like on mine, the water comes in from the top left, and drains out from the bottom right. That increases the circulation, and will cause the water to turnover more quickly. You can use a couple of drops of food dye to test it out and see how long it takes to clear the dye. This test won't tell you how long you have to let your prints wash, but it will tell you if you have any areas where water stagnates and doesn't flow freely. If so, you may need to alter your design.
 

Todd Barlow

Subscriber
Joined
Aug 9, 2004
Messages
493
Location
Ontario
Format
Multi Format
Yes, I have built a couple different versions....
The Tank:
  • I struggled to find an appropriate tank (big enough with vertical walls and made of plastic for easy drilling of holes for inlet and outlets)
  • The idea of using a fish tank came from Fine Art Photo Supply who had advertised a Water Saver Print Washer using an aquarium for the tank.
  • Here is a link to my flickr page showing my first 11x14 version: https://www.flickr.com/photos/c330shadowcatcher/albums/72157629185153709
  • I like the Versa Lab unit tank but the cost with exchange to CDN and the cost of shipping to Canada is too much, however I think I found the source of the tanks they use: https://www.usplastic.com/catalog/item.aspx?itemid=26177&catid=960
  • Shipping cost for this tank to you may be more reasonable.
  • I used a standard off the shelf aquarium for both the 11x14 and 16x20 Vertical Print Washer (VPW) with no reinforcements
  • In the 16x20 version in my post I had drilled two holes - I no longer bother with that and use standard washing machine hoses from Home Depot and a Little Giant pump to circulate water, drain and or add water.
The "Fingers" to keep the dividers separated and in place:
  • I am lucky to have a table saw so I am able to cut down the Wire Duct to make the "fingers" that hold the slot dividers in place: https://ca-en.alliedelec.com/product/panduit/g2x2wh6/70333534/
  • I cut in two along the length of the duct and then trim off the ends of the fingers before cutting to the width of the tank.
  • I recommend using clear silicone to hold then in place as the white silicone looked messy.
The Slot Dividers
16x20 Vertical Print Washer:
  • Uses a 24"L x 12.5"D x 16"H, 20 gallon tank
  • Has 15 slots to hold up 15 16x20 photographic prints
  • Footprint 12.5"x24"
11x14 Vertical Print Washer:
  • Uses a 20"L x 10"D x 12"H 10 gallon tank
  • Has 12 slots to hold up 12 11x14 (24 8X10) photographic prints
  • Footprint 10"x20"


Let me know if you have further questions or if you would like more details.

All the best

Todd
 

Attachments

  • small.jpg
    small.jpg
    201.7 KB · Views: 286
  • small2.jpg
    small2.jpg
    223.3 KB · Views: 260
  • small3.jpg
    small3.jpg
    319.2 KB · Views: 279
  • VPW Detail 2.JPG
    VPW Detail 2.JPG
    47 KB · Views: 464
  • VPW Detail.JPG
    VPW Detail.JPG
    27.5 KB · Views: 315

Steve Goldstein

Subscriber
Joined
Jul 8, 2007
Messages
1,738
Location
Northeastern US
Format
Multi Format
The dividers in my Inglis 8x10 paper/film washer appear to be made of cut-down plastic shower door material, the kind with a textured and slightly pebbly finish. The odds of film or a print sticking to the dividers is low because the surfaces aren't smooth. My 11x14 Versalab uses some kind of very smooth plastic (polypropylene??) sheet for the dividers, and I do occasionally find a stuck print during washing.

What I'd really like to find is a "portrait mode" 11x14 washer - I'd happily trade off height for reduced footprint in my micro-darkroom. I guess I need to make one...
 

reddesert

Member
Joined
Jul 22, 2019
Messages
2,314
Location
SAZ
Format
Hybrid
Back when I was in grad school and only had a utility closet to use as a darkroom, with no running water, I made a sort of vertical processor with 3 or 4 slots each for dev/stop/fixer, out of acrylic. This is a bit like making a vertical washer, smaller, but with a greater requirement for keeping the solutions separate. In a washer, you just need dividers, not individually sealed compartments. I used precut 12x12" sheets of acrylic from a plastics store on Canal St in NYC, and acrylic strips for the edges between the sheets. It worked, but leaked a little, so I had to stand it in a tray to avoid a mess.

A few thoughts:
- The solvent usually used to glue acrylic contains methylene chloride and is extremely nasty (toxic/carcinogenic). Use this outside if you must use it. Someone upthread was able to use RTV, which is more innocuous. Research what glues will work with the plastics you plan to use.
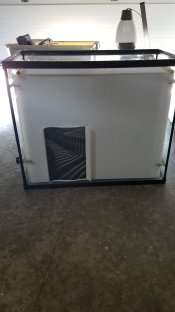
- Even my small acrylic processor wound up quite heavy. Plus filling a big tank with water is super heavy. Of course, if you use an aquarium as the outer tank, it's designed to take the water weight, but make sure you have a plan for where you are going to put it and a fill and dump routine.
- If you use RC paper, it washes quickly and you don't need an elaborate washer.
 

DREW WILEY

Member
Joined
Jul 14, 2011
Messages
13,708
Format
8x10 Format
I've made several of them in different sizes. Without going into detail, I recommend learning basic acrylic fabrication skills through either web tutorials or classes held by plastics stores. Sheets of Plexiglas which have been accidentally scratched are sold at considerable discount. You need to be able to make straight, perfectly square-edged cuts for acrylic solvent welding, or have them cut the pieces for you. It takes me about half a day to make a very professional looking and functioning washer.
 

dswiger

Member
Joined
Aug 15, 2012
Messages
25
Format
Medium Format
Yes, I have built a couple different versions....
The Tank:
  • I struggled to find an appropriate tank (big enough with vertical walls and made of plastic for easy drilling of holes for inlet and outlets)
  • The idea of using a fish tank came from Fine Art Photo Supply who had advertised a Water Saver Print Washer using an aquarium for the tank.
  • Here is a link to my flickr page showing my first 11x14 version: https://www.flickr.com/photos/c330shadowcatcher/albums/72157629185153709
  • I like the Versa Lab unit tank but the cost with exchange to CDN and the cost of shipping to Canada is too much, however I think I found the source of the tanks they use: https://www.usplastic.com/catalog/item.aspx?itemid=26177&catid=960
  • Shipping cost for this tank to you may be more reasonable.
  • I used a standard off the shelf aquarium for both the 11x14 and 16x20 Vertical Print Washer (VPW) with no reinforcements
  • In the 16x20 version in my post I had drilled two holes - I no longer bother with that and use standard washing machine hoses from Home Depot and a Little Giant pump to circulate water, drain and or add water.
The "Fingers" to keep the dividers separated and in place:
  • I am lucky to have a table saw so I am able to cut down the Wire Duct to make the "fingers" that hold the slot dividers in place: https://ca-en.alliedelec.com/product/panduit/g2x2wh6/70333534/
  • I cut in two along the length of the duct and then trim off the ends of the fingers before cutting to the width of the tank.
  • I recommend using clear silicone to hold then in place as the white silicone looked messy.
The Slot Dividers
16x20 Vertical Print Washer:
  • Uses a 24"L x 12.5"D x 16"H, 20 gallon tank
  • Has 15 slots to hold up 15 16x20 photographic prints
  • Footprint 12.5"x24"
11x14 Vertical Print Washer:
  • Uses a 20"L x 10"D x 12"H 10 gallon tank
  • Has 12 slots to hold up 12 11x14 (24 8X10) photographic prints
  • Footprint 10"x20"


Let me know if you have further questions or if you would like more details.

All the best

Todd
I'm looking to build the aquarium based print washer described in your post. What size water pump did you use or think necessary
Thanks
 
Photrio.com contains affiliate links to products. We may receive a commission for purchases made through these links.
To read our full affiliate disclosure statement please click Here.

PHOTRIO PARTNERS EQUALLY FUNDING OUR COMMUNITY:


Ilford ADOX Freestyle Photographic Stearman Press Weldon Color Lab Blue Moon Camera & Machine
Top Bottom