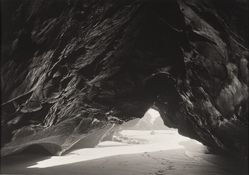
What would you do if you have sometihng very dark in the scene that you want to put in the Zone 2, or 3 to be able to see the detail. Let's say it's EV 3. But then you have highlights waaay out of the zone system with EV 17, and you still want to see details in those highlights. This could be a scene of a dark room with the open window. Outside is too bright, and you want to capture details in the room and clouds in the sky.
I know film should be exposed for shadows, and recovering highlights is easier than shadows, but I'm talking here where the highlights will be blown out for sure if I exposed for shadows.
If I'm shooting digital, I'd bracket it and merge in post, but I'm curious how to achieve this on film. And, no artificial lights should be used.
I guess this is not possible, but I'm curious what would you do to achieve the best result for this scene.