Samples of Ektar 100 printed on Fuji CA

Fantasyland!

D
Fantasyland!

  • 7
  • 1
  • 61
perfect cirkel

D
perfect cirkel

  • 2
  • 1
  • 111
Thomas J Walls cafe.

A
Thomas J Walls cafe.

  • 4
  • 5
  • 215

Recent Classifieds

Forum statistics

Threads
198,743
Messages
2,780,192
Members
99,691
Latest member
jorgewribeiro
Recent bookmarks
0
Joined
Mar 12, 2009
Messages
23
Format
Medium Format
I'm just curious what it looks like. Can you show me some samples of Ektar 100 printed on Fuji CA in the darkroom?

Tusen takk
Steffen
 

polyglot

Member
Joined
Jun 12, 2009
Messages
3,467
Location
South Australia
Format
Medium Format
I haven't got any good examples to hand at the moment as they're on my cubicle walls at work. It is high contrast and high saturation as you'd expect; a similar contrast/saturation to Velvia though the palette differs.

Pulling the C41 one stop gives contrast suitable for a portrait but still way too much saturation (I could show that but it's ugly). Reala pulled one stop on CA works pretty well for faces though.
 
OP
OP
Joined
Mar 12, 2009
Messages
23
Format
Medium Format
Its the high saturation Im after for the fall colours here. But the colours should look pleasant. Thats why Im asking for some examples. Contrast is not the problem I can reduce it with SLIMT in the printing stage.
 
OP
OP
Joined
Mar 12, 2009
Messages
23
Format
Medium Format
Selective Latent Image Manipulation Technique


For RA4 Im using bleach ( mine is from Moersch) in homeopathic doses like 1+1000 to 1+5000 for about 2 minutes before development. Im also always doing a short rinse between SLIMT and development.
 

polyglot

Member
Joined
Jun 12, 2009
Messages
3,467
Location
South Australia
Format
Medium Format
polyglot, you have a rather nice one on Flickr:
http://www.flickr.com/photos/24125157@N00/7527604520/

(Let me know if you'd rather I remove the link.)

Glad you like it, but I didn't post it because it's a poor demonstration of Ektar+CA. That print was made when my RA4 blix wasn't working properly so there is too much black (retained silver) in the dark areas. Ektar+CA should look better than that scan.
 

bvy

Member
Joined
Jul 22, 2009
Messages
3,285
Location
Pittsburgh
Format
Multi Format
Glad you like it, but I didn't post it because it's a poor demonstration of Ektar+CA. That print was made when my RA4 blix wasn't working properly so there is too much black (retained silver) in the dark areas. Ektar+CA should look better than that scan.

I see what you mean after looking at the scan. I'm really itching to get into RA-4 printing this winter...
 

anikin

Member
Joined
Nov 16, 2009
Messages
935
Location
Capital of O
Format
Multi Format
Fuji CA used to come in two types: Type C and Type P. My experience with printing Ektar was that Type C had too much contrast, but Type P was just about perfect. Unfortunately, I no longer see the two types of paper at most online places, so that differentiation might be over. I wonder if anyone else had similar experience with different Fuji papers.
 
OP
OP
Joined
Mar 12, 2009
Messages
23
Format
Medium Format
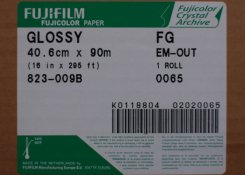
I think mine is neither type C nor D. Im using this one:
Fuji_CA.jpg
 
OP
OP
Joined
Mar 12, 2009
Messages
23
Format
Medium Format
Thank you Wayne. As I can see you are using the Kodak Color Print Viewing Filter Kit . Ive always wanted to try it but havent purchased one yet. Would you recommend it?
 

DREW WILEY

Member
Joined
Jul 14, 2011
Messages
13,925
Format
8x10 Format
Well, I'm just about to calibrate a forty-inch wide roll of polyester-based CAII for printing mainly from Ektar 8x10 film, so it should give you a clue to the faith I put in this combination. And once you
understand the variables, things even trickier than skintones can be routinely controlled. But it's not
an artificially warmed film like skintone neg films per se, like Portra 160, for example. But in principle,
it's not much different than printing on smaller ordinary CAII paper based media. And the difference
between CAII and the older Super C is very minor in terms of filter settings - the CAII is a little cleaner and more vibrant, but slightly lower over all contrast (not as low as Type P, however). Once you learn the basics you can control contrast either up or down via supplementary unsharp silver
masking.
 
Joined
Aug 2, 2009
Messages
147
Location
Alberta, Canada
Format
Multi Format
Sorry to redirect the thread here guys.

Drew, how are you handling your roll of paper? Do you have a roll paper dispensor of some sort? I've been looking for anything I can find on the market for some rolls of B&W paper I have and want to get into some color rolls as well.
 

DREW WILEY

Member
Joined
Jul 14, 2011
Messages
13,925
Format
8x10 Format
I don't really have room in my facility for a commercial XY cutter/feeder. But I do have a 50" rotatrim
flush mounted to a big formica drating table. There are threaded inserts in the tabletop at critical
positons so I can position a stainless straightedge using nylon screws. This type of "paper" is rather
heavy and easily dented, and sadly, they don't offer it in sheets anymore at all. I have a set of cone
rollers to hold the big roll slightly below the edge of the trimmer. Then another basic linear roller will
feed it to the Rotatrim blade once I have pulled the paper to the stainless length stop (which is
precisely squared to another edge). Then I guess I'll carefully slip a "sled" of Gatorboard or plexi
under the paper to slip it into my 30X40 paper safe on an adjacent table, or to smaller safes (I chose
40 inch roll width because it is also nice for 20x24 or 20X30 sheets. You can also buy 30 or 32 inch
wide rolls, which would be easier to handle. When actually in use, I have a plastic sled which transfers my delicate paper from the paper safe right onto the vacuum easel in the dark without
risk of crinkling it. The transfer from there into the drum rolled-up just takes a little practice - the
paper is less likely to kink when in a gentle roll. I learned the tricks back when doing big Cibachromes.
 

anikin

Member
Joined
Nov 16, 2009
Messages
935
Location
Capital of O
Format
Multi Format
Drew, by polyester-based CAII do you mean fujiflex? I've been drooling about it for a while, but
could never justify the cost for something I've never seen live.
 

frotog

Member
Joined
Jan 7, 2007
Messages
730
Location
third stone
Format
Large Format
Sorry to redirect the thread here guys.

Drew, how are you handling your roll of paper? Do you have a roll paper dispensor of some sort? I've been looking for anything I can find on the market for some rolls of B&W paper I have and want to get into some color rolls as well.

Successful roll paper handling does not need a Rube Goldberg, space-stealing contraption . A simple, fool-proof way to do this is as follows...

1. If you're working with paper 20" or wider you're in luck as it ships in its own single-roll light-proof box. Take the photo paper out of its box so that you can examine the box with the light on. Make certain that it's actually light proof by putting the two halves together and forcing the top down. This way you'll be able to feel any leaks at the seems as you push down. Tape any leaks you might find with black paper tape.

2. Determine the length of the print that you'll be making. Tape some nylon cord cut to the same length to the inside of the bottom half of the box. This will be your guide for how much paper to pull off the roll.

3. Back in the drkrm. you'll want to take your paper out of it's light proof bag and back in its box. Now you're all set to pull your paper off the roll.

4. Place box on floor and use your guide (Hold the end of the guide in your mouth) to determine how much paper to pull off the roll. Pull with both hands.

5. Roll the paper up into a fairly tight scroll (4-6") until you get to the lip of the bottom half of the box.

6. Holding the scroll in the center with one hand, cut along the lip of the box with a straight edge.


Not only will this technique take up a lot less room than what was described earlier in this thread, it's done vertically which means less chance for stuff to land on the large surface of your paper.

I have an automatic roll paper cutter that will handle rolls up to 52". It cuts in two directions along the width-wise axis (not sure why you'd want an xy cutter in an analogue drkrm using rolls). But I keep it loaded with rolls of 11" wide paper and don't even bother swapping out the larger rolls because the technique I described above is so ridiculously simple it doesn't warrant the time it takes to swap rolls. Besides, once you get a taste of how expensive the larger sizes can be you'll realize that you won't be going through as many sheets as you'd otherwise would printing with smaller sized sheets.
 

DREW WILEY

Member
Joined
Jul 14, 2011
Messages
13,925
Format
8x10 Format
Thanks for the tip, but that idea would be far too risky and dirty for my personal needs. At a
thousand dollars a roll, and the possibility of a sheet being crinkled with a single minor mistake, I
need a more foolproof system. I'll cut a bunch a sheets in a session, store them in the safe, and
then if needed resize from the 30x40 sheets. I could also print 40x60 from the master roll, though
that would be stretching my current print storage capacity. When I work with color materials of
andy kind, everything gets swabbed down until I'll got a true cleanroom setting. These prints have
to be world class. Period. And if you've worked with polyester you already know it's a lot fussier
than handling RC paper.
 

frotog

Member
Joined
Jan 7, 2007
Messages
730
Location
third stone
Format
Large Format
Polyester? Are you printing on duratrans?

If you're dragging your paper horizontally through a rototrim guide then you'll have bigger problems than dust (which is easily spotted out - even amongst the provincial class).
 

DREW WILEY

Member
Joined
Jul 14, 2011
Messages
13,925
Format
8x10 Format
Fujiflex. Don't worry about my trimmer technique - I've used it for a long time for Cibachrome, which
is even more fussy and very easily scratched or dented. But you are correct pointing out the risk of that little bar cover on the Rotatrim - it will be removed for roll work in the dark, and substituted with something more appropriate. Per dust - I try to work very clean. It was almost impossible to
retouch Ciba, so had to get real good at this. And even Fuji polyester base will show any kind of
opaque color as a zit on that high gloss, though you can use penetrating retouch dyes to build up
a minor white spot caused by dust. The nice thing about the Fuji is that it isn't highly electrostatic
like the Ciba base was (virtually a dust magnet!).
 
Photrio.com contains affiliate links to products. We may receive a commission for purchases made through these links.
To read our full affiliate disclosure statement please click Here.

PHOTRIO PARTNERS EQUALLY FUNDING OUR COMMUNITY:


Ilford ADOX Freestyle Photographic Stearman Press Weldon Color Lab Blue Moon Camera & Machine
Top Bottom