• Welcome to Photrio!
    Registration is fast and free. Join today to unlock search, see fewer ads, and access all forum features.
    Click here to sign up

Ripening in a closed container?

Somewhere...

D
Somewhere...

  • 2
  • 1
  • 51
Iriana

H
Iriana

  • 5
  • 1
  • 104

Forum statistics

Threads
202,736
Messages
2,844,886
Members
101,493
Latest member
aekatz
Recent bookmarks
2

grainyvision

Subscriber
Joined
Feb 19, 2018
Messages
695
Location
Seattle
Format
Multi Format
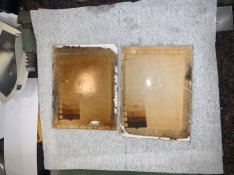
So I'm still trying to optimize my process and one of the maybe better ideas I had was to put the emulsion after precipitation into a closed black plastic bottle and to dunk that into a sous vide (my hot plate is VERY difficult to maintain a perfect temperature with, but sous vide works with practically no effort). My plan would basically be to ripen in the closed bottle in the sous vide (with a floating bowl to prevent the bottle from moving too much), and then in theory I can use room lights etc until ripening is complete. When it is complete, then I'd go back to safe lights, filter the emulsion (unwashed paper emulsion) into a beaker, add finals, stir while sitting in a cold water bath to get to coating temp, and then finally divide the emulsion into black film canisters, each canister being enough for coating one sheet of paper, then to put these film canisters of emulsion back into the sous vide (which has now been adjusted for coating temp). The advantages are numerous. Less safelight exposure being the biggest practical one. I can in theory even switch to room lights safely during coating if needed as long as my already coated paper is protected... And I can do other things while waiting for the long ripening times.

My biggest concern is that this could affect evaporation (should I use slightly less water?) and if there is any off gassing, then this wouldn't be as efficient (such as off gassing of ammonia or chlorine etc). Otherwise though it sounds like a solid plan that makes temperature control extremely simple and consistent and also removes humidity of the darkroom from the equation to a certain extent (I live in Colorado, so even with water baths etc going, still rare to get above 50% humidity in my darkroom)

Does this seem reasonable or would the prevention of off-gassing make this non-ideal?
 
I'm quite confident you could compensate for the reduced evaporation by adjusting the water/gelatin content.

I dunno, but my biggest concern would be that it seems you have omitted stirring in the new method. Assuming you have been using a stirring hotplate up until this point, I would expect that the ripening/digesting would be different without mixing. Hard to know without trying I suppose. Let us know how it goes!

Another option would be to use a water bath with your hotplate. The thermal mass should damp some of the temperature fluctuations.

The recipe I have (chlorobromide enlarging paper emulsion from Handmade Silver Gelatin Print) actually has no stirring at all for the ripening step. (vigorous stirring for the relatively short precipitation step though) Most other recipes I've seen are also either no stirring or "as slow as possible" stirring during ripening. For the slow as possible stirring I'd likely just not use the floating bowl and the bottle would move around a bit due to the current from the sous vide. Maybe I should've been more specific about the type of emulsion and ripening procedure called for!
 
The sous vide can be used to keep a water bath at temperature, in which can sit whatever container you desire to put the emulsion in. You will want to characterize the temperature of the emulsion vs temperature the sous vide is set at.

For the amounts that Denise’s formulas create, it’s true that you do nit need to stir. For larger amounts, you do want to stir to aid in maintaining constant temperature In the emulsion. Stirring impacts ripening rate, of course.

Honestly even the small batch amounts that Denise's formulas add up to are almost too much at times for my limited space. If I'm doing everything on a hot plate it's actually a lot easier to add slow stirring, but figured it messed with the ripening too much. Regardless, I was pretty well geared up and decided to try this process just now. Waiting for the ripening now. One concern is that even a relatively small 150F water bath suitable for a sous vide will really heat up the room. Putting foil over the water bath helps the bath temp to be more stable and to put off a least a bit less heat and humidity. I heated the initial gelatin on my hot plate directly in a beaker (no water bath) and basically right when it was about to hit target temp, I turned off the hot plate and turned up the stirring. The silver solutin and additional gelatin was put into small chemical jars and held in the water bath for ripening (I took them out early so they'd cool down a bit. Target temp for the additionals was 5F lower). I pour each jar into the initial gelatin as directed with rapid stirring, let it sit there a minute, then put it into a large black (never used) chemical bottle. Didn't have any small dark bottles or larger jars that could handle the volume. Ripening now for 45m. Definitely a much easier process than sitting 45m under safelights constantly needing to change hot plate temp to keep the temperature of the bath stable
 
The sous vide can be used to keep a water bath at temperature, in which can sit whatever container you desire to put the emulsion in. You will want to characterize the temperature of the emulsion vs temperature the sous vide is set at.

For the amounts that Denise’s formulas create, it’s true that you do nit need to stir. For larger amounts, you do want to stir to aid in maintaining constant temperature In the emulsion. Stirring impacts ripening rate, of course.

In the case of this recipe, increasing the volume doesn't change the stirring procedure. The rapid addition, followed by still ripening, is called "dump procedure." The method produces enlarging speed paper with a full density range. I adapted the recipe with almost no changes except volume reduction and losing the cadmium chloride from the SPSE Handbook of Photographic Science and Engineering, "Chloro-Bromide Projection Paper Emulsion Formula." The original recipe has 5x the volume I use in my recipe.
 
In the case of this recipe, increasing the volume doesn't change the stirring procedure. The rapid addition, followed by still ripening, is called "dump procedure." The method produces enlarging speed paper with a full density range. I adapted the recipe with almost no changes except volume reduction and losing the cadmium chloride from the SPSE Handbook of Photographic Science and Engineering, "Chloro-Bromide Projection Paper Emulsion Formula." The original recipe has 5x the volume I use in my recipe.

My understanding is that Cadmium Chloride is what made the original emulsion a warmtone emulsion by modifying how the grains crystalized during precipitation. However, cadmium is nasty stuff and I have no intentions of working with it at this point. Are there any homebrew known replacements for cadmium for making a warmtone paper emulsion? In one very unscientific test I tried using a very small amount of triethanolamine as a form of chemical sensitization in the simple chloride contact paper emulsion and this did result in very red images when using an appropriate developer, but also fogged the emulsion to an unusable level. Many sheets actually were already quite darkened before exposure or development. Other than the one reference that encouraged trying out TEA (specifically a printing out reference saying that TEA in the emulsion results in a reddish image printing out), I've found pretty much nothing for how warmtone or even coldtone emulsions are created.
 
Any chlorobromide paper can be printed warm-tone with the right developer and exposure calibrated for the developer. Copper chloride in the emulsion will give the warmth a boost, but it's not necessary. Cadmium chloride was added to adjust the characteristic curve, but it proved pretty much not worth the risk of its toxicity.
 
@earlz Cd was used as much as a curve modifier as for tone. I've seen evidence of Pb salts used in warmtone emulsions too - it seems as much about controlling the shape/ size of grain formed that defines the warmth/ coolness of the emulsion. CuCl2 has long been recommended as a modifier for warm tones. Some recipes use reverse addition too.
 
Any chlorobromide paper can be printed warm-tone with the right developer and exposure calibrated for the developer. Copper chloride in the emulsion will give the warmth a boost, but it's not necessary. Cadmium chloride was added to adjust the characteristic curve, but it proved pretty much not worth the risk of its toxicity.

That is the big benefit with handmade emulsions, warm-tone developers really do give a drastic modification in tone. However, I'm looking for that rare super warm tone that seems to not exist anymore. I know PE has said in the past that cadmium was used both for contrast modification and to change the overall tone of the emulsion, but either way it seems like a difficult problem to figure out as a homebrew user. Haven't tried it, but looking at the examples in your book the effect of copper chloride is pretty subtle. I'm curious if it would also work in an enlarging speed chlorobromide emulsion though. Another set of components that might have some potential (and pointed out in that printing out reference paper) is ferrous sulfate and stannous/tin chloride both also will modify tone. Stannous will modify toward red, ferrous toward brown. I believe gold salts were also mentioned. My understanding of what is being done by introducing these weird metal salts is basically doping the crystal to modify its shape. Without an electron microscope or at least an extremely high magnification microscope though, I don't expect to be able to objectively measure what differences these make without making an emulsion, coating it, and seeing what happens. It's pretty confusing figuring out how to shape the tone since in theory red/brown means finer grain and black/blue means larger grain, yet obviously it is possible to make a fairly fast warmtone emulsion commercially.

I still have to print my current results when they're completely dry, but from a test strip I cut off while wet, the closed container ripening seemed to be a lot more consistent from beginning to end. No slugs at the end! Only potential problem was I saw very tiny little spots that looked like air bubbles under the surface. My test strip I cut off had no bubbles visible though so maybe it doesn't matter too much. For the test strip I have though the texture of the paper is a lot more obvious than expected. Sitting it in the sun darkened everything up nicely but the grain of the paper is rather obvious. Hopefully less obvious when properly developed or I'll need to use a less textured paper or pre-size or something, or maybe just need a thicker coating. Regardless, doing the closed ripening method was so much easier. No syringes needed (though wasted about half the emulsion due to too much being put into each one-sheet canister) that minimized the obvious above surface air bubbles, and being able to leave the darkroom at anytime in the middle of a coating really comes in handy, as well as being able to prepare for coating in daylight. My coating method in general seemed good and somehow without shelvages when wet, but looking at the test strip I have it's obvious there's a thin strip where my puddle pusher and coating well dragged the paper. If I ever do this for full size printing I'd likely try to use a paint brush or something along the edges so that the shelvages become a neat "hand coating look" part of the print, even if the actual coating isn't put down with a brush.
 
You may be misremembering how "warm" chlorobromide papers were. The tones achievable with handmade chlorobromide paper line up nearly perfectly with actual Kodak paper samples from the 1940s. You may be thinking instead of the tones available in gelatin chloride P.O.P. Attached is one example. More information and examples can find found at www.thelightfarm.com, the P.O.P. project.
 

Attachments

  • Bullkelp POP print.jpg
    Bullkelp POP print.jpg
    661.8 KB · Views: 151
You may be misremembering how "warm" chlorobromide papers were. The tones achievable with handmade chlorobromide paper line up nearly perfectly with actual Kodak paper samples from the 1940s. You may be thinking instead of the tones available in gelatin chloride P.O.P. Attached is one example. More information and examples can find found at www.thelightfarm.com, the P.O.P. project.

I'm more thinking of specifically marketed warmtone emulsions (polywarmtone being the most modern example I've processed myself), rather than chlorobromide emulsions in general. The differences in processing of a modern chlorobromide emulsion vs handmade though is quite interesting. Specifically, what is it that caused most modern papers to not really respond much to different developers. I know from some other thread a lot of people said the removal of cadmium caused many proven emulsions to change and become less responsive to developer changes, but I'd think that whatever replaced cadmium caused that, rather than the cadmium itself being absent
 
It's pretty confusing figuring out how to shape the tone since in theory red/brown means finer grain and black/blue means larger grain, yet obviously it is possible to make a fairly fast warmtone emulsion commercially.

Remember that there are a whole lot of things that the manufacturers can do relatively easily that are very hard to do at home without specialist computer controlled emulsion growth technology allowing precision halide placement and sensitising techniques that allow high speed high chloride emulsions to be made pretty readily & tonally adjusted. At least in part this technology seems to have come about in order to find ways around the use of certain of the nastier heavy metal salts for growing grains with specific shape/ aspect characteristics. Lead (ii) Nitrate (or similar) pops up quite often in old warmtone emulsions - it seems to have offered an advantageous combination of warm tones, but also seemingly lower fog, which is significant if you want to get more speed via sulphur/ gold sensitisation - which are known to cause fog issues with chlorobromide emulsions.

And I'd suggest that the removal of the Cd happened much earlier than people assume (1970's) - and the (wrong) idea of 'less silver in modern emulsions' related to those reformulation attempts with their nominal tonal shortcomings relative to the then available emulsion technology & budget for re-formulation of less significant business lines.
 
For references of what kind of red tone I was able to achieve with the chloride emulsion with TEA, see the attachments. First picture is a lith print and second is abusing the paper for printing out (no development, just fixing). I didn't see a deep red like this with the normal chloride emulsion without TEA addition
 

Attachments

  • 8D3D9968-22BD-4BC0-B9D1-71B466FAE64C.jpeg
    8D3D9968-22BD-4BC0-B9D1-71B466FAE64C.jpeg
    105.4 KB · Views: 160
  • 925434E5-9B30-4577-8A65-145E42199C71.jpeg
    925434E5-9B30-4577-8A65-145E42199C71.jpeg
    83.2 KB · Views: 146
You may be misremembering how "warm" chlorobromide papers were. The tones achievable with handmade chlorobromide paper line up nearly perfectly with actual Kodak paper samples from the 1940s. You may be thinking instead of the tones available in gelatin chloride P.O.P. Attached is one example. More information and examples can find found at www.thelightfarm.com, the P.O.P. project.

This is completely off topic, but seems I can't send you a PM, so here is two questions I had for you, if you don't mind spending the time to answer them:

Hi Denise, one thing that kind of stood out in your book is that the developers used are typically quite low in activity. I understand the peppering issue with chlorobromide being a potential problem with HQ based developers, but even TLF or D-23+ is formulated to be more like a film developer than a paper developer. Is this just for contrast control or is there another reason? I've used Ansco 130 with no problems, though have to be careful with development times to avoid fog.

Also, for rapid fixers (TF-4 specifically) that are formulated for no image bleaching, will bleaching still happen with extended fixing time? It seems difficult to really tell when bleaching starts to occur in my experience, though taking a print out into the sun very quickly reveals if the print wasn't fixed enough. I was getting ~1m30s with TF-4 for silver chloride emulsion, though coated much thicker than recommended.
 
earlz,

Emulsions are emulsions, so at the most simple level, developers are developers -- film or paper. The One Big Idea that underpins my work is simplicity and sustainability. Being able to make a product that you can't buy, or which might disappear in the future, gives an artist the creative security to make a lifetime's work of a concept or process.

However, throughout the history of photography there have been two basic approaches. One is to work with a whole bunch of processes and tools, perhaps never mastering any of them, but having a whole lot of fun. The other is to choose one process or camera at a time and master those so that you can concentrate on the image aspect of photography. Most people cast about within the first approach until they can decide if the second approach is right for them. There aren't any shortcuts that I know of. There is a tremendous amount of excellent literature posted on The Light Farm. It couldn't hurt to do some deep reading.

As far as fixers are concerned, best to just follow the manufacturers' recommendations. That said, I'm not a big fan of rapid fixers. That's always been the case, even before I started making my own materials. Hardener is sometimes useful, but hardener can be added to a standard fixer. The Darkroom Cookbook, by Steve Anchell, Focal Press, is a natural companion to emulsion making. I don't have a clear idea of your goals. Perhaps some of the answers to your questions are in Steve's book.

Thanks for the reply.

Simplicity definitely makes sense. Almost surprised TLF isn't a "teaspoon" style formula actually heh. I'm not sure how often metol is used outside of photography, but I know hydroquinone, sulfite, carbonate, and bromide each have major industry uses outside of photography. The potential of certain products being unavailable in the future is a big worry of mine in my own formulations, especially ones with glycin.

I've dabbled in both. With coronavirus limiting my traveling (and most of my photography being travel stuff) it's really caused me to explore a lot of different chemistry aspects behind it. There is definitely benefits to the latter though. I've quickly learned over the past year that having too much gear to choose from is actually a problem, even if you have a car etc where you don't need to worry about packing restrictions. There definitely aren't any short cuts heh. Also The Light Farm has been a great resource. I've read through a lot of it already, but need to go deeper into a few topics. The new POP guide/formula looks especially interesting

Since fixing is a to-completion process, I've honestly never seen too much merit for mixing my own, though I have a pound of hypo sitting around waiting for a use. TF-4 has always given me great results and it seems like trying to make a homebrew version of TF-4 (ie, alkaline rapid fixer) comes with a lot of problems including needing to source ammonium thiosulfate. And yes, I have that book and read it cover to cover a few times already. I've tried a few of the weirder paper developer formulas but they just don't work well on modern materials, but I think they might be ideal for tone shifting etc on homemade emulsions. My goals are honestly constantly changing. Whatever I find fun for the moment heh.
 
Photrio.com contains affiliate links to products. We may receive a commission for purchases made through these links.
To read our full affiliate disclosure statement please click Here.

PHOTRIO PARTNERS EQUALLY FUNDING OUR COMMUNITY:


Ilford ADOX Freestyle Photographic Stearman Press Weldon Color Lab Blue Moon Camera & Machine
Top Bottom