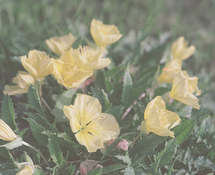
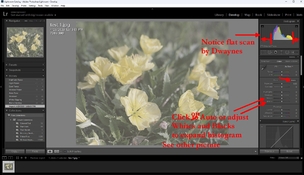
Hello, I recently got back my 120 scans, and they all look very "thin" if that makes sense. It's not that the images are underexposed, just "airy." I am not sure how this lab is scanning the film (Dwayne's). See image for direct from lab scan.
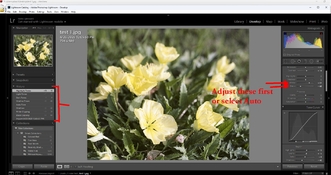
I would like to fix this and give the images more "substance" but I cannot get them to look natural.
Does anyone have any pointers to get the images looking better? I hope to rescan them one day when I can get a copy stand and negative carrier.
Thank you
I would like to fix this and give the images more "substance" but I cannot get them to look natural.
Does anyone have any pointers to get the images looking better? I hope to rescan them one day when I can get a copy stand and negative carrier.
Thank you