Proper proofs and corrections

Hydrangeas from the garden

A
Hydrangeas from the garden

  • 2
  • 1
  • 34
Field #6

D
Field #6

  • 4
  • 1
  • 57
Hosta

A
Hosta

  • 12
  • 8
  • 118
Water Orchids

A
Water Orchids

  • 5
  • 1
  • 69
Life Ring

A
Life Ring

  • 4
  • 2
  • 60

Recent Classifieds

Forum statistics

Threads
197,909
Messages
2,766,736
Members
99,500
Latest member
Neilmark
Recent bookmarks
1

banandrew

Member
Joined
Oct 13, 2015
Messages
84
Format
Multi Format
Hi everyone, I am relatively new to darkroom printing and would appreciate some advice from you kind souls. I've spent a lot of time on trying to get up to speed, my primary resource is "Way Beyond Monochrome", which is amazing. I've read it cover to cover, and many sections more than once, and it's a great reference.

More often than not, I'm having difficulty getting a balanced print using "normal" contrast paper. I am using both the single grade and multi-grade printing, though right now I prefer multi-grade since it's easier to get what I want when I'm dodging and burning. I tried today to make "proper proofs" (as suggested on this site I found: http://www.halfhill.com/proof.html). Turns out many of my recent negatives are way too dark and muddy when I print them this way. I use HP5+ @ 320 and develop hc-110 Dilution H for 10:30-11:00 minutes.

So my question to you all is, should I try to increase exposure first? Or increase development time? Most of the shots that are too dark still have good shadow detail, but I'm a bit hesitant to increase dev. time since I'm shooting at more or less box-speed-or-slower. Any suggestions would be very appreciated. Oh and I printed the proofs using a #2 filter. Condenser head. And Ilford MG IV RC paper.
 

Sirius Glass

Subscriber
Joined
Jan 18, 2007
Messages
50,227
Location
Southern California
Format
Multi Format
Welcome to APUG
 

MattKing

Moderator
Moderator
Joined
Apr 24, 2005
Messages
52,236
Location
Delta, BC Canada
Format
Medium Format
Welcome to APUG.

Some might be slightly confused by your thread title. I (and I think many others) think as "proofs" as being individual, small prints from each negative. Generally proofs will have received some adjustment, even if they are not finely corrected.

I think you are referring to what I would call a "contact proof sheet".

Have you tried doing test strips to "fine tune" your contact proof sheets? By that I mean trying a number of different exposures on the same sheet. You can do tests varying time, and you can do separate tests varying contrast.

With roll film and varying light it is not unusual to have different densities and contrasts on the same roll. Sometimes parts of the roll require one exposure wile other parts require another.

Sometimes you can accomplish what you need by burning and dodging. But more often than not, doing two different exposures on two different sheets is the easiest solution. Then just keep both.
 

MattKing

Moderator
Moderator
Joined
Apr 24, 2005
Messages
52,236
Location
Delta, BC Canada
Format
Medium Format
Sorry, I misunderstood what you are asking.

I had originally thought you were asking about how to improve your contact proof sheets for viewing, not how to use your contact proof sheets as a test on your process.

I'm not sure that I would recommend the system used in the linked article, unless you are contact printing for your final results.

Are you able to achieve final prints you are happy with from your negatives? Frequently without extra-ordinary manipulations (dodging and burning)? If so, your exposure and development are fine.

I'd suggest trying this: take a negative that prints easily and well, and then make a contact proof sheet with that negative forming part of it. Adjust your contact proof sheet until the image of that negative is equally pleasing. The appearance of the film rebate on that contact proof sheet is what you should be aiming for in all your contact proof sheets. Then, they will tell you something useful about your negatives.
 
OP
OP

banandrew

Member
Joined
Oct 13, 2015
Messages
84
Format
Multi Format
Oops, I was trying to edit that last post for clarity and the mobile site decided to delete it instead.
 
Joined
Sep 10, 2002
Messages
3,575
Location
Eugene, Oregon
Format
4x5 Format
Making a "proper proof" is a multi-step process. After you've nailed it, however, it is a really useful tool for lots of things. I'll elaborate what I think you should do:

First, you need to make a contact-sheet test-strip. Make sure you note enlarger head height and lens aperture (and light intensity setting if you have one). The object is repeatability. Your goal is to find the exposure where the unexposed area of your negative matches maximum paper black*. For this reason, include some area outside your negative in your test strip, i.e., some paper that gets exposed, but is not covered by any of the negative. Make your test strip, dry it down (otherwise you won't get an accurate result) and then, in "normal viewing light," choose the minimum exposure in which the unexposed edge of the film matches the black of the paper that was exposed without film covering it. (Hope that's all clear...)

*Qualification: "Maximum paper black" or D-max for the unexposed area of the negative is not "really" what we are after. What you need is a black printed through the unexposed area of the negative that visually matches the black of the paper exposed without film covering it in the same illumination that you prefer for viewing your prints. If you do the test in direct sunlight, you'll likely end up with a too-long exposure time. If you want to learn about "black" examine your test strip in various light sources and at various intensities. You'll quickly find that you need to choose matching "blacks" based on illumination. Now back to the "proper proof."

Once you have established your proper-proofing exposure for a film and development scheme, proof a group of negatives and evaluate them. Here's where the value of a "proper proof" shows itself. If your negatives are lacking shadow detail, they are underexposed.* If they lack highlights, they are underdeveloped. If they have way too much shadow detail and the highlights are blown-out white, they are likely overexposed (this latter, however, often results in imminently printable negatives). Refinements of the above: let's say you have a proof on grade 2 that has adequate shadow detail, but too-dark highlights. Well, then you know you're going to need a higher-contrast paper to print this neg well. If shadows are okay, but highlights are blown, then you'll need less contrast when printing... you get the idea.

Qualification: If you've chosen a proper-proofing time that is too long (i.e., your black is too black) then this will be the case as well. That's why establishing what exposure you want for minimum time for maximum black is so important.

The real thing you need to watch for, once you get your time for max black nailed down, is adequate shadow detail. If you don't have that at proper-proofing time, you're underexposing. Change your working E.I. If you have a lot of normal scenes that need higher (or lower) contrast when printing, then you are likely under- (or over) developing regularly; adjust your developing time accordingly.

Keeping track of exposure data and comparing it to the proper proof gives you all kinds of info that helps refine your work in the field.

Finally, Matt has a point above about the difference between contact prints and enlarged ones. A condenser-type enlarger will yield a print with more contrast than a contact sheet while a diffusion enlarger will give one with slightly less contrast (due to lens flare). If you are aware of this, you can figure out what to expect from your system and adjust accordingly.

I proper-proof everything. I think it is a valuable tool.

Hope this helps,

Doremus
 
OP
OP

banandrew

Member
Joined
Oct 13, 2015
Messages
84
Format
Multi Format
Hi Doremus, that's the most detailed explanation I've read, thank you so much for that. Especially the *qualifications*. I'd never considered viewing light at all when making the proofs. I "proper proofed" a roll of 135 until the sprocket holes were invisible (under indoor incandescent lighting). All the images looked too dark, lacking highlights, except for the high-contrast backlit images. Do you think this is over-printing? Or is that a good method?

It's hard to tell but I'm pretty sure that shadow detail is there, however it's HP5+ which has a long toe, so I guess at EI 320, if I start increasing [edit: development] time, I'm essentially pushing the film. I'll try a roll at EI 200, normal dev, and another roll at EI 400, and dev for 800. The interesting thing is that digitaltruth.com has both 7.5, and 10 minutes for HP5+ in Dilution B, 20C. I'll try 10 minutes first, and see if it's overshooting.
 
Last edited by a moderator:
Joined
Sep 10, 2002
Messages
3,575
Location
Eugene, Oregon
Format
4x5 Format
Hi Doremus, that's the most detailed explanation I've read, thank you so much for that. Especially the *qualifications*. I'd never considered viewing light at all when making the proofs. I "proper proofed" a roll of 135 until the sprocket holes were invisible (under indoor incandescent lighting). All the images looked too dark, lacking highlights, except for the high-contrast backlit images. Do you think this is over-printing? Or is that a good method?

It's hard to tell but I'm pretty sure that shadow detail is there, however it's HP5+ which has a long toe, so I guess at EI 320, if I start increasing [edit: development] time, I'm essentially pushing the film. I'll try a roll at EI 200, normal dev, and another roll at EI 400, and dev for 800. The interesting thing is that digitaltruth.com has both 7.5, and 10 minutes for HP5+ in Dilution B, 20C. I'll try 10 minutes first, and see if it's overshooting.

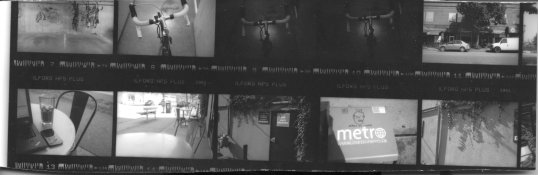
Take a look at the negative itself. If there is a lot of shadow detail that is not printing at your selected time, then maybe you are printing your "proper proof" too dark. However, if it is "hard to tell" if more detail is there, then you're likely fairly close. You're obviously shooting 135, and are, rightly, checking the sprocket holes. Keep in mind, however, that there will always be a little outline of the sprocket hole even when the blacks of the hole and the film base are the same. If you're trying to get this outline to "disappear," then you're likely overexposing your contact print. If you need more than the sprocket holes to compare to, leave a strip of paper uncovered by the film on your contact and compare to that. Again, the outline of the edge will still show up when the blacks match. If you're happy with how the blacks match and your proofs are "too dark, lacking highlights," then increase development time till you get the range of tones you like.

The whole reason for a "proper proof" is to see at a glance if you've under- or overexposed/under- or over developed etc. The assumption is that printing at a time that gives you a good black will show this. That said, you need to spend some time living with and understanding "black" as relates to a fine print. Viewing light makes a big difference. Do a test strip without any film at all and well into the black range. You'll find that the blackest strip in dim light will have significant separation from its neighboring strips in brighter light. It's the way your eye works. If, like me, you plan to exhibit your prints and expect rather bright gallery lighting, then evaluate under those conditions. I often check my test strips in direct sunlight, but keeping in mind that the detail rendered under such bright light won't be visible under dimmer lighting. It's always a compromise to fit an "ideal" amount of illumination.

If you really want D-max black from clear areas of your negatives (and many of us do) then you'll likely find that you'll have to work at a significantly slower E.I. than box speed and, when those clear areas are printed max black, you'll sacrifice some of the shadow detail visible in the negative. This, for me, is not necessarily a bad thing. It means I can dodge shadows selectively to dig for a bit more detail. Large-format Zone System practitioners often shoot at half of box speed.

And, since you're this far with photo processing, lets "qualify" those pesky terms, "push" and "pull." :smile: Developing longer gives you more overall contrast on your negative; it doesn't speed up your film appreciably. Developing less gives you less overall contrast. Zone System practitioners use this to tailor their negatives to the range of tones in the scene they are shooting (along with the paper they use). Got a flat scene? Give it more development and vice-versa. Sure, you can use extended development to get underexposed film to look better in a final print (sometimes necessary when you're shooting in really low light), but you'll always lose shadow detail. This latter is what I call "pushing," not increasing development time to get more overall (and the correct) contrast. Pulling has less of a reason for existing; often it's just a sloppier way to "overexpose and underdevelop" to get more shadow detail instead of doing the tests (like the proper proofing you're doing).

In honing in on an optimum personal exposure index and development scheme for "normal" scenes, we may have to increase or decrease E.I. and/or development time to get to the point where the proper proof gives a full range of tones and the desired amount of shadow detail and the black we want. Once you are there, then the proofs can be used to monitor our actual practice in the field.

An aside on using the Zone System with roll film: My advice is: Don't bother. I use it exclusively for sheet film, where the process is slow and I can develop the negatives individually. For roll film I advocate the following: Find your personal E.I. and developing time for "average" or "normal" scenes for you. Calibrate these so the print well on a middle contrast grade. For 135 film, I like to aim for grade 3, but grade 2 is fine as well (I think developing for grade 3 yields a bit less grain). Then, shoot away with one caveat: For scenes that are contrastier than "normal," you'll likely have to adjust exposure. If you're using your averaging or center-weighted in-camera meter, overexpose by a stop (or two if the contrast is really high). This seems counter-intuitive, but it prevents the loss of shadow detail. The resulting overly-contrasty negative you deal with when printing by using a lower contrast grade paper (that's why VC papers go down to grade 0). (If you are basing your exposure on a shadow value, as Zone System guys do, then you won't need to make an adjustment; it'll already be there. However, most of us don't meter that way when shooting 135.)

Hope all this helps,

Doremus
 

MattKing

Moderator
Moderator
Joined
Apr 24, 2005
Messages
52,236
Location
Delta, BC Canada
Format
Medium Format
To add to what Doremus has said, if you intend to use this technique with your contact proof sheets, use it more as a control than as an initial source of calibration.

Do something like Doremus suggests above for roll film, and once you get some good (and relatively easy) prints, then adjust your contact proof sheet to match. The appearance of that matched contact proof sheet becomes your target when making subsequent contact proof sheets.

And by the way, a blank frame is a lot easier to view then the film rebates when you are first trying to calibrate your contact proof sheets.
 
OP
OP

banandrew

Member
Joined
Oct 13, 2015
Messages
84
Format
Multi Format
Hey Matt and Doremus, thanks for the responses, it's all very informative for a n00b like me. Good to know that you should still be able to see the outlines of the sprocket holes lightly. I might be overprinting the "proper proof". I'll try it with a blank frame instead. I only shoot roll film, 135 and 120 (so far, heh), so I was planning on doing as you said, Doremus, and finding a "good enough" EI and development time for each average negatives, then adjusting with contrast filters. And I did notice that the film base for 120 HP5+ is a lot lighter than for 135.

Here's a strip from a flatbed scan using the "proper proof" exposure that I settled on. The outlines of the sprocket holes are just faintly visible. I realize that looking on a screen is different than looking at it under viewing light. (I'm currently working on prints for a personal book, so I guess indoor incandescent or a reading light is a good viewing light).

attachment.php


There is paper white on the left, which was held under the easel. This roll was given normal development. I have a hard time remembering how I exposed each shot though. It looks like frame 7 and 8 are properly exposed, 9 and 10 are about a stop under exposed, 11 is well exposed, 13 could stand a half stop more exposure, and 14 could stand a stop less (but still appears easily printable, as the actual strip has plenty of detail in the highlights, but this was a bad scanning job). frame 15 looks OK but maybe could use a bit more exposure. I think for 13 and 15, I had the camera set to 400 EI, while for 14 I had the camera set to "sunny 11", 1/250 f/16. However this was a leaf shutter with max speed of 1/500th, so I guess it's not *really* giving 1/250 f/16, probably more like 1/125 f/16.

Do my assessments sound about right? Or am I off the mark?
 

Attachments

  • 2015-10-20-0002.jpg
    2015-10-20-0002.jpg
    258.1 KB · Views: 184

MattKing

Moderator
Moderator
Joined
Apr 24, 2005
Messages
52,236
Location
Delta, BC Canada
Format
Medium Format
Your assessments seem fine, although it is always difficult dealing with looking at scans on the web and telling for sure.

One caution though. For scenes like the one in negative 13, where there is a large subject brightness range, the determination of whether the exposure is correct depends greatly on what the photographer wants to have emphasized in the photo. In that case, if the glass is your centre of interest, the answer might be different than if the computer is the centre of interest. In either case, the metering necessary requires a lot more judgment than the metering of a more evenly lit scene.

As an illustration, the exposure used for #15 looks ideal for the sign that forms part of the scene.

As you learn, and while you are developing "standards" as a reference, it is probably best to use examples with more commonly encountered and easy to understand lighting situations. Looking at your examples, #7 seems to be a good example of low contrast lighting and a narrow subject brightness range, #11 seems to be a good example of high contrast, sunlight and shade lighting and a wide subject brightness range, and #8 may to be a good example of moderate contrast lighting and a moderate to wide subject brightness range. You could use those three as useful references for now.
 
OP
OP

banandrew

Member
Joined
Oct 13, 2015
Messages
84
Format
Multi Format
Hi Matt, great, that's exactly the kind of help I was looking for from this experienced community. I'll study the negatives and use them as approximate guides as I figure out good EI for each camera and development times. Thanks for your responses. I see you're in Delta. I've been living in Vancouver for the last 5 years. Hi neighbour!
 
Photrio.com contains affiliate links to products. We may receive a commission for purchases made through these links.
To read our full affiliate disclosure statement please click Here.

PHOTRIO PARTNERS EQUALLY FUNDING OUR COMMUNITY:


Ilford ADOX Freestyle Photographic Stearman Press Weldon Color Lab Blue Moon Camera & Machine
Top Bottom