Pre-flash, post-flash, and chemical fogging question?

Vernal Dark

A
Vernal Dark

  • 2
  • 1
  • 15
WPPD-2025-TULIPS

A
WPPD-2025-TULIPS

  • 2
  • 0
  • 63
Deco.jpg

H
Deco.jpg

  • Tel
  • Apr 29, 2025
  • 1
  • 0
  • 38
Foggy pathway

H
Foggy pathway

  • 3
  • 1
  • 74
Holga Fomapan 400

H
Holga Fomapan 400

  • 1
  • 0
  • 60

Recent Classifieds

Forum statistics

Threads
197,471
Messages
2,759,687
Members
99,381
Latest member
Daybreak135
Recent bookmarks
0

grainyvision

Subscriber
Joined
Feb 19, 2018
Messages
695
Location
Denver, Colorado
Format
Multi Format
I have some very slow speed 1.5 ISO Ortho Litho film (in 120 format) that I'm trying to make a bit more usable. At 1.5 ISO it looks great of course, but it's a very difficult to use speed, requiring a tripod for any depth of field even in bright daylight. I've done quite a few developer tests and the film is just that slow in the shadows. There's quite a bit of light required before the film will have any info in the shadows, but once you get over that hump it works quite well with continuous tone moderate contrast results (with careful development)

I've had as well as seen quite a bit of success with effectively increasing the speed of the film by pre-flashing. This works fine for single sheets, but it's very difficult to do with a 32" 120 sized strip of film, not to mention that it requires unrolling the film etc. The speed increase seems take this film to as high as 25 ISO or maybe even 50 ISO with higher contrast.

Apparently post-flashing is actually as effective as pre-flashing and has the same shadow speed boosting effect. I haven't tested with this film, but I've seen many reports that post-flashing is the same, as well as tested it with paper. Post flashing doesn't really make the 32" sized strip of film any easier to handle, but I had an idea. What if I used a chemical post-flash? ie, similar to the E-6 reversal bath, used something that would chemically fog the film. Would this work at all, and what kind of chemical should I use for this? I believe that chemical fogging, if I could get it perfectly even, might actually be better than light exposure. It would (in theory?) fog the shadows before the highlights with a very weak dilution reversal bath. Of course, unlike every reversal process I've seen, this is not designed to make positives, but rather just to simulate the shadow speed boosting effect of flashing, and thus would NOT be a to-completion process. The easiest to obtain reversal bath appears to be using "iron off" powdered cleaner, something like a teaspoon per roll of film and I assume around 300ml of distilled water.

Has anyone tried something like this or think it would or wouldn't work? I'm far from a chemistry expert, but I have a ton of this film that I'm trying to figure out how I can use more often. If I can do effectively a chemical post-flash that would increas speed without other ill effect it'd suddenly make these ~300 rolls worth of film I have more valuable
 

Truzi

Member
Joined
Mar 18, 2012
Messages
2,624
Format
Multi Format
Not related to chemicals, but if your camera can do a double/multiple exposure and you have a diffuser similar to an ExpoDisk, you may be able to pre-flash as you go. It can be a bit tedious, though.
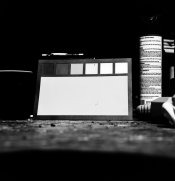
I have an ExpoDisk that I had tried to pre-flash some microfilm with. I opened the aperture, unfocused the lens, put on the ExpoDisk, pointed it towards the clouds, and exposed a frame. I then disengaged the double-exposure lock, recocked the shutter, removed the ExpoDisk, and took a picture. Sometimes I'd do two pre-exposures.

This was not a serious test, more of a proof of concept, and it did seem to work a bit. If I really wanted to test this and get good at it I'd not use microfilm, as that is too much of an unknown variable to me.
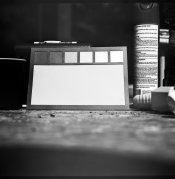
Somewhere on Photrio there is a thread where a member preflashed some color film with good results.
 

Rudeofus

Member
Joined
Aug 13, 2009
Messages
5,054
Location
EU
Format
Medium Format
There have been reports that preflashing and postflashing indeed improved film speed, but not by more than one or two stops - if that. Turning an ISO 1.5 film into an ISO 3 or 5 film may be exciting from a theoretical standpoint, but may not really solve your problem. It often amazes me how little difference a full stop of speed really makes in practical situations.
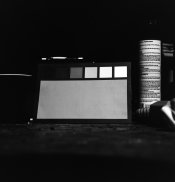
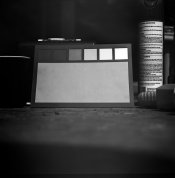
I suggest you use this film in situations where long exposure times and wide open apertures really don't matter, and use modern, fast pictorial film for every other situation.
 

darkroommike

Subscriber
Joined
Mar 22, 2007
Messages
1,673
Location
Iowa
Format
Multi Format
For post flashing I have seen recommendations of using a very low intensity Wratten No. 3 (green) safelight for a few seconds/minutes? at about 4 feet. Very, very low intensity. You could strip the paper backing off the roll and thumb tack the roll to a cork board for post exposure flash.
 
OP
OP
grainyvision

grainyvision

Subscriber
Joined
Feb 19, 2018
Messages
695
Location
Denver, Colorado
Format
Multi Format
Did some testing today. Iron Out does indeed give a fairly slow and controllable fog to film (but make sure to use distilled water or it won't do anything). As Rudeofus said though, it really can't increase speed more than 2 stops, and more like 1 stop if you're lucky. I was aiming for a conservative 12 ISO and ended up with a bunch of blank test strips, or test strips where there's just a bit of cloud detail in my test shot. My first test was a picture that was cut in half. One side did 30s in iron out, the other did 2m. Shot at 12 ISO, but with brighter (dreary cloudy sky) highlights. Both developed in DD-X 1+19 for 6m. The one that did the lighter fogging came out completely blank, not even a visible sky. The other came out with very weak, but visible sky detail. So this is definitely something that can bring a bit of under exposure latitude where otherwise the film would be completely black.. but it's not some magic bullet for bringing shadow details beyond 1-2 stops out.

I think 3 or 6 ISO is probably as far as this will take me, which is still too slow for most hand held things. It seems that either my scale is awful, or the tiny amount of Iron Out required is less than 0.1g. It's pretty much the equivalent of around 2 teaspoons in 500ml of distilled water for test strips. Have not done an entire test roll yet. With Ortho Litho, visible fog begins at 2 minutes with constant agitation. I use 1m30s for non-visible or very subtle fog. (ie, can see the difference side by side in a tray, but looks perfectly clear otherwise). It did work to bring up some shadows as well as make contrast much more controllable. Surprisingly got some non-awful results of some clouds using paper developer which really beefed up density. Normally after 1m in a tray like that the sky would be completely to dmax. I think it might (at a slower speed) be safe to combine this technique with "normal" developers like DD-X 1+9. I found 1+19 to have too little contrast with the post-fog. Really interestingly, by using development by inspection it's very easy to develop good beefy highlights in a strong developer, and then rinse and stick in the Iron Out for 1m and then develop again in a weaker developer to bring out what midtone and shadow detail is there, giving a lot more control over the contrast difference between highlights and midtones. The problem I've had using ultra low contrast developers like DD-X 1+19 is that if the image is exposed enough to have shadow detail, it actually comes out really flat.. while if it's not exposed enough, it's basically low contrast highlights and mid tones with deep black shadows; not a greatly desirable look. Selectively developing highlights and midtones as well as choosing what level shadows should be brought to I think will be an interesting thing to explore with this film. Unfortunately, it requires development by inspection for that level of control, which is not at all easy with 32" 120 sized strips of film.

I also tried mixing post-flashing and post fog. I did a non-visible post-flash and then developed and saw the film was still perfectly clear. Then, I put it into the iron out for about 30s. Afterwards when I developed it, it looked black in the tray, but actually was only slightly tinted under room lights.

I was really hoping to get up to 12 ISO, and still haven't completely given up on it, but I might have to go a more exotic route than expected. Even with slight visible fog or flash it seemed like the film is still really bad about 100% black shadows that just don't develop anything at all. Maybe the formula changed between v2 and v3 of this film, as all the success I've heard for pre-flashing is for v2.

Also, if anyone can point me to ANY technical data about Ortho Litho film it'd be much appreciated. I really would like to see the response curves etc. The closest I found was a "data sheet" for v2.0 which contained only the color spectrum sensitivity (spoilers: significantly more sensitive to green than blue)
 
Joined
Sep 10, 2002
Messages
3,565
Location
Eugene, Oregon
Format
4x5 Format
Flashing (pre- or post-) really doesn't speed up your film... It gives you a "just-below-threshold" exposure that allows subsequent exposure that otherwise wouldn't have registered, to break the threshold and create exposure on the film. In essence, you are manipulating the toe of the film's response curve, boosting the lower end a bit, but at the expense of separation in the shadow detail.

Think of it this way. If it takes, say, 4 units (totally arbitrary here) to make a just-above-threshold exposure, you can record a 2 unit exposure by giving the film an overall 2 unit exposure. This may seem to speed things up a stop, since the lower exposure now registers on the film, but it's really just an additive exposure. Subsequent higher exposures will be less affected by a 2-unit exposure. Think in stops: 4 units = threshold exposure, 8 units is plus 1 stop, 16 units is plus 2 stops, 32 units is 3 stops (now we're at Zone IV), etc.

If you flash the film with 2 units of overall exposure, you'll boost all those values by 2, i.e.: 6 units (just above threshold), 10 units, 18 units, 34 units, etc. With each stop of additional exposure, the 2-unit initial exposure becomes less and less important. At some point, the 2-unit flashing exposure becomes inconsequential. You are getting a bit more exposure in the deep shadows, but higher exposures function practically the same. This is not too much different than using an uncoated lens with lots of overall flare.

Best,

Doremus
 

Andrew O'Neill

Moderator
Moderator
Joined
Jan 16, 2004
Messages
11,767
Location
Coquitlam,BC Canada
Format
Multi Format
I pre flash in the field. I stick a translucent piece of plexi on the front of the lens. First I take an over reading with the plexi over my light metre (digital spot) and place that reading 3 or 4 stops below on the lens or shutter. Then make exposure with the plexi on the lens. Remove the plexi, then make the actual exposure. Has worked very well for me for several years.
 

Rudeofus

Member
Joined
Aug 13, 2009
Messages
5,054
Location
EU
Format
Medium Format
Dori, the reason why pre/post flashing actually does increase film speed is the need for 3-4 silver atoms in a cluster required to render a film grain developable, but only 2 silver atoms together to stay stable. If this pre/post exposure adds these 1-2 missing atoms to existing 2-clusters, then you render a grain developable which wasn't before. At the same time you do not affect film grains that had no silver clusters, since the 2 atoms created will not render it developable.

Real film speed will be increased, but only by 1-2 stops, which is nice to have but not a life saver with ISO 1.5 film.
 
Joined
Sep 10, 2002
Messages
3,565
Location
Eugene, Oregon
Format
4x5 Format
Dori, the reason why pre/post flashing actually does increase film speed is the need for 3-4 silver atoms in a cluster required to render a film grain developable, but only 2 silver atoms together to stay stable. If this pre/post exposure adds these 1-2 missing atoms to existing 2-clusters, then you render a grain developable which wasn't before. At the same time you do not affect film grains that had no silver clusters, since the 2 atoms created will not render it developable.

Real film speed will be increased, but only by 1-2 stops, which is nice to have but not a life saver with ISO 1.5 film.

Rudi,
I understand what you are saying. However, is this really an increase in film speed, or just more exposure, which has an effect largely in the shadow densities? Using your logic, using film with an uncoated lens that had a bit of overall flare would increase the speed of the film it was used with. Everything I've seen just points to a modified toe response. Sure, you are getting an image of something that would normally have been under the film's threshold and that may even get you some detail that you would have had to expose and extra stop for without flashing, but exposure is exposure is exposure... Pre- and post- flashing and overall flare are all just exposing the film to light, not about film speed per se. The change in the characteristic curve shape with flashing as opposed to not flashing tells the tale.

Perhaps we're just arguing semantics here. I stick to the definition of film speed as that tested under ISO standards, which really doesn't include any flare/flashing.

Best,

Doremus
 

Rudeofus

Member
Joined
Aug 13, 2009
Messages
5,054
Location
EU
Format
Medium Format
Pre- and post- flashing and overall flare are all just exposing the film to light, not about film speed per se. The change in the characteristic curve shape with flashing as opposed to not flashing tells the tale.
Film sensitivity is only a question of shadows, because you can determine by your development regime how brighter parts are rendered. Then you assume, that light is a continuous stream of energy and that film's response to light is strictly linear. This model roughly fits for higher EV, but completely breaks down in weak light. If a smart daemon was able to place an Ag2-cluster on every film grain, film sensitivity would go up at least threefold, and Schwarzschild effect would be completely remedied. Pre/Post flashing tries to create just this, and because light follows the Poisson distribution at low levels, the actual gain from pre/post-flashing tends to be less than that.
 
OP
OP
grainyvision

grainyvision

Subscriber
Joined
Feb 19, 2018
Messages
695
Location
Denver, Colorado
Format
Multi Format
So probably not exactly related to flashing/fogging, but I finally was able to get a bit of speed boost out of this film, though with very strange contrast behavior. I mixed some POTA developer, advertised as being capable of "distinguishing between 20 stops of exposure"... Well, my experience doesn't quite match that. It is low contrast enough to be pictorial, but also very prone to getting blown highlights and "strange" shadows. Shadows and low mid tones seems to keep rather low contrast, while highlights and high mid tones go high contrast. It really gives an interesting vintage look to the film. Process:

* Brackets 1.5 ISO to 100 ISO of high contrast landscape scene
* Pre soak for 3 minutes
* Iron Out, about 1 tablespoon in 500ml of water. Agitate constantly 1m30s.
* Mixed POTA (phenedol + sulfite) developer, chilled to ~70F (dunk a bottle in ice water) and prepared about 30 minutes prior. Develop for 13 minutes total, 60s initial agitation, 4x every minute after
* Water stop bath
* TF-4 fixer for 2 minutes

Changes I'd recommend:

* maybe 2-3 minutes less development, and 30s initial agitation and 2x every minute would probably help to tame the crazy highlight contrast and avoid so many blown highlights
* Only use 1 teaspoon instead of a tablespoon of iron out, and maybe only soak in the fogging solution for 1 minute. The film as I did was quite fogged. I think the long POTA development time, and it's knack for pulling out shadow details amplifies the fog. Overall I would have no problem printing this, and no problems scanning, but less fog would probably improve shadow contrast to be more normal
* Definitely wait until there are 2 rolls to develop. POTA doesn't keep and is pretty time consuming to mix and use, so might as well do 1L at a time rather than 500ml.
* A precision way of figuring out developer temperature is needed. Normally my room is a natural 68F so temperature is easy, but with this requiring chilling etc, it's less trivial to figure out. I think the temperature might have been a bit warmer, maybe as high as 75F, potentially leading to problems seen

Observations:

* In this process a true speed boost seems to be observed, but at the expense of over exposure latitude. 1.5 ISO was massively blown out, and a test shot at ~0.1 ISO was pure black with very few visible details using a very long exposure scan.
* The true ISO with this is not trivial to figure out due to the weird split contrast. I think 6 ISO would probably be the best, but 12 ISO also looks decent and with better highlight detail. In the field I would probably aim for 6 or 9.5 ISO and er on the side of under exposure, as there was a surprising amount of blown highlights even at 3 ISO.
* Even the test shot at 100 ISO has some shadow detail, with the film edge (true black) clearly being different from the exposed film. It's definitely not printable of course, and most details are lost, but I was impressed by how much detail is actually visible. It might be interesting to try out a 2 bath process for "pushing" this film. POTA to get the initial shadow details etc, and then a normal developer to bring the shadow detail into a printable contrast range.
* I'm unsure which part is to blame, but there seems to be some uneven development and/or fogging from me having left the roll of film in the sun for half a day. Some areas are definitely the latter, but I think some might be the former. Either way, will definitely have to do another test before using it for pictures I care about, as the uneven development appears worse than I experienced even with PMK.
* Grain is fairly fine in this process, with no grain being obvious or evident until contrast boosting after 50 ISO.

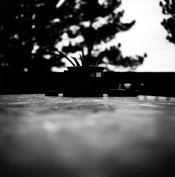
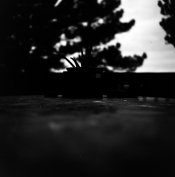
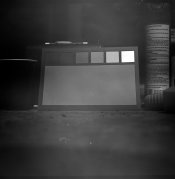
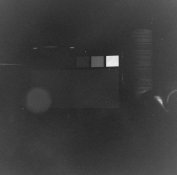
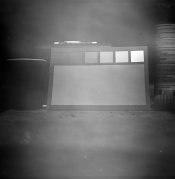
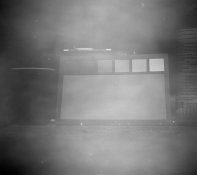
Ok, and now onto the actual results. All brackets are simply corrected with "levels" to correct the black and white point. 50 and 100 ISO have a slightly "off" black point to bring the very low contrast shadow detail more into "human viewing range".

1.5 ISO
1.5 iso.jpg

3 ISO
3 iso.jpg

6 ISO
6 iso.jpg

12 ISO
12 iso.jpg

25 ISO
25 iso.jpg

50 ISO
50 iso.jpg

100 ISO
100 iso.jpg

Sample picture taken at ~6 ISO
_0000011.jpg

Here's another one taken at maybe 12 or 16 ISO
_0000012.jpg


Lost my gray/color card I did have, but I got another one in so judging contrast should be a bit easier next time.

This POTA developer is quite fascinating, and the way this film looks in it (maybe when over developed heh) is truly the most unique kind of thing I've shot. It's so rare to see full range low contrast negatives, but with very little over exposure latitude. If I can figure out the uneven development problem though (hoping it's something from the iron out) there is hope for being able to shoot this film at 12 ISO handheld and get good and unique results. I wish POTA wasn't such a pain to mix up, but for results like these and making my ~275 rolls worth of ortho litho film easier to use, I'll just deal with the inconvenience.
 
OP
OP
grainyvision

grainyvision

Subscriber
Joined
Feb 19, 2018
Messages
695
Location
Denver, Colorado
Format
Multi Format
I did another test run today. Don't really have a good place to post this, so here is as good as any since it's mostly for my reference anyway.

I skipped the chemical fog step and it completely solved the uneven development problem, indicating it was actually uneven fogging. How to solve that problem, well, not really sure. Probably a much weaker solution with much more time

Process: Ortho Litho film in 120 format. Room and water temp 68F/20C

* Presoak 2m
* Develop in POTA for 11 minutes. 30s initial agitation, 4x agitation per minute, 72F/22C developer temperature (probably decreased to 70 when hitting the colder tank)
* Water stop bath
* TF-4 fix for 2 minutes
* Rinse and photoflo

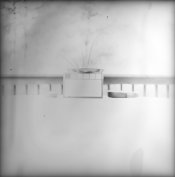
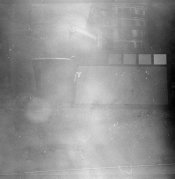
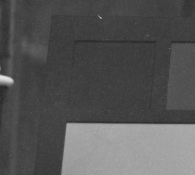
These brackets start from 1.4 ISO and go up from there. This time, to aid in consistent scanning, I used the middle grey on the card to set the scan exposure. Each scan was then cropped and had black point and white point both set to just barely clipping

1.4
_0000020.jpg

3
_0000021.jpg

6
_0000022.jpg

12
_0000023.jpg

25
_0000024.jpg

Bulb exposure, probably around 0.1 ISO
_0000025.jpg

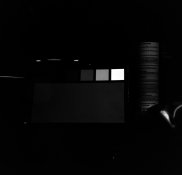
The streaks from the bulb exposure is due to the negative being so dense and my scanning setting not being ideal for super dense negatives. This is a close up of it that works around my scanning limitations and shows the actual detail you could get out of it. I kept the color with this to show what it'd look like (the negatives are orangey-green) and also show the middle green spot which is my DSLR lens in scanning
_0000033.jpg

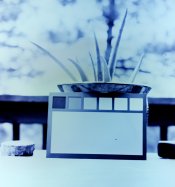
This was the scene. It was very cloudy and really non-ideal but I had an order to fill and needed to do a QA test on the batch of film
IMG_2655.jpg


Here is a random infinity shot of a high contrast land scape, shot at 1.4 ISO
_0000027.jpg

EDIT:

These scans definitely push the limit of my DSLR camera. I actually took a few HDR style bracketed shots and intend to process them to see how much detail I can pull. These negatives I think would be quite difficult to print in a darkroom, but definitely possible with extended exposure times. Things my camera didn't capture is really dense highlight detail along with some intricate shadow detail. I processed another roll at the same time that was mostly done at 1.5 and 3 ISO and it had some higher contrast scenes. I had a few shots with some cloud detail, while still having the full detail of the ground, but my camera wasn't capable of pulling it out, and to pull out cloud detail basically glare compromised all contrast and shadow detail in the image as well as introducing various artifacts
 
Last edited:

Rudeofus

Member
Joined
Aug 13, 2009
Messages
5,054
Location
EU
Format
Medium Format
POTA is a developer for a very specific purpose, and your application does not seem to fit this purpose very well. As a result you get very low effective speed, the ISO 3 sample already shows considerable underexposure. And you have little control over final contrast. I recommend you take a good look at Michael R.'s series of low contrast developers. Unfortunately he started his article with Pyrogallol, but later on he progresses to much more viable secondary developers. Since you already have Phenidone and Sulfite (separately or as ingredients of POTA), a measured pinch of Ascorbic Acid or Hydroquinone is all you need to obtain controllable and usable results.
 
OP
OP
grainyvision

grainyvision

Subscriber
Joined
Feb 19, 2018
Messages
695
Location
Denver, Colorado
Format
Multi Format
I'm beginning to think that as well, but I do like the crazy vintage look POTA gives with this. I'm unsure if more time in POTA or chemical fogging is responsible, but previously I was able to boost this film to around 12 ISO. The film itself is super slow. ISO 3 is actually pretty fast for this. With "standard" developers like HC-110, DD-X, and Pyro PMK, the nominal speed is 0.8 ISO (and still usually some black shadows), but also it yields incredible over exposure latitude due to development being far from complete in such dilute developers. The dilute developers are also incredibly vulnerable to inconsistent development and banding, especially around highlight areas. A problem I've not really been capable of completely solving, only getting "good enough" results to not be incredibly noticeable. POTA's original intended use was to record low contrast results on Kodak Lith film. This is why it seemed like it could be a good match, but I don't see this matching the "20 stops of exposure differentiation" that the POTA + Kodalith combo it was created for, although I do have trouble scanning it with my nominal 12 stop DSLR sensor. The interesting thing though is that contrast is not insane, yet I get full range negatives with black highlights and delicate grey shadow detail. No previous developer I've tried has done this and thus has been fairly difficult to print properly.

Maybe even with the reduced time, I'm doing the equivalent of "pushing" in POTA, leading to all the missing shadow detail yet blown highlights, a hallmark of pushed film. Everything I see says don't go less than 11 minutes in POTA, but I might try just 7 or 8 minutes next time to see if I can get full range negatives of lower contrast and higher exposure latitude. I also want to hone in the iron out fogging method to get a speed boost to around 10 ISO. Flashing/fogging definitely does produce a measurable 1-2 stop speed increase in the shadows.

I do want to modify POTA though. I think adding HQ would make this too "normal" of a developer and cause ortho litho film to go lith with no middle grey tones. However, it'd be really nice if I could figure out some way to make this a stock solution and/or allow it to be reused. Needing to mix just before development is a real pain. The other thing I'd like is to make this a coarser grained developer, at least if it keeps the same look. With this vintage look, I'd like it to have some visible grain; as is grain is pretty much invisible. Reducing the sulfite would probably help, but I think it might make the developer too unstable to oxidization. Not really sure how to substitute something like bisulfite in it's place though
 
OP
OP
grainyvision

grainyvision

Subscriber
Joined
Feb 19, 2018
Messages
695
Location
Denver, Colorado
Format
Multi Format
So I finally was bit by the inconsistency of household chemical usage, got 2 rolls of film vastly over fogged from what looks to be just a simple mistake with Iron Out. I used 0.5g in 1L of water and ended up with near complete fogging with only faint images visible. (edit) This was hours after doing the same process with 1g in 1L of water and getting normalish results (over fogged, but very visible images)

Now I'm wanting to figure out a better solution for chemical flashing. Iron Out is reasonable as a fogging developer and chemical fogging agent, but there is a fine line between flashing and "oh god my entire roll of film is fogged" it seems. This would be easy to fix if it were possible to make a "stock" of iron out, but the solution in water is known to only last 2 hours (according to similar Kodak formulas like FD-70). Seems like the candidates are selenium toner(?), Sulfide toner(?), ammonia... others? Basically want something easy to find, fairly stable, and hopefully does the job without a lot of artifacts.

Anyone have any ideas here?
 

Rudeofus

Member
Joined
Aug 13, 2009
Messages
5,054
Location
EU
Format
Medium Format
As you can imagine, all these fogging agents are strong reducers which happily react with aerial Oxygen, and trace impurities in water or the compound could speed up decay (c. f. Fenton reaction and Ascorbic Acid).

I'd start with something in powder form and use as freshly mixed as possible.
 
OP
OP
grainyvision

grainyvision

Subscriber
Joined
Feb 19, 2018
Messages
695
Location
Denver, Colorado
Format
Multi Format
Apparently sodium dithionite (main component of iron out) will be much more stable, as well as still function as a fogging developer (more active actually) in a basic solution. Can't find any hard data, but at pH 11.5 and below 10C it is apparently the most stable. I did a small test run adding some sodium hydroxide (lye) and it didn't emit any noxious fumes at least. Going to try making a small half-bottle solution and keep it in the fridge and see how long that will last. If I can make a stock solution that can last for at least 6 months, then that will at least let me calibrate the process using a known solution, as the actual amount of sodium dithionite needed is very small. 0.5g of Iron Out in 1L of water is more than enough it seems, under ideal conditions. Also could try using standard isopropynol alcohol as a secondary test. I can't find if sodium dithionite is stable in this, but it's definitely known to be unstable in water, and even less stable with oxygen. Going to also add some sodium sulfite to hopefully scavenge oxygen to preserve it longer. With this there is at least a very simple test of effectiveness. Using a strong solution (ie, the stock), simply place a drop on a piece of exposed film. It should turn black in less than a minute. I can time that as a judge of effectiveness and monitor when it is becoming less effective. The overall scary part though is that one of the decay products is sodium thiocynate, ie, fixer. I'm not sure if it will actually do any fixing in a basic solution, but if it does then I'd be effectively fixing before development. Definitely will need a test before each run either way.
 
OP
OP
grainyvision

grainyvision

Subscriber
Joined
Feb 19, 2018
Messages
695
Location
Denver, Colorado
Format
Multi Format
I've figured out a few things with chemical pre-flashing finally. However, with more questions as always.

So, I've tried making a (hopefully) long-lived room-temp stock solution for the flashing. It consists of:
* TEA (Triethanolamine, actually should be abbreviated TEOA) - the primary solvent
* a relatively small amount of distilled water (to keep it from freezing at 20C)
* sodium sulfite - absorb any oxygen present, hopefully with more preference than the sodium dithionite would
* Iron Out - for the sodium dithionite. Contaminants: ~20-40% sodium metabisulfite, probably a few other things that gives it a characteristic "good" smell. Despite the good smell, do not breath this stuff in, it'll make you cough and burn your nose
* Lye - Bring the pH down. sodium dithionite is known to be better preserved at 11.5pH. I don't have a great pH meter, but the solution appeared to be around 10.5pH, close enough

The real question is if using TEA as the primary solvent will be enough to preserve the dithionite. I didn't want to add the small amount of water, but it was necessary in order to get the other chemicals to mix in a timely manner. TEA is really best mixed at around 175F. However, dithionite begins to decompose at 125F, so a compromise was needed. Note that this REQUIRES an automated stirrer. It takes a very long time (more than 15 minutes) for the Iron Out to completely dissolve

I made 150ml of the solution, and it contains approximately 100ml of TEA, and 6g of Iron Out. The solution is somewhat thick, but far from a syrup like HC-110. I dilute it 1+30. At this dilution, the fogging will normally be thick and somewhat inconsistent, but it's action as a developer will be completely gone. The stock solution, if you put a drop on film, or only somewhat dilute it to 1+10, will begin to darken exposed film. This is a useful test to ensure that the solution is still active. A drop of the stock solution on dry Ortho Litho film should develop to a pure black dot within 1 minute (in my experience it was around 30s). With previous tests with a water based mix, after 6 hours the unrefigerated solution would only develop the film to a somewhat dark brown, rather than pure black, indicating a decay in the developing/fogging agent, sodium dithionite.

Sodium dithionite appears to be much more active as a developer with a strong base, with a tiny amount going a much longer way. However, it is untested as to if the fogging action is affected by pH level.

The solution in initial test runs was quite unstable. Too much and the film would be near black. Too little and it was clear that it exhausted in the middle of the run (inconsistent fogging and absolutely 0 activity afterwards). The magical solution turned out to be the way that regular hyperactive developers are tamed. Potassium Bromide. To the working solution, I added 2.5g of bromide per 150ml of solution. The bromide mixes in without any effort really, though I plan on later making a solution of bromide or something like that so that I don't need to use my scale. This made it so I could use stronger solutions that won't exhaust, but also make the fogging process last longer than 1 minute so that I could control it precisely. My final test had the intended goal, a thin, easily workable, and visible layer of fog, perfectly consistent across an entire strip of 120 film. My hand tank holds around 450ml for 1 roll of 120. There is a tiny amount of non-visible grain added by the fogging. The fogging step is 5 minutes, 30s of initial agitation and 4x agitation per minute after.

The developer used was "D-23LC", a low contrast version of D-23 that uses a stock solution about equivalent to D-23 but with less sulfite. The stock is diluted to 1+9 and then stand developed for 40 minutes with 30s of initial agitation

The speed increase with this was more modest than expected though. Previously, I had (I thought) achieved a combo that would work for a native ISO of 15, though with downsides like bad over exposure latitude and very long scale negatives. With this, a speed of 3 or 6 ISO looked to be preferable. 12 or 20 ISO was very under exposed, with 40 ISO having hardly anything beyond highlight details. Strangely, this also resulted in extreme over exposure latitude, with ~+5 stops still being fairly normal-low contrast and no clipped highlights. This amount of over exposed latitude I'd not seen in any developer other than Pyro PMK. I'm unsure what would be responsible for this however. Previous tests with D-23LC (both with and without fogging) were much harsher, so this could be an indication of the developer going bad, even if it appears to be a good thing for every aspect other than potentially speed (heh how do I age a developer like this?)

So, questions now...

* Does this TEA based solution have a chance of keeping the dithionite alive for longer than a month? This appears to have been a problem big enough that a patent has been filed for a dithionite "paste", intended for more safely transporting dithionite. The primary claim was that the paste should have a high pH (11.5, yet again), be extremely strongly salted with alkali sodium or potassium salts (basically going up to dilution limits in water), and should contain a high amount of dithionite (again going up to dilution limits). Even with this, the claim was that it would remain 90% active after 30 days at 10C... I couldn't find anything about TEA and dithionite, or even isopropynol or some other alcohol or thing that isn't water.
* Could the bromide be compromising the speed increase of chemically pre-flashing? Or did I make some measurement error with the test that resulted in 15 ISO being "the best"
* Could the strong bromide content in the fogging solution be carrying over to the developer despite rinsing? Or somehow modifying the emulsion?
 

Rudeofus

Member
Joined
Aug 13, 2009
Messages
5,054
Location
EU
Format
Medium Format
I don't have the article, but at least according to the summary here, TEA should act as a preservative for Sodium Dithionite. I don't know how TEA would do this, but the same mechanism might also inhibit pre-fogging of silver halide grains.
 
OP
OP
grainyvision

grainyvision

Subscriber
Joined
Feb 19, 2018
Messages
695
Location
Denver, Colorado
Format
Multi Format
I haven't "put it to the test" by developing a roll in it, but a few weeks later, it definitely appears that the TEA+dithionite mixutre is decaying. I'd estimate it's around 50% as effective as previously. Would be interesting for a reversal agent where you could supply plenty more than needed, but not suitable for a flashing agent that requires precision. Noteably though, a refrigerated solution of water + lye + dithionite is still around 80% effective several weeks later.

The only other idea is if there is some way to moderate the reaction, so that despite the amount of dithionite (as long as it's enough of course) it would still have the same amount of effective activity. From some rough tests, it appears that pot bromide is not suitable for this purpose. It slows down the reaction, but only in correlation to the amount of dithionite.

Currently researching alternative agents that could be used for flashing or a similar effect. TEA itself has been reported to be useful for hypersensitization, but only for pre-exposure. If it turns out to have some effect post-exposure benefits, that's a cool thing in itself (and could be why I saw an insane speed boost from 3 ISO to 25 ISO). Unfortunately all I can find about the mechanism behind this is the wikipedia article, and the book saying "this works" cited as a source. On the same note, I also see a reference as dithionite being used in "some film developers", but again can't find any info at all about that.

Trying to figure out what chemistry terms I need for the process of basically fogging the film and trying to understand what happens at the chemistry level so that I at least have a chance of figuring out some simple way to do this without exotic chemicals, nor unpredictability.
 

Rudeofus

Member
Joined
Aug 13, 2009
Messages
5,054
Location
EU
Format
Medium Format
I haven't "put it to the test" by developing a roll in it, but a few weeks later, it definitely appears that the TEA+dithionite mixutre is decaying. I'd estimate it's around 50% as effective as previously. Would be interesting for a reversal agent where you could supply plenty more than needed, but not suitable for a flashing agent that requires precision. Noteably though, a refrigerated solution of water + lye + dithionite is still around 80% effective several weeks later.
It appears from what you report here, that Sodium Dithionite is more stable in highly alkaline environment. Funnily TEA is not always the same product when you order it: in some cases it's mostly pure TEA, whereas in other cases it's a mixture of TEA and DEA - the latter being more alkaline. I could imagine, that the TEA+DEA mixture would keep Sodium Dithionite better than pure TEA. One more thing: people have been able to dissolve Sodium Metaborate in TEA. If you are stuck with pure TEA, this may be a way to raise the pH of your TEA.

This patent here (US patent 4283303) contains some information about stability of dithionite slurries. Even at insane concentrations dithionite gets lost rather quickly and unpredicably, although a powerful chelating agent seems to help.
The only other idea is if there is some way to moderate the reaction, so that despite the amount of dithionite (as long as it's enough of course) it would still have the same amount of effective activity. From some rough tests, it appears that pot bromide is not suitable for this purpose. It slows down the reaction, but only in correlation to the amount of dithionite.
If you add powerful restrainers to your mix, especially organic restrainers have a habit of sticking to silver halide crystals. Whatever you may gain in terms of dithionite concentration, you may end up losing when the developer can't do its job.

On the same note, I also see a reference as dithionite being used in "some film developers", but again can't find any info at all about that.
Dithionite has been used as second developer for B&W reversal processing - in this case all silver needs to be developed and the developer does not have to differentiate between exposed and unexposed silver. While this simplified B&W reversal processing a great deal, it will not help you with negative processing.
 
OP
OP
grainyvision

grainyvision

Subscriber
Joined
Feb 19, 2018
Messages
695
Location
Denver, Colorado
Format
Multi Format
The TEA I have is from photographer's formulary, so I'd expect it to be just TEA with some impurities. It is yellow though, rather than the pure version that is clear.

Also, forgot to post an update from some previous runs. So, I discovered my "D-23LC" stock solution is unstable. The metol literally crystalized out of solution after a few days. I had made a calculation error and basically to make a stable stock solution the stock must be significantly less concentrated. I'll chase that idea another day though and for now just mix from scratch just before development. Anyway, with this solved, the speed increase returned, and with a vengeance. I controlled for variables like UV exposure that would bypass the meter (mostly negligible it seems). I did a test run of D-23LC with and without the TEA-dithionite mixture, and basically confirmed that the TEA-dithionite mixture causes a massive increase in shadow speed. With no fogging, the ideal speed seemed to be around 3 ISO, the usual maximum for this film. However, with fogging, the speed jumped significantly. ISOs 1, 3, and 5 appeared straight up over exposed. ISO 10 has the best shadow detail, and ISO 15 or 20 is the ideal exposure. However, for ISO 40 (measured by the middle grey), there was a completely distinguishable grey card. In the tests without fogging, ISO 40 was almost completely clear, with only a single square of white being visible on the grey card. With the fogging, the lower highlights also develop, and the lower exposure values will be over exposed, rather than simply having shadows brought up. Another test with the same process (1 week later) resulted in the same effect, but with no visible fog, indicating the dithionite solution was decaying.

This behavior seems inconsistent with info I've seen around flashing, and my own experiences with non-chemical based flashing. Primarily that with this it is possible to gain more than 1 stop in speed, and the speed increase affects highlights as well as shadows.The TEA-dithionite-bromide solution appears to be a true speed boosting solution when compared to the dithionite-water flashing solution.

This caused me to pursue quite a bit of research. I stumbled upon info (patents, studies, etc) that TEA is commonly used to hypersensitize photographic plates. The procedure for that appears to be to make a (slow) plate, and then dip it in a weak solution of TEA and dry it, and suddenly it is a faster speed. This also (according to an article) will sensitize the plate to the red portion of the light spectrum, down to 1.7um. The key thing here though, is that this is all done before exposure. This makes sense, it could change the crystal shape or whatever, making it more receptive to light. I would never expect a post-exposure treatment to magically recover red light when the film was not capable of capturing it... but I also wouldn't expect it to turn an undevelopable latent image into a developable one, aside from flashing equivalent. Unfortunately, I can't really find any info about how TEA hypersensitizes the emulsion. Only sources saying that it does. I can find some info for other hypersensitization methods like hydrogen gas or ammonia.

Later tonight I'm going to try a "control" test of TEA and bromide, no dithionite, as a post-exposure bath. This will test if a speed increase is observed, and if it is the thing truly responsible for this effect... Of course, if that is the case though, then how does that even work, chemistry wise? It makes no sense to be capable of truly increasing a film's speed after exposure. I also would like to try a TEA pre-exposure bath to see if I can sensitize this film to red really that easily, and what the speed increase would be with that. Of course, I'd lose the antihalation layer in the process, but it would be interesting if ortho litho could be made into a weirdly "normal" 50 ISO film or something like that
 
OP
OP
grainyvision

grainyvision

Subscriber
Joined
Feb 19, 2018
Messages
695
Location
Denver, Colorado
Format
Multi Format
The experiment seems to have been a success, but with caveats. I think the amount of bromide was just too much. Despite rinsing twice before developing, an uneven yellowish stain is across the entire middle of the film strip. Also, contrast was significantly compromised. Typically a good thing for this film, but this was so low contrast it was somewhat difficult to scan. In addition, density was very weak, though still with enough to scan. On the bright side, this could make a great addition in a weaker form to control highlight density. There was nothing even close to over exposed in this test run. I also switched cameras from a Lubitel 166+ to Mamiya 645 1000s. Still metered the same way externally though.

Comparing it to a previous test run with no pre-bath, the speed increase appears to be at least 1 stop, even with too much bromide. In this, 6 ISO appears to be the ideal exposure, but with 3 being just as nice and a bit brighter and lower contrast. 12 ISO has the important details, but the yellow stain causes a lot of noticeable artifacts. 25 ISO has a clearly visible image, but again, with significant artifacts, and some obvious shadow detail loss. ISO 50 has a somewhat recognizable image, but with more artifacts than image really. ISO 100 had pretty much no image except for the single white hightlight block on the grey card. Interestingly, this added an appreciable amount of grain, though still a fairly fine grain result. The extra grain may also be from the stain.

Recipe: (all at 68F/20C)

2x rinse to remove anti-halation
Prebath (~5ml of TEA and 10g of bromide in 600ml distilled water) 5m, with agitation every 1m and 30s of initial agitation
2x rinse
D-23LC (0.75g metol, 6g sulfite, 500ml water) for 35m, stand. Agitate first 30s
1x rinse (water stop)
TF-4 fixer for 3m

Brackets (ISO 3 and each after is +1 stop)
_0000003.jpg

_0000004.jpg

_0000005.jpg

_0000006.jpg

_0000007.jpg

Additional images:

Grain detail at 6 ISO
2019-06-13 01_18_56-_0000004.psd @ 100% (Levels 1, Layer Mask_16).png

Secondary test image for ISO 12
_0000011.jpg

Random portrait (~20 ISO)
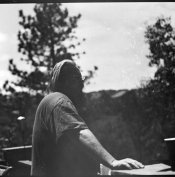
_0000013.jpg


Next steps planned are to do a test run with no bromide in the prebath, but with the same amount of TEA, to confirm the bromide isn't an essential part of the speed boosting effect. Test idea of adding a small amount of bromide to D-23LC in order to tame the highlight detail, if the first test confirms bromide is not needed in the prebath. Goal: achieve decent 3-12 ISO results using prebath + D-23LC, and that hopefully can be boosted to ~20 ISO with flashing or a dithionite prebath
 
OP
OP
grainyvision

grainyvision

Subscriber
Joined
Feb 19, 2018
Messages
695
Location
Denver, Colorado
Format
Multi Format
Here is the test run results. Photrio’s awful editing system caused me to lose this entire write up once, so forgive if I’m a bit short.

Process:

Rinse 2x (with one roll of film in 1L tank)

Prebath - 64F (cold at the time in my basement) for 6 minutes with 10s of agitation per minute
* Distilled water, 1L
* TEA (triethlamine, NOT triethylamine which is a much more dangerous chemical) 5ml
* Potassium Bromide, 1g

Rinse 2x
Insert second roll of film
Rinse 3x (clear the antihalation dye from second roll)

D-23LC v2 - 64F, 1 minute of initial agitation, 45m total stand
* Water, 1L
* metol 1.5g (with pinch of sulfite beforehand)
* sodium sulfite, 12g
* potassium bromide, 0.5g (can be increased in future runs, to 1g or maybe 2g without hurting speed)

Water stop bath
TF-4 fix for 3 minutes

And now finally to the results:

0X4mqvB8-ZtdgRMQ3Fhrvgj7nLvhHCx_fPywWVfBy1W5htQUtI3iwpkLnXWWwAY1tkmLttEdNxNn-F_7CcZ4VFMzlWLxnEtDdDFIHy8NZyull3J1Xt-bGNduKxgwpOYBDAHKq4wEWy0z3DijmdiZwnwOEIfsGlYsDW5_UMLe02yDKCMpCF1XYBwNBZUbsaJFY0lND2RdDf9T86lHSxHDy39U6owQt3tHAlm42oUDUWwRRSxbNyJkFDY6LQJsDEVWcVKlo40kC30DIUI1KO6NzcKcG0cgfOHYLqx_q0Pcj6m7b8vEGntdH8GIYG0HP2YsI5I_Q55C0DCZLSOFLz1DFN4oaW5yy6dP1FF_-t3vQykjf7O07aiUYAv0CRoRCL3D1TnrUj4T7wjKnH2Qrpqj_km8b8r0H-UoiZaXz6PnFdoul1fsG2Vl2oiSN8lUIe9xFb82pIj7Fqn59g2XAB6Dmz_TwRxtrJdeHHIITPOe0aj7LdPh70fwfP6No-gqdonkBN0jb502pdEFXo3HjGoN1NA1UQrdGOduYwiFHLgqNGgvPnKWpW4pTJAGyJsxI3efrYQbvXzx9POSjqXeXM16Xk03Z5rtyfVOvZXvpBHiMcfmG67ja6dS5M3L-UitPROWgNQu6N1doy5lUgOf_a1gD9K8lmQa3XTf=w974-h1298-no


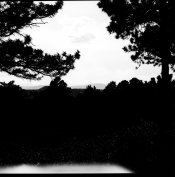
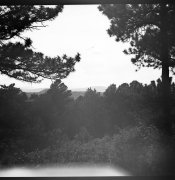
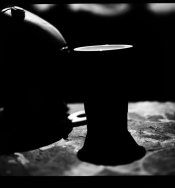
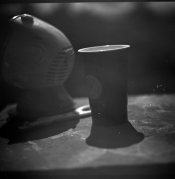
The strip to the left is without the prebath, the strip to the right is with it. Note the fogging on the right strip. This is because the prebath also successfully sensitizes the film to red light, and I had forgotten about this when opening the tank. It was only exposed for a second or so to my safelights, but definitely caused fog. I also used a test with a red flashlight (sandwich end of film between flashlight and my cabinet and flash it on and off quicky) on both strips of film to see confirm this, and the flashlight mark is clearly on the version with prebath while the version without is perfectly clear.

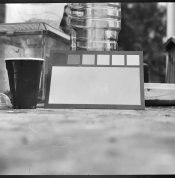
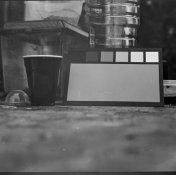
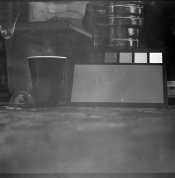
And now to the brackets. Version without the prebath is on the left, the version with is on the right. The brackets start from 1.5 ISO and then are 1 stop faster for each subsequent exposure
_0000001.jpg _0000014.jpg
_0000002.jpg _0000015.jpg
_0000003.jpg _0000016.jpg
_0000004.jpg _0000017.jpg
_0000005.jpg _0000018.jpg

Note only the prebath version is shown here, the version without prebath was completely clear with no image

_0000019.jpg
_0000020.jpg

And here is a crop for grain detail. Left is 3 ISO on version with no prebath, right is 6 ISO on version with (to match relative exposure level):

_0000002-detail.jpg _0000016-detail.jpg

Each picture was scanned by DSLR for best detail, and then corrected in PS simply by clipping highlights slightly, and moving shadows up to just before clipping. The over exposed ones tended to push against the limits of my DSLR due to the long-scale nature, with shadows and highlights almost clipping from the raw scan, so contrast may be somewhat compromised in those extremes.


Conclusion is that TEA is very effective at increasing shadow speed of this film. The actual term for it is latensification. It's commonly used in hologram circles with glass plates, and was once more commonly used, but appears to be a very niche process now. Darkroom Cookbook included a note about it saying that it was once recommended for speed increases, but has since been deprecated due to it being ineffective on modern films. Modern films typically use dyes more than silver processes in order to increase speed. This Ortho Litho emulsion however, must be a very simple and vintage style emulsion that this still works very well on. The emulsion is significantly cheaper than anything else out there, with each strip of 120 film costing me around $1/roll, hence why I love experimenting with it. However, with this knowledge, it is unknown if anything learned here can be brought over to other types of film.

Regardless, this makes Ortho Litho a cheap, and much more manageable film, keeping with extremely fine grain, higher than normal (but not extreme) contrast, a decent speed for going handheld (10 ISO or so should work with more agressive development), and a decent amount of under exposure latitude, though weak over exposure latitude. I really want to try sensitizing a strip of this with the prebath and then shooting it to see what a red sensitive version of this emulsion would look like, but still trying to figure out how to reliably dry it in pure darkness.
 
Last edited:
OP
OP
grainyvision

grainyvision

Subscriber
Joined
Feb 19, 2018
Messages
695
Location
Denver, Colorado
Format
Multi Format
Here is an over exposure test (~5 stops over exposed from 1.5 ISO)
_0000006.jpg _0000021.jpg

Also, here are some random pictures of varying contrast that were all metered and shot the same way on each film, and all high speed at 10-20 ISO:

_0000007.jpg _0000022.jpg
_0000008.jpg _0000023.jpg
_0000009.jpg _0000024.jpg
_0000011.jpg _0000026.jpg

Oh yea, skin tones in harsh light are definitely not attractive on this, but that's a well known property of ortho litho anyway
 
Photrio.com contains affiliate links to products. We may receive a commission for purchases made through these links.
To read our full affiliate disclosure statement please click Here.

PHOTRIO PARTNERS EQUALLY FUNDING OUR COMMUNITY:


Ilford ADOX Freestyle Photographic Stearman Press Weldon Color Lab Blue Moon Camera & Machine
Top Bottom