I've already posted this on my blog, but I thought it belongs here too.
Whilst researching purchasing a PA-145 back for my Speed Graphic, I searched this forum for a guide to using it or at the least a review of it. However, sadly, there wasn't one that I could find. Never the less, I bought one and hope to try to be of use to anyone hoping to do so in the future.
The PA-145: An Introduction
Instant photography with a 4x5 camera is a frequent tool for those hoping to check exposure, composition etc. before finally taking the picture, in addition to use as a photographic medium in its own right. Ansel Adams claimed that it had "rewarding potentials in many fields of practical and creative photography", and used instant film for a good few of his iconic pictures, and even wrote an illuminating guide to its uses. In this guide, he was able to give information about multiple films produced by Polaroid in the 4x5 (image of 3.5 x 4.5inches) format- from Type 51 (high contrast, blue sensitive black-and-white print film) to Type 58 (a colour film). Now, after first Polaroid then Fuji stopped producing 4x5 film (Fuji discontinued its FP-3000B45 films relatively recently, with the colour film being sold only in Japan) one can only use the smaller PA-145 holder and the FP-3000B/100C films (3.25 x 4.25" image size). Thankfully, both are still available.
The Back:
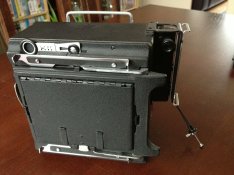
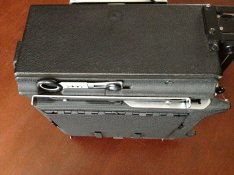
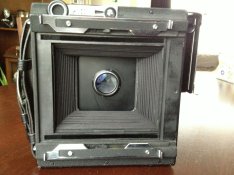
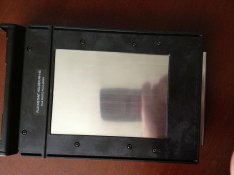
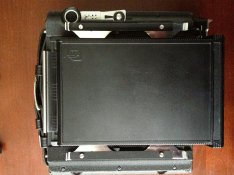
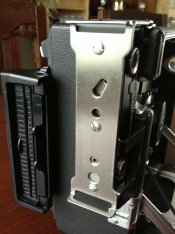
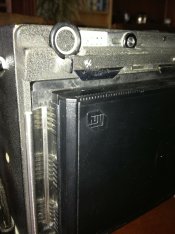
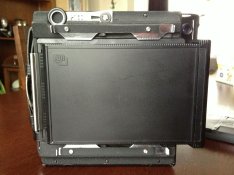
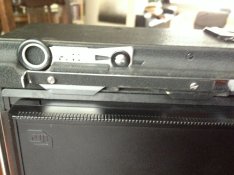
The back, briefly, fits a graflock back, and is essentially a plastic case with rollers and a dark slide. The film fits into the case and the film is pulled out of the rollers. Its all rather self explanatory.
The film:
FP-100C:
http://www.fujifilm.com/products/ins..._datasheet.pdf
The film, with a speed at 100ASA, costs about £17 and is sold in packs of 10. In addition to fitting in the PA-145 back it fits into various Land cameras (IIRC the 100,200,300 and 400 series cameras). It's temperature is 5500K, or daylight. It can be developed (post exposure) at a temperature of between 10-35oC- with times ranging from 60-270 seconds. Care should be taken, as always, to prevent exposure to radiation or extreme temperatures (to prevent the developing fluid from freezing). There is a recoverable negative, but its a pain to recover.
FP-3000B:
http://www.fujifilm.com/products/ins..._datasheet.pdf
As opposed to FP-100C, this has an ASA of 3000 (not 3200!) and costs about £18. Its a medium contrast black and white film. Again, it fits in the PA-145 and some Land cameras. Its development times are far shorter, in the order of about 30 seconds. Again care should be taken, as always, to prevent exposure to radiation or extreme temperatures (to prevent the developing fluid from freezing). The negative can (when dry) be scanned, inverted and have to contrast boosted to give an image (generally not as good as the print tho').
Use:
(This is my workflow, using a tripod (as I assume most would) if you're handholding, skip straight to step 3)
1. Prepare the camera for exposure as usual. Focus, compose (bearing in mind that the image exposed will be slightly offset to one side) and close the shutter.
2. Remove the ground glass, and attach the back.
3. Remove the dark slide, or move it out of the way.
4. Make the exposure.
5. Replace the dark slide. I usually find it helpful to take the back off the camera at this point.
6. Pull the first (white) tab out of the back.
7. Pull the second tab out, attempting to do so with even timing and pressure. Bear in mind that the pressure will suddenly increase when you get the neg/print to the rollers. For an even image, pull at an even, mid paced speed- perhaps timing by saying "polaroid".
8. Start timing the development from now. On part of the NEG/PRINT sandwich, closest to the tab, should be a table giving timings for this.
9. Peel off the print after a the time has elapsed.
10. Let the print dry in a dust-free environment, as the surface can be slightly tacky and difficult (if not nearly impossible to clean).
(11?) Before/ after using a roll, its a good idea to remove and clean the rollers (instructions for this are printed on the inside of the pack).
Results:
Both films are tack-sharp, the 100C has relatively accurate colour rendition (i.e. they look realistic, but I haven't bothered checking). The 3000B is very fine-grained, depute being fast. I prefer to rate the 3000B at about a half stop under, and give it a few extra seconds development, however YMMV. I may post some of my pictures on here at some point, but thats another blog post.
Happy shooting!
[/B][/B][/B][/B]The PA-145: An Introduction
Instant photography with a 4x5 camera is a frequent tool for those hoping to check exposure, composition etc. before finally taking the picture, in addition to use as a photographic medium in its own right. Ansel Adams claimed that it had "rewarding potentials in many fields of practical and creative photography", and used instant film for a good few of his iconic pictures, and even wrote an illuminating guide to its uses. In this guide, he was able to give information about multiple films produced by Polaroid in the 4x5 (image of 3.5 x 4.5inches) format- from Type 51 (high contrast, blue sensitive black-and-white print film) to Type 58 (a colour film). Now, after first Polaroid then Fuji stopped producing 4x5 film (Fuji discontinued its FP-3000B45 films relatively recently, with the colour film being sold only in Japan) one can only use the smaller PA-145 holder and the FP-3000B/100C films (3.25 x 4.25" image size). Thankfully, both are still available.
The Back:
The back, briefly, fits a graflock back, and is essentially a plastic case with rollers and a dark slide. The film fits into the case and the film is pulled out of the rollers. Its all rather self explanatory.
The film:
FP-100C:
http://www.fujifilm.com/products/ins..._datasheet.pdf
The film, with a speed at 100ASA, costs about £17 and is sold in packs of 10. In addition to fitting in the PA-145 back it fits into various Land cameras (IIRC the 100,200,300 and 400 series cameras). It's temperature is 5500K, or daylight. It can be developed (post exposure) at a temperature of between 10-35oC- with times ranging from 60-270 seconds. Care should be taken, as always, to prevent exposure to radiation or extreme temperatures (to prevent the developing fluid from freezing). There is a recoverable negative, but its a pain to recover.
FP-3000B:
http://www.fujifilm.com/products/ins..._datasheet.pdf
As opposed to FP-100C, this has an ASA of 3000 (not 3200!) and costs about £18. Its a medium contrast black and white film. Again, it fits in the PA-145 and some Land cameras. Its development times are far shorter, in the order of about 30 seconds. Again care should be taken, as always, to prevent exposure to radiation or extreme temperatures (to prevent the developing fluid from freezing). The negative can (when dry) be scanned, inverted and have to contrast boosted to give an image (generally not as good as the print tho').
Use:
(This is my workflow, using a tripod (as I assume most would) if you're handholding, skip straight to step 3)
1. Prepare the camera for exposure as usual. Focus, compose (bearing in mind that the image exposed will be slightly offset to one side) and close the shutter.
2. Remove the ground glass, and attach the back.
3. Remove the dark slide, or move it out of the way.
4. Make the exposure.
5. Replace the dark slide. I usually find it helpful to take the back off the camera at this point.
6. Pull the first (white) tab out of the back.
7. Pull the second tab out, attempting to do so with even timing and pressure. Bear in mind that the pressure will suddenly increase when you get the neg/print to the rollers. For an even image, pull at an even, mid paced speed- perhaps timing by saying "polaroid".
8. Start timing the development from now. On part of the NEG/PRINT sandwich, closest to the tab, should be a table giving timings for this.
9. Peel off the print after a the time has elapsed.
10. Let the print dry in a dust-free environment, as the surface can be slightly tacky and difficult (if not nearly impossible to clean).
(11?) Before/ after using a roll, its a good idea to remove and clean the rollers (instructions for this are printed on the inside of the pack).
Results:
Both films are tack-sharp, the 100C has relatively accurate colour rendition (i.e. they look realistic, but I haven't bothered checking). The 3000B is very fine-grained, depute being fast. I prefer to rate the 3000B at about a half stop under, and give it a few extra seconds development, however YMMV. I may post some of my pictures on here at some point, but thats another blog post.
Happy shooting!

Last edited by a moderator:


