Hey Everyone!
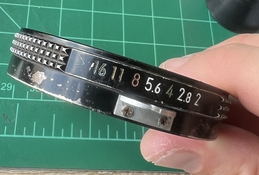
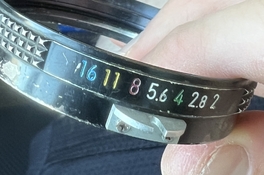
I am restoring some older Nikon lenses, and I was wondering if anyone had any suggestions for which colors to repaint the aperture number and depth of field lines with? I am referring to the blue, yellow, red, orange, and green in the lettering below. I'm looking for brands, or specific color names, as I want to match them as close as possible.

If anyone has insight it's greatly appreciated! Thanks!
I am restoring some older Nikon lenses, and I was wondering if anyone had any suggestions for which colors to repaint the aperture number and depth of field lines with? I am referring to the blue, yellow, red, orange, and green in the lettering below. I'm looking for brands, or specific color names, as I want to match them as close as possible.
If anyone has insight it's greatly appreciated! Thanks!