Minolta XE rewind base plate rod

Sombra

A
Sombra

  • 3
  • 0
  • 69
The Gap

H
The Gap

  • 5
  • 2
  • 85
Ithaki Steps

H
Ithaki Steps

  • 2
  • 0
  • 93

Forum statistics

Threads
199,010
Messages
2,784,569
Members
99,769
Latest member
Romis
Recent bookmarks
1

unwantedfocus

Member
Joined
Mar 29, 2021
Messages
190
Location
Germany
Format
Multi Format
Hello people,

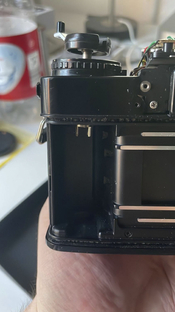
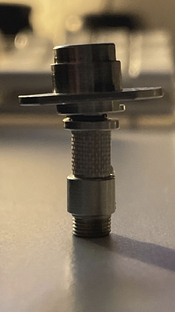
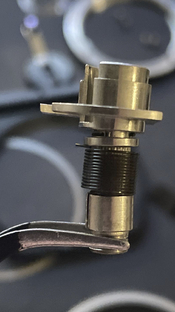
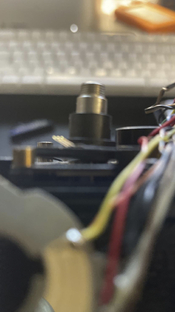
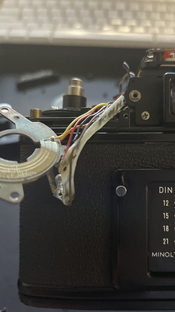
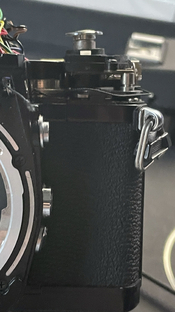
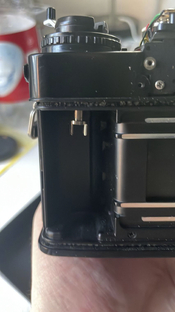
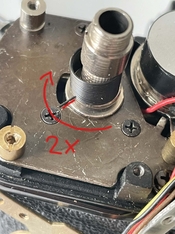
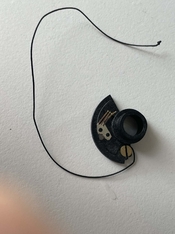
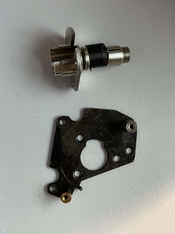
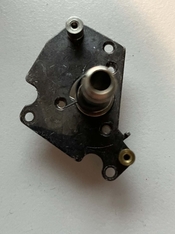
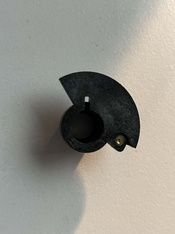
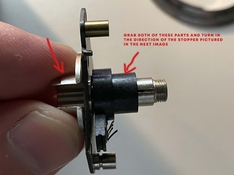
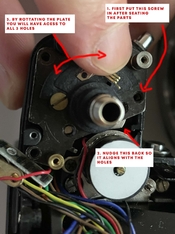
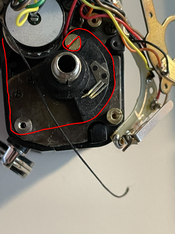
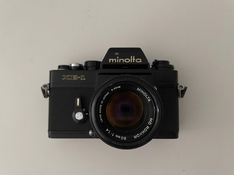
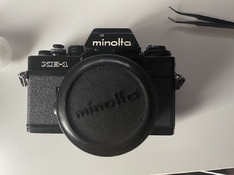
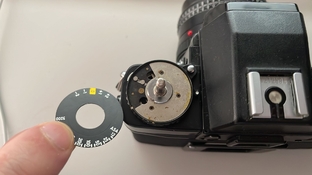
I bought a Minolta XE-1 was super hyped but up on further inspection the aperture pulley was disconnected and a part of the rewind base plate was bent. I'm not sure if the rod who holds the film canister is bent too. This most likely contributed to the aperture "half wheel" looking part not moving correctly anymore. The camera itself is fine in any other department shutter is smooth and the light meter works and the overall condition is nice. My question since the xe-5 and xe-1 are similar would I be able to get that spare part from an XE-5 and replace it?

thanks
 

Attachments

  • 1.jpg
    1.jpg
    256.4 KB · Views: 88
  • aperture pulley.jpg
    aperture pulley.jpg
    364.6 KB · Views: 87
  • 7.jpg
    7.jpg
    243.7 KB · Views: 93
  • 6.jpg
    6.jpg
    327.7 KB · Views: 91
  • 5.jpg
    5.jpg
    239.7 KB · Views: 88
  • 4.jpg
    4.jpg
    280.1 KB · Views: 81
  • 3.jpg
    3.jpg
    376.7 KB · Views: 91
  • 2.jpg
    2.jpg
    248.8 KB · Views: 78
OP
OP

unwantedfocus

Member
Joined
Mar 29, 2021
Messages
190
Location
Germany
Format
Multi Format
Bought a broken XE-5 according to the repair manual they are the same will update on the progress.
 

cmacd123

Subscriber
Joined
May 24, 2007
Messages
4,314
Location
Stittsville, Ontario
Format
35mm
XE/XE1 and Xe7 are the same depending on where they were intened to be sold. the XE5 is the economy model so should be OK as a parts donor for the rewind shaft.
 
OP
OP

unwantedfocus

Member
Joined
Mar 29, 2021
Messages
190
Location
Germany
Format
Multi Format
okay so I changed the part however on assembly I encounter this problem, there is a spring which creates the tension on the aperture plate wich is connected with the front with a string. I have to turn the spring 2 times and then put the aperture plate on top however there is no space to keep the tension on the spring it will always pop back before I can assemble the part. Anyone has a good method so I can keep the tension on the plate and put my part on top?
 

Attachments

  • IMG_9847.jpg
    IMG_9847.jpg
    270.6 KB · Views: 72
  • IMG_9848.jpg
    IMG_9848.jpg
    200.1 KB · Views: 82
  • IMG_9849.jpg
    IMG_9849.jpg
    176 KB · Views: 80
  • IMG_9850.jpg
    IMG_9850.jpg
    540 KB · Views: 66
Joined
Jan 31, 2020
Messages
1,294
Location
Germany
Format
Multi Format
The end of the spring is supposed to go in the hole in the black plastic "half wheel", right? Stick a thin tool trough that hole to hald the spring in place, then lower the part into place? I've also done something like this with a bit of string, form a U, hold spring in place with that, slip it off once the part is in place. Sometimes you can also put tension on a spring from its other end.
 
OP
OP

unwantedfocus

Member
Joined
Mar 29, 2021
Messages
190
Location
Germany
Format
Multi Format
The end of the spring is supposed to go in the hole in the black plastic "half wheel", right? Stick a thin tool trough that hole to hald the spring in place, then lower the part into place? I've also done something like this with a bit of string, form a U, hold spring in place with that, slip it off once the part is in place. Sometimes you can also put tension on a spring from its other end.

thank you I was kind of stuck and you made me think out of the box I tried a different approach and it worked I will later follow up on how I fixed it.
 
OP
OP

unwantedfocus

Member
Joined
Mar 29, 2021
Messages
190
Location
Germany
Format
Multi Format
I hope this makes sense here what I tried to picture.
 

Attachments

  • 1.jpg
    1.jpg
    179.5 KB · Views: 78
  • 2.jpg
    2.jpg
    162.6 KB · Views: 85
  • 3.jpg
    3.jpg
    146.3 KB · Views: 73
  • 4.jpg
    4.jpg
    251.1 KB · Views: 84
  • 5.jpg
    5.jpg
    271.6 KB · Views: 75
  • 6.jpg
    6.jpg
    218.8 KB · Views: 81
OP
OP

unwantedfocus

Member
Joined
Mar 29, 2021
Messages
190
Location
Germany
Format
Multi Format
I'm currently trying to figure out the length of the pulley, the one that was on it only went to f11 and the other one teared when I tried to make adjustments on the brass screw marked in the picture, the adjustment room for the pulley seems very small. You also have to count in the position of the pulley plate, the plate has to sit in the position against the stopper if the pulley is too short then the plate doesn't sit in the original position this will probably result in wrong readings.

I still have some strings left however does anybody know where to buy spares? Also is there an adjustment method im not seeing?
 

Attachments

  • IMG_9884.jpg
    IMG_9884.jpg
    1.1 MB · Views: 70
OP
OP

unwantedfocus

Member
Joined
Mar 29, 2021
Messages
190
Location
Germany
Format
Multi Format
New update, the brass screw is indeed there to make adjustments, I had a SRT which was broke took the string connected it first on the aperture ring then to the aperture plate. There was still wiggle room so I adjusted it perfectly with the brass screw. Now everything is assembled and seem to work as intended however can only confidently say when I shot a roll with it. I don't know why but I lost the 3rd red dot screw from the front in a row seems to be a curse.....hope this will help someone with the same problem. Last step new light seals and clean the outside a bit. Very Happy now!!!!
I still have some strings left however does anybody know where to buy spares?
would still like to know where I could buy them cheers.

IMG_9894.jpg
 
OP
OP

unwantedfocus

Member
Joined
Mar 29, 2021
Messages
190
Location
Germany
Format
Multi Format
Had to re-glue the asa/iso dial, it fell off.
Repainted the white lettering on the camera with 1 euro acrylic paint, what i did not do yet, is replacing the mirror damper. On the XE it's deeper and very far into the housing compared to the SRT damper seal/cushion. Not very easily accessible.
 

Attachments

  • old.jpg
    old.jpg
    175.6 KB · Views: 67
  • new.jpg
    new.jpg
    175.7 KB · Views: 70
  • dial.jpg
    dial.jpg
    174.4 KB · Views: 74
Photrio.com contains affiliate links to products. We may receive a commission for purchases made through these links.
To read our full affiliate disclosure statement please click Here.

PHOTRIO PARTNERS EQUALLY FUNDING OUR COMMUNITY:


Ilford ADOX Freestyle Photographic Stearman Press Weldon Color Lab Blue Moon Camera & Machine
Top Bottom