M42 Rikenon 55mm f1.4 / Sears Auto 55mm f1.4 Helicoid CLA with pictures!

On the edge of town.

A
On the edge of town.

  • 6
  • 3
  • 98
Peaceful

D
Peaceful

  • 2
  • 11
  • 226
Cycling with wife #2

D
Cycling with wife #2

  • 1
  • 3
  • 97
Time's up!

D
Time's up!

  • 1
  • 1
  • 92

Recent Classifieds

Forum statistics

Threads
198,262
Messages
2,771,955
Members
99,582
Latest member
hwy17
Recent bookmarks
0

j-dogg

Member
Joined
Jun 26, 2010
Messages
1,542
Location
Floor-it-duh
Format
Multi Format
After much sleuthing on this gem of a lens to resolve a stiff focus and not finding ANYONE with a write-up on how to service it, I channeled my experience with Soviet LTM lenses into this Rikenon I got for free and took pictures. It's a tricky bastard but very doable and you don't even need to fully disassemble it to do this part which from what I have gathered, is what they all suffer from right now, old grease that has congealed. I didn't touch the optics because they were perfect, but judging from what I saw it's like any other standard lens at the time, two separate optical blocks a front and a rear behind the diaphragm and the elements pop out with simple lens spanners, or one complete optical block like on the KMZ 85mm f/2 LTM Soviet Sonnar copy. I got it apart and put it back together and calibrated the infinity focus on a Pentax Spotmatic then checked it on a Sony A7S digital. It's perfect, here's my story.

Back when we were still trying to land on the Moon, Ricoh was making 35mm cameras and one such camera was called a TLS401, known for it's built-in WLF. Sears sold them with their name on it called an Auto TLS without the WLF. Both were offered with this absolute unit, a Rikenon 55mm f1.4. We are covering that version though the Sears model is mechanically the same thing underneath. I got one for free with a stiff focus ring, decided I should do something about it. If any of you have done camera repair you probably can take this on easily, but for those out there on the Internet searching for this, I put it here for the search engines to grab.
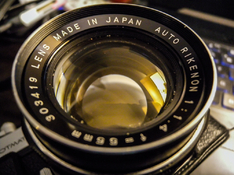
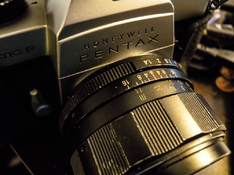
1137-1688.jpg 1137-1689.jpg
 
Last edited:
OP
OP
j-dogg

j-dogg

Member
Joined
Jun 26, 2010
Messages
1,542
Location
Floor-it-duh
Format
Multi Format
Getting the lens apart is rather simple. A set of rubber cones or even a rubber lens hood strategically placed will get the nameplate screwed off. Once you do that, the optical block is visible. The holed ring is for the individual elements in the block, you want the outer ring with the larger square divots to remove the block. It's all one big assembly that comes out nice and easy.

block.jpg
 
OP
OP
j-dogg

j-dogg

Member
Joined
Jun 26, 2010
Messages
1,542
Location
Floor-it-duh
Format
Multi Format
If you have dust or haze in this block, now is a good time to get it apart and clean it. If you have trouble removing the individual elements put the block back in the lens and use a screwdriver to hold the outer ring in place and a lens spanner tool to get the inner ring loose.

Now that we have the block out, we can get the focus ring off. It's held on with three very small set screws and all the screws are magnetic, so if you have a magnetic screwdriver now is your time to shine. Set it to infinity focus and remove the set screws, place them in a film canister one of the clear white ones so you can see it. Or put them in a magnetic tray, you don't want to lose them. Then remove the focus scale ring with three smaller set screws, also magnetic.

You will now notice it looks like this. It is very important for re-assembly that you make tick marks on various areas of alignment, you can see one I made here for the infinity adjustment plate. These are actually set with glue as well so if you're lucky and remove it the glue will stay and create an outline of where it was set. You don't need any special tools for the glue it's just for setting to prevent it coming loose from vibration.

This is actually two helicoids and I will explain how this works next post, it's fun but doable.

1137-1686.jpg
 
OP
OP
j-dogg

j-dogg

Member
Joined
Jun 26, 2010
Messages
1,542
Location
Floor-it-duh
Format
Multi Format
Now separate the two helicoids using the brass ring that the focus ring attaches to. Mark the alignment with a tick mark, shown here on this picture. You can also see the outline of the glue on the infinity adjustment plate, and if you look very carefully on your plate, you might see where the screws themselves made an indentation on the plate when they were adjusted and screwed down from the factory.

You will notice that as the first helicoid rises, it does not rotate, this is because of alignment rails inside that I will explain later. The second helicoid does not spin either but is a much finer pitch than the first one, because it has to be aligned one way for ease of assembly. This helicoid has only one "grab" point where it will screw on, it only goes on one way and thats with the stop tab facing up, in case you forgot to make your tick marks.

1137-1668.jpg
 
OP
OP
j-dogg

j-dogg

Member
Joined
Jun 26, 2010
Messages
1,542
Location
Floor-it-duh
Format
Multi Format
Yours should now look something like this. The base is at the left, the focus ring in the middle and the optical block on the right. Surprise, the diaphragm dowel pin is on the top, don't worry, it looks scary but it's easily doable to get back together. Now we will get that nasty old grease off and give this thing the love it deserves.

291137554_3140194062869941_1350196321119642395_n.jpg
 
Last edited:
OP
OP
j-dogg

j-dogg

Member
Joined
Jun 26, 2010
Messages
1,542
Location
Floor-it-duh
Format
Multi Format
290906889_579044530675767_5599479195027226582_n.jpg


If you look at the brass ring you will see two corresponding pitches of helicoid. The fine one is for the focusing base, the coarse one is for the front optical assembly. Clean these with naptha, or lighter fluid. You need to get ALL of the old stuff off or this won't work right. Turn the ring sideways and apply a small amount of lighter fluid. I like to use a cotton ball or a big Q-tip to clean all the old stuff off. Then go back over it again with the same procedure, just for good measure. Do the same on the helicoids on both the optical block and the lens base, twice for good measure.
 
OP
OP
j-dogg

j-dogg

Member
Joined
Jun 26, 2010
Messages
1,542
Location
Floor-it-duh
Format
Multi Format
Assemble one side and check for stiffness, if you have any you need to clean it again. Do the same with the optical block, run the brass ring up and down on it, check for stiffness. If all is well, we can now apply the grease. My weapon of choice is Japan Hobby Tool Helicoid Grease there are a few different types depending on how stiff you want your focus to be, choose the one that works for you. I like a nice medium between ease of focus and not going anywhere I think the stuff I use is #10 but don't quote me on that. They also make a really nice nameplate removal rubber tool which various different sizes which I also used on this lens.

Then, once you apply the grease, a small amount, run each side through the helicoids separately to check for viscosity and any hitches in the movement. Remove the ring then with a small Q-tip remove the excess grease from the ends of the thread where the two helicoids meet in the ring. Check viscosity again, if you are happy with it, let's put this thing back together.

Now is also a great time for a screw check on the base, 50 years of vibration can loosen things. My optical block actually came out by hand once I got the ring off.

The fun begins, pay attention to this image right here. See how this screw and the alignment tab are aligned? This will help with re-assembly, mark this screw with a tick mark between the helicoid and the black outer shell, I'll show you where it aligns, this is the tricky part

1137-1676.jpg
 
OP
OP
j-dogg

j-dogg

Member
Joined
Jun 26, 2010
Messages
1,542
Location
Floor-it-duh
Format
Multi Format
1137-1680.jpg

Remember this image? This is important for mounting the optical block. I mounted the base on the camera for ease of assembly at this point because you will be trying to align basically 3 sets of rings and this just makes it easier.

The block is almost fully extruded at this point, minimum focusing distance. See the tab on the brass ring? Set the lens to minimum focus using the infinity focus tab on the brass ring, align it either using the old glue or the tick marks you made earlier on the base, then rotate it 1 full turn counter-clockwise with the front of the camera facing you. On the base of the lens there are two alignment posts and this set of levers for the diaphragm. Set the lens base to f/1.4
 
Last edited:
OP
OP
j-dogg

j-dogg

Member
Joined
Jun 26, 2010
Messages
1,542
Location
Floor-it-duh
Format
Multi Format
base.png

This is also very important. Make sure it's set to f/1.4. The red arrow is the alignment post, there's one 180 degrees opposite of it. Notice there's nothing there, remember the optical block and how the screws and hole aligned? That goes on the red arrow side. The green arrow is the catch for the diaphragm dowel rod. The blue arrow points to the aperture pin that the camera uses to stop down the aperture, make sure this is down, it can get moved around while working and if you set it down it will push the pin all the way in and you'll go through all the work of aligning this like I did only to have no aperture control and have to take it all apart again lol

post.jpg


Now you want to make a tick mark on the outside of the base for that alignment post. The red is the tick mark and the green represents the alignment post behind it, this will be very important later.
 
Last edited:
OP
OP
j-dogg

j-dogg

Member
Joined
Jun 26, 2010
Messages
1,542
Location
Floor-it-duh
Format
Multi Format
Now the fun part where we make this work in concerto. Hold the brass ring in place, then align that screw on the body of the optical block with the tick mark you made on the base for the alignment post, then rotate it clockwise maybe 1/8th of a turn. The top helicoid has 16 possible catch points to seat into the brass focus ring, but only one of them is the right one. This is that right one. As you begin to screw the top helicoid in, you will notice that the marked screw will now align itself with the alignment post tick mark you made earlier. Now, with everything lined up, turn the brass focus ring clockwise, if it all works it will look like this. Be sure to also check that the aperture works and stops down properly.

If you think you got it, check the infinity focus with the front optical block installed. If you like what you see in the finder, the hard work is done, now let's re-assemble the rest of it.

1137-1681.jpg
 
Last edited:
OP
OP
j-dogg

j-dogg

Member
Joined
Jun 26, 2010
Messages
1,542
Location
Floor-it-duh
Format
Multi Format
Re-install the infinity focus adjustment plate, but do not torque down all the way, just enough to where it is snug. Find a cell tower or something far away, and adjust the focus until you are at infinity. As you adjust to infinity, the plate will move as well, once you are satisfied, torque down, then check again. I used my Spotmatic and later my Sony A7S to verify critical infinity focus and I nailed it. My years shooting dusty Soviet rangefinders with dirty viewfinders paid off on this one.

1137-1686.jpg
 
OP
OP
j-dogg

j-dogg

Member
Joined
Jun 26, 2010
Messages
1,542
Location
Floor-it-duh
Format
Multi Format
Now re-install the focus scale, be very careful to not drop those set screws. The smaller ones are for the focus scale, put them on. Doesn't need a lot of torque. Then re-install the focus ring, do not use excessive torque. Mine actually had glue behind the set screws, if you torque too much it will warp the brass ring and you will have intermittent stiffness when focusing.

Next, reinstall the nameplate and give the front optic a good clean because the rubberized tool will touch the optics as you are installing.

Enjoy your new lens!
 

GRHazelton

Subscriber
Joined
May 26, 2006
Messages
2,246
Location
Jonesboro, G
Format
Multi Format
Ooogh....! My hat's off to you. This demonstrates why I'll pay someone to CLA any of my lenses which need work.
 
OP
OP
j-dogg

j-dogg

Member
Joined
Jun 26, 2010
Messages
1,542
Location
Floor-it-duh
Format
Multi Format
Ooogh....! My hat's off to you. This demonstrates why I'll pay someone to CLA any of my lenses which need work.

It's no big deal once I figured out how it worked it was easy, the figuring out was the hard part haha
 

waynephoto

Member
Joined
Apr 6, 2024
Messages
3
Location
Arizona
Format
35mm
Thank you for all the information. I have a Rikenon 55mm F1.4 lens that needs aperture repair (not operating). It looks like the second ring after the name plate, "the outer ring with the larger square divots", appears to be glued and will not budge. Any insights on how to remove it would be welcome.
 
Photrio.com contains affiliate links to products. We may receive a commission for purchases made through these links.
To read our full affiliate disclosure statement please click Here.

PHOTRIO PARTNERS EQUALLY FUNDING OUR COMMUNITY:


Ilford ADOX Freestyle Photographic Stearman Press Weldon Color Lab Blue Moon Camera & Machine
Top Bottom