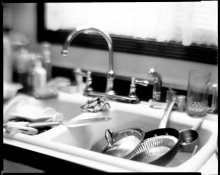
A couple of 8x10 Paper negs of a messy kitchen sink...
I used my 500mm f:6.9 Wollaston Meniscus on an extended Kodak 2-D
The lens to faucet distance was 1.5 meters (59 inches).
One shot wide open @ f:6.9, the other @ f:16, using ISO 10, no filter.
Fresh Photo Warehouse rc paper, pre-flashed 1 second, developed 3 minutes in Ansco 130, @ 1+15 dilution.
Reinhold
www.re-inventedPhotoEquip.com
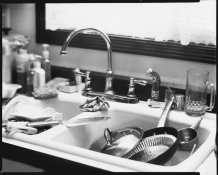