Installing new lens and lensboard into a Beseler 23CII-XL Dichro

The Long Walk

H
The Long Walk

  • 1
  • 0
  • 34
Trellis in garden

H
Trellis in garden

  • 0
  • 0
  • 32
Giant Witness Tree

H
Giant Witness Tree

  • 0
  • 0
  • 31
at the mall

H
at the mall

  • Tel
  • May 1, 2025
  • 0
  • 0
  • 35
35mm 616 Portrait

A
35mm 616 Portrait

  • 4
  • 5
  • 115

Recent Classifieds

Forum statistics

Threads
197,497
Messages
2,760,121
Members
99,387
Latest member
Repoleved
Recent bookmarks
0

Joan Arkham

Member
Joined
Sep 3, 2012
Messages
6
Location
Washington D
Format
35mm
Hi! I feel bad to have my first post be such a sad plea for help, but here goes:

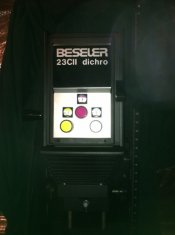
I purchased a Beseler CII-XL Dichro via Craigslist many years ago, and use it for 35mm printing. I've recently gotten into medium format toy camera stuff, and would like to print those photos at home. After reading this forum for advice, I purchased this lens and board...but maybe I screwed up. Is a "C23" not compatible with what I have? The board has no screw holes, where the one it came installed with has two.

Also, I tried following the instructions I found at this thread: (there was a url link here which no longer exists) but can not get the existing board to just "pop out," even after removing the two screws.

I have the original manual, but it's worse than useless. I'm kind of embarrassed to have this professional piece of equipment, and not know how to really use it or maintain it beyond the basics...and I'm terrified I'm going to break something. Any help would be appreciated!
 

Jon Shiu

Subscriber
Joined
Dec 2, 2003
Messages
3,288
Location
Mendocino, California
Format
Plastic Cameras
No removal of screws are needed. To remove the lensboard just grab the lens and push towards the back. It is spring loaded. Then the front of the lens board can drop down off of a little ledge.

Jon
 

Rick A

Subscriber
Joined
Mar 31, 2009
Messages
9,849
Location
Laurel Highlands
Format
8x10 Format
Welcome to Apug! The lensboard should be spring loaded, and just push either toward the back of the machine or to one side. If the board won't budge you will have to take screws out to disassemble it. Never be embarrassed to ask for help here, we've all been stumped by our gear from time to time.
 

ic-racer

Member
Joined
Feb 25, 2007
Messages
16,478
Location
USA
Format
Multi Format
That ebay link directs to an auction for a box marked "8021" I'll let the others comment on the focusing ability of a 75mm lens with that board. The manual calls for the "8023" for a 75mm lens, but it look like there is only a few millimeters difference in the mounting location between the two lensboards.
There is a PDF of the manual here, it even has an exploded diagram: http://www.jollinger.com/photo/cam-coll/manuals/enlargers/beseler/Beseler_23C_II.pdf
 
OP
OP

Joan Arkham

Member
Joined
Sep 3, 2012
Messages
6
Location
Washington D
Format
35mm
Thanks, everyone! I went and tried again and although there's a bit of give, it just does not want to move. I'm wondering if the guy I bought it from modified it in some way? I took some pics of how it looks with the 35mm lens mounted, and the front of the enlarger.

I guess I'm not sure what the different lensboards look like, or why you would want a different one for a different length of lens...but now I see the table in the manual where they list the lensboard numbers. Is it worth trying to track down the proper one, or do you think I might be able to make it work?
 

Attachments

  • lensmount.JPG
    lensmount.JPG
    108.3 KB · Views: 668
  • 23CII.JPG
    23CII.JPG
    65.1 KB · Views: 619

Konical

Subscriber
Joined
Jun 1, 2003
Messages
1,824
Good Evening, Joan,

The easy part first: Having a separate lens board for each focal length lens is not absolutely necessary, but it certainly makes switching lenses much more convenient. Having different focal length lenses for different size negatives is standard practice. Usually, it's 50mm for 35mm negatives, 75-80mm for 6 x 6 negatives, 90mm for 6 x 7 negatives, and 100-105mm for 6 x 9 negatives. Using a shorter than usual focal length lens normally causes vignetting of the projected image.

The lens board pictured has two additional screw heads(???) beside the lens, not something on any of my Beseler boards, nor on any I have seen. It could well be that someone has, for some reason, adapted the board to deal with some problem I can't think of. I did an recessed adaptation of the board for my 50mm El-Nikkor to move it closer to the negative; otherwise, I couldn't achieve proper focus. That does not appear to be the case with your board. Sorry I can't be more helpful, but I'll bet that someone here will be before long.

Konical
 

paul ron

Member
Joined
Jan 22, 2004
Messages
2,706
Location
NYC
Format
Medium Format
It seems there are 2 knobs one on either side of the lens, unscrew em and the board will come out as normal by pusihng it to the rear n it will drop down. If the board doesn't drop, take the 2 rear screws n that bracket off n the spring will fall out then the board can be removed.

My 4x5 Beseler has the same screw knobs on it's board.

.
 

Jon Shiu

Subscriber
Joined
Dec 2, 2003
Messages
3,288
Location
Mendocino, California
Format
Plastic Cameras
You don't need any special board to mount your 75mm. Regular flat board with 39mm hole should be fine.

Loosen, or remove those knobs and you should be able to push the board to the rear and drop the front edge down. Boards with those knobs are not common and not needed.

Jon
 
Joined
Mar 26, 2011
Messages
733
Format
35mm
Thanks, everyone! I went and tried again and although there's a bit of give, it just does not want to move. I'm wondering if the guy I bought it from modified it in some way? I took some pics of how it looks with the 35mm lens mounted, and the front of the enlarger.

I guess I'm not sure what the different lensboards look like, or why you would want a different one for a different length of lens...but now I see the table in the manual where they list the lensboard numbers. Is it worth trying to track down the proper one, or do you think I might be able to make it work?

Joan,

I have that model of enlarger but with the simple bulb-and-condenser head. For various reasons my lens board is a bit too long front to back such that pushing the lens to the back will not move the lens board enough to clear the front flange. (The one to the top in your pic.) If you loosen the two little phillips head screws in the front (top) that flange will dip down a bit, perhaps enough to let the edge of the lens board clear. If you take them out completely the flange bar will fall off and the board too. So be careful and mind where those screws fall, but doing this will not break anything in a normal 23CII; I've done it several times myself.

Good luck

s-a
 

Ian C

Member
Joined
Feb 8, 2009
Messages
1,236
Format
Large Format
Posting your problem with the Beseler 23C II difficult-to-remove/install lens board is useful. To better answer your question I disassembled the oldest of the three that I own. It had the same problem as yours. It took an inordinate amount of force to move the lens board far enough forward against the spring to change boards. This should be easy to do with a modest force. In the process I also disassembled a second 23C II so that I could analyze the differences and discover why #1 has the problem, but #2 works fine.

Here’s what I found. The difference is that the formed flat spring at the rear of the lens board retainer was incorrectly shaped on #1 compared to the spring of #2. By swapping the springs, the problem moved to enlarger #2 and #1 worked correctly. This seemed to confirm that the misshapen spring was the cause of the problem.

In my case, the small radius curl at one end of spring #1 was too long. It looked like the blank had been fed slightly out of position into the forming die in manufacture. Consequently, the spring had far too much force when tying to install or remove a lens board.

I remedied the situation by carefully grinding the excess off of the overly long end with the excess arc length. The other end was shaped correctly and looked the same as the spring on enlarger #2. The overly-long end was about 2mm too long to work properly. After altering the spring, the resistance to pushing the lens board forward against the spring to install or remove the board is now normal and the lens board changes are fast and easy—the way the Beseler designer originally intended.

In your case the spring ends might be correctly shaped, but the center arch might be too great. That will increase the force needed to install and remove a lens board, possibly by quite a bit.

If that’s the case, you can deal with the overly stiff spring by placing it on a table top with the large arch upward and push down to flatten the arch somewhat. If you overdo it, it can be bent back. This spring is only somewhat springy and can be adjusted without much trouble.

This is something of a “bend and try” process. What you’re trying to accomplish is to reduce the spring tension to reasonable value so that you can easily install and remove the lens board and still have the board safely retained by the spring force.

In order for the lens board retainer to work properly, the self-tapping screws that hold the front and rear lens board retainer plates in position must be fully screwed in. Leaving one or more of these screws partially loose in an attempt to fix the problem is a poor practice and doesn’t address the actual problem.

The Beseler 23C enlargers, all versions: 23C, 23C II, and the current 23C III, are well-made, robust machines that work well. Apparently in a few rare cases parts are sometimes slightly off-standard and might require adjustment.
 
Last edited by a moderator:
Joined
Mar 26, 2011
Messages
733
Format
35mm
In order for the lens board retainer to work properly, the self-tapping screws that hold the front and rear lens board retainer plates in position must be fully screwed in. Leaving one or more of these screws partially loose in an attempt to fix the problem is a poor practice and doesn’t address the actual problem.

Just sayin', nowhere in my post did I suggest loosening the screws should be used as an on-going fix. The OP was interested in removing the lens board and nowhere in her posts did she mention looking for a such a B-grade solution. Luckily there are APUG members such as yourself who, owning duplicate hardware, can experiment and determine a process that works better should lens board removal become more than an occasional chore.

Thanks,
s-a
 

Ian C

Member
Joined
Feb 8, 2009
Messages
1,236
Format
Large Format
We think alike. The first time this happen to me, a lens board & lens got trapped in the retainer. It went in hard, but was impossible to remove. The only way I could get it out was to remove the screws holding the front plate.
 

ann

Subscriber
Joined
Sep 10, 2002
Messages
3,336
Format
35mm
Those screws are for leveling the lens, not holding it in place. They were popular in the 60's
 

Konical

Subscriber
Joined
Jun 1, 2003
Messages
1,824
Good Morning, Ann,

Interesting--thanks for the information.

Konical
 
OP
OP

Joan Arkham

Member
Joined
Sep 3, 2012
Messages
6
Location
Washington D
Format
35mm
Just wanted to say thanks again to everyone who responded. I'm kind of blown away by this forum, and plan on sticking around.

Will play with the lens this weekend, and report back on what happens!
 

paul ron

Member
Joined
Jan 22, 2004
Messages
2,706
Location
NYC
Format
Medium Format
Those screws are for leveling the lens, not holding it in place. They were popular in the 60's

Those 2 screws at teh very back only hold the spring in place n are not lens levelers at all. Once the 2 screws are out the metal angle comes out n behid that is the spring that is only a tensioner for the lens board.

The 2 knobs are for holding the lens board nice n tight to the mount reducing light leaking, some even had a strip of light seal foam.

The lens is leveled by the entire stage.

.
 
OP
OP

Joan Arkham

Member
Joined
Sep 3, 2012
Messages
6
Location
Washington D
Format
35mm
So. You guys are not going to believe this, but...

I decided to give things one more try before taking that front plate off. I loosened but did not remove the two plastic screws, braced my hands against the head, and pushed the lens back and down firmly with both thumbs...and it did, in fact, pop right out. Maybe all the fussing I did with it last weekend loosened up the spring, or maybe I was just able to picture the motion I needed better after learning more about it. Either way, thanks to everyone who chimed in! I've got the new lens and board in, and it seems to work just fine with my negatives.

Thanks again!
 

pdraver

Member
Joined
Sep 19, 2012
Messages
5
Format
35mm
The 8021 and 8023 are functionally the same. The 8021 has a recess bored on the front side. Early 23c's had a slide-in filter holder immediately behind the lensmount. It would collide with the rear of similar vintage 50mm f2.8 EL-Nikkor lenses. The 8023, with a recess bored on the back side pushed it just enough out to clear. Either should be fine for most 50-105mm lenses.
 

DonF

Member
Joined
Jul 19, 2016
Messages
285
Location
Saint Charles, Il
Format
Large Format
I know this is an ancient thread, but Ian's advice was spot-on and fixed my enlarger lens board issue.

On my Beseler 23CII-XL.... I found it almost impossible to slide the lens board back against the springs far enough to remove the old lens board. I needed to remove the front metal strip and its two screws to allow the lens board to drop out. The metal strip formed spring was badly cut in my 23CII, with one end of the strip longer than the other. Clearly the shear used to cut the strip was dull or mis-positioned, as the cut edge was very rough on one side with an indentation about 1mm in where it looked like the cutter had slipped. This extra length prevents the lens board from compressing the spring fully when pushed back into the slot. I removed the two screws holding the retaining strip and spring in place. I used a Dremel tool to grind about 2mm from the longer end of the bent spring strip. After reassembly, the board fits tightly, yet can be easily removed by sliding the board to the rear of the enlarger - as intended.

Thanks!

Don F.

Posting your problem with the Beseler 23C II difficult-to-remove/install lens board is useful. To better answer your question I disassembled the oldest of the three that I own. It had the same problem as yours. It took an inordinate amount of force to move the lens board far enough forward against the spring to change boards. This should be easy to do with a modest force. In the process I also disassembled a second 23C II so that I could analyze the differences and discover why #1 has the problem, but #2 works fine.

Here’s what I found. The difference is that the formed flat spring at the rear of the lens board retainer was incorrectly shaped on #1 compared to the spring of #2. By swapping the springs, the problem moved to enlarger #2 and #1 worked correctly. This seemed to confirm that the misshapen spring was the cause of the problem.

In my case, the small radius curl at one end of spring #1 was too long. It looked like the blank had been fed slightly out of position into the forming die in manufacture. Consequently, the spring had far too much force when tying to install or remove a lens board.

I remedied the situation by carefully grinding the excess off of the overly long end with the excess arc length. The other end was shaped correctly and looked the same as the spring on enlarger #2. The overly-long end was about 2mm too long to work properly. After altering the spring, the resistance to pushing the lens board forward against the spring to install or remove the board is now normal and the lens board changes are fast and easy—the way the Beseler designer originally intended.

In your case the spring ends might be correctly shaped, but the center arch might be too great. That will increase the force needed to install and remove a lens board, possibly by quite a bit.

If that’s the case, you can deal with the overly stiff spring by placing it on a table top with the large arch upward and push down to flatten the arch somewhat. If you overdo it, it can be bent back. This spring is only somewhat springy and can be adjusted without much trouble.

This is something of a “bend and try” process. What you’re trying to accomplish is to reduce the spring tension to reasonable value so that you can easily install and remove the lens board and still have the board safely retained by the spring force.

In order for the lens board retainer to work properly, the self-tapping screws that hold the front and rear lens board retainer plates in position must be fully screwed in. Leaving one or more of these screws partially loose in an attempt to fix the problem is a poor practice and doesn’t address the actual problem.

The Beseler 23C enlargers, all versions: 23C, 23C II, and the current 23C III, are well-made, robust machines that work well. Apparently in a few rare cases parts are sometimes slightly off-standard and might require adjustment.
 

binglebugbob

Subscriber
Joined
Mar 2, 2007
Messages
1,211
Location
Tacoma, WA vicinity, USA
Format
Medium Format
Those 2 screws at teh very back only hold the spring in place n are not lens levelers at all. Once the 2 screws are out the metal angle comes out n behid that is the spring that is only a tensioner for the lens board.

The 2 knobs are for holding the lens board nice n tight to the mount reducing light leaking, some even had a strip of light seal foam.

The lens is leveled by the entire stage.

.

You may be correct, but I picked up an Omega B / D series lens disk out of my junk box and looked at the holes drilled in it. Low and behold: The two knobs on the Beseler board screw into the Omega lens disk. I assumed it was an adapter to use an Omega lens disk on a Beseler 23/45 series enlarger. At least it seems to work that way. Coincidence? Dunno.
 
Photrio.com contains affiliate links to products. We may receive a commission for purchases made through these links.
To read our full affiliate disclosure statement please click Here.

PHOTRIO PARTNERS EQUALLY FUNDING OUR COMMUNITY:


Ilford ADOX Freestyle Photographic Stearman Press Weldon Color Lab Blue Moon Camera & Machine
Top Bottom