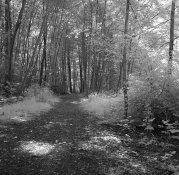
Using a visibly-transparent red filter on this film will not make it work all that much differently than most b/w films. When you use anything but an opaque filter, the amount of visible light exposing the film by far overwhelms the amount of IR, and you get a barely-noticeable IR effect most of the the time. It is a great and sharp general purpose film, if that is the intent, but think about the price before you shoot it with anything other than an opaque filter for IR results.
And when using opaque filters, you should shift focus if you want sharp shots. It is not necessary with filters you can readily see through, as visible light is doing almost all of the exposing in those cases.
Shooting IR film is sort of like shooting with flash. In both cases, you are making two exposures at once, and you need to decide how to balance the two to get the results you want. With flash, you have an ambient exposure and a flash exposure. You set your diaphragm to expose for the flash, and your shutter to expose for the ambient light. You can choose to effectively remove the ambient exposure from the equation if you'd like, by speeding up the shutter. Similarly, with IR film, you have a visible-light exposure, and you have an IR exposure, both going on at once in every shot. Filtration affects the ambient exposure, but the IR exposure is constant as long as the filtration cuts off below about 750 nM. You can balance the two with each other in varying ways, or you can effectively eliminate one or the other from the equation. The heavier the filter you use, the less ambient is picked up, thus the longer exposures get, thus the more the IR is seen. Filters do not increase the IR exposure; they simply decrease the ambient exposure, so increase the relative IR exposure. Use no filter, and by the time the right exposure has been reached on the visible-light-sensitive part, the IR-sensitive part has barely been tickled; it has been effectively eliminated from the picture, and the film looks like any other b/w film. Go to yellow, orange, and red see-through filters, and the proportion of IR making it into the exposure increases, but the film still doesn't look all that different than a regular b/w film. But when you start getting to the heavier red filters, you are blocking out a lot of visible light, and the IR and the visible light even out. Move to the opaque filters, and IR takes over as visible light is completely blocked from hitting the film.
FWIW, the R72 is not truly opaque to visible light. You can still see through it, actually. But it does allow a noticeable IR effect while allowing some barely-visible light to tickle the film.
In regards to exposure, I usually start with an incident reading, just to get a general sense of the lighting conditions, but with the understanding that I am not actually metering IR; I am metering for a lighting condition that experience has shown will work with a certain procedure. I will meter at EI 3, and then add about 3 stops on a sunny and clear day (or EI 400 and add about 10 stops). This is using a Hoya R72, which lets in some visible light. If you can get a filter that cuts off right around 750 nM, it would be ideal for getting the best IR effect from this film, as it would cut out all visible light, even the very deep reds, and the entire exposure would come from the IR.
With cloudy days or other untested weather, all bets are off using that formula. I add large amounts of exposure on top of the above formula and see what happens. 3, 4, 5, 6 stops extra. I usually get something usable. Hey, it's negative film. It's good for some slop!


 !
!
 .
.