Ideas for larger format B&W print developing

Recent Classifieds

Forum statistics

Threads
199,136
Messages
2,786,818
Members
99,820
Latest member
Sara783210
Recent bookmarks
0

FL at CC

Member
Joined
Sep 16, 2016
Messages
57
Location
Melbourne, Australia
Format
Multi Format
Hi everyone!

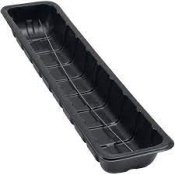
I’m starting to arrange a slew of prints for an exhibition that will be intended for printing up to 30x40” (I’ve only ever run trays up to 20x24). Can anyone suggest a rig to construct sinks/trays to support 30x40” also how would I easily manage temperature and circulate the solutions for each bath? I’ve heard of some using heat exchangers, aquarium heaters, etc though would appreciate some sound advice.

Good news is that I’m very handy so constructing something from scratch isn’t an issue. More good news is I have my whole loft which can support the large footprint of the large baths.
 

Sirius Glass

Subscriber
Joined
Jan 18, 2007
Messages
50,411
Location
Southern California
Format
Multi Format
The problem I had with 20"x24", the largest I printed, using trays is that with paper that large or larger, turning the print over and back without getting uneven development can be a challenge. That is why I may go out and buy the rest of the Jobo print drums that I would need.
 

NB23

Member
Joined
Jul 26, 2009
Messages
4,307
Format
35mm
There was a guy the other day on the forum who mentioned he used bottom dishwashers (clothes washers?) pans in which he installed ball valves for easy drainage. Sounded really clever.
 

NB23

Member
Joined
Jul 26, 2009
Messages
4,307
Format
35mm
The problem I had with 20"x24", the largest I printed, using trays is that with paper that large or larger, turning the print over and back without getting uneven development can be a challenge. That is why I may go out and buy the rest of the Jobo print drums that I would need.

Always work two prints at a time, back to back. This way both sheets are sturdier and easier to move around even by holding only one corner.
 
Joined
Feb 22, 2006
Messages
1,213
Location
Hawaii
Format
35mm RF
Make a set of troughs for each bath, using wide PVC pipe.
Having enough dark space is a requirement.
Use way more chems than you think.
Prepare for spills, make at least an extra print of each neg for just in case.
It's easier with a darkroom buddy.
One challenging aspect is acceptable image sharpness.
Get a laser alignment tool and sandbags.
Print at night with low vibrations if needed.
Have fun, good luck.
 
OP
OP

FL at CC

Member
Joined
Sep 16, 2016
Messages
57
Location
Melbourne, Australia
Format
Multi Format
Make a set of troughs for each bath, using wide PVC pipe.
Having enough dark space is a requirement.
Use way more chems than you think.
Prepare for spills, make at least an extra print of each neg for just in case.
It's easier with a darkroom buddy.
One challenging aspect is acceptable image sharpness.
Get a laser alignment tool and sandbags.
Print at night with low vibrations if needed.
Have fun, good luck.

Thanks for those great suggestions! I'm just curious as to your suggestion for the PVC pipe - how would I handle the prints in these troughs? What diameter of pipe would be best for something like that?
 
Joined
Feb 22, 2006
Messages
1,213
Location
Hawaii
Format
35mm RF
Ha well as big as you can get really; If your doing 2-3ft wide then at least 10-12 inch diameter and cut in half. Wider diameters can seat the chems at a lower level so it can be tidier but can be wasteful for chems.
Sand the edges since the paper will contact the rims.
Stabilize the trough so it does not tip.
When time to develop (most important obviously) have one buddy on one side; you handle the dry paper thats rolled.
Unspool about 1 foot and have the buddy dip the first 6 inches or so; then you scoop the whole edge down and pull that edge back up, so the paper gets 'cupped' under the mass of liquid; then the goal is to unspool the paper as they raise their side. You lower as they raise, switch. If you do it right most of the liquid stays on top of the paper and the paper is pulled thru it up and down, hence the first little scoop down into the trough deep (not to the bottom edge or you can stick) and back up so the paper curves as if it is supporting the liquid if that makes sense.
The papers you'll use for this will have a certain curve that can help you; let it help.
Have a good grip on the paper and be even as you hold and slide it to minimize creases and folds.
Try the actual paper in the actual developer stop and fix so you understand and can anticipate the certain grip characteristics as the paper goes thru each solution; this prevents surprise drops at exactly the wrong time.
Consider using gloves with a certain texture or grip rather than smooth, but grippy ones can damage or show on the print, test.
Prepare to waste at least a few sheets/meters to learn; I found cutting thinner yet longer test strips to help practice the team developing using the troughs.
The test strips also serve to iron out the projection issues that arise with large prints.
If the end goal is to 'see what the challenge is' vs 'good enough for credit' vs 'this is the pinnacle of my artistic existence' then you have to be realistic with the projection and just how far up that scale you can climb. Put another way, if your horizontally projecting a 35mm neg from a sideways tilted Besler 23 in wood floored/framed 2 story house from 10pm until dawn you'll only be able to achieve so much, versus say a 10x10 Durst sitting on concrete pad with vacuum easel during business hours.
That said; the biggest gains I could find to go up the quality mountain was laser alignment; vibration reduction to as far as possible and the tested best of an enlarger lens that was designed for large projection.
Most common enlarging lenses are only designed for a certain size, you want the ones as high as you can find for your film format.
Consider doing a dupe neg in a much larger size and printing that neg; 35mm to 4x5 or 6x7 to 8x10. This can be an effective way to use that 10 inch enlarger and can give more control on difficult negs; easier to work on a smaller size for complicated D&B and then that makes for easier repeatable printings.
 

Paul Howell

Subscriber
Joined
Dec 23, 2004
Messages
9,731
Location
Scottsdale Az
Format
Multi Format
In the past I've used wall paper trays, I know they they are made up to 30 inches wide, not sure about 40 inches. I once had a job to do murals, at the time I had a large basement darkroom with a floor drain, I laid the print on the floor, used a sponge mop to apply the developer, stop and fix, with a hose rinsed between each step and as I was living on the Sacrament river, washed the print in the river. I was afraid of the muddy water, no stains. Hung from a cloths line to dry, then flattened between plywood panels with sheets to protect the dry print and weighted with bricks. I just bought a used D3, barrowed a better lens than I owned, used a 300 watt enlarging bulb to cut down the exposure time. I would take it a step at a time, figure out how you are going to wash and dry. For 30X40 I would get a kiddy plastic wading pool, set it up outside for the wash.
 

Attachments

  • upload_2021-11-14_18-36-14.jpeg
    upload_2021-11-14_18-36-14.jpeg
    5.1 KB · Views: 63
Photrio.com contains affiliate links to products. We may receive a commission for purchases made through these links.
To read our full affiliate disclosure statement please click Here.

PHOTRIO PARTNERS EQUALLY FUNDING OUR COMMUNITY:


Ilford ADOX Freestyle Photographic Stearman Press Weldon Color Lab Blue Moon Camera & Machine
Top Bottom