Hurray!
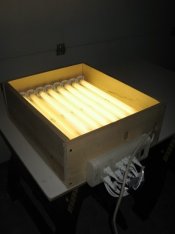
My folks came to visit and it was a great time to have the kid's watched and my dad and I do some projects around the house. Here's some pictures. I used this guide to make it:
http://shutterbug.com/techniques/lighting/0900sb_howto/
I used 8 18" undercabinet lights, some 1x3's and 1x8.
I've done some cyanotypes and Van Dykes before with 4x5's and a basic UV lightbox someone gave me. But now, I'll be able to use some 8x10's!
Just ordered F15T8/BL bulbs from topbulb for it. These are regular lights just to see if it works
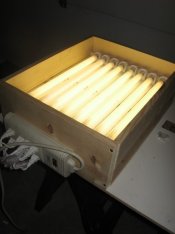
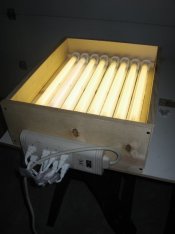