Hybrid workflow for 35mm film: Interested in a workflow discussion/Photoshop tutorial?

Recent Classifieds

Forum statistics

Threads
198,695
Messages
2,779,431
Members
99,682
Latest member
desertnick
Recent bookmarks
0

Andreas Thaler

Subscriber
Joined
Nov 19, 2017
Messages
4,822
Location
Vienna/Austria
Format
35mm
Background

I have been shooting analogue 35mm film since 1985. In 2002 I switched to digital and became familiar with Adobe Photoshop 7.0. Since then I have used both media in parallel, focusing on hybrid 35mm photography.

I shoot with various 35mm cameras, develop my color negative film at home using the C41 process, and digitize with a Nikon Super Coolscan 5000 ED and VueScan. I convert with NegativLabPro and optimize my images in Photoshop.
This includes the Ilford XP2 Super, which is a chromogenic black and white film also processed in the C41 process.

Over time, I have learned, tried out, and developed various techniques, as well as tested image editing tools. Photoshop has remained the norm, with little additional software.

My goal is to preserve the characteristics of the films and lenses used as much as possible, rather than ironing out every "mistake." I'm convinced that film photography also thrives on certain characteristics that should be preserved in a hybrid workflow.

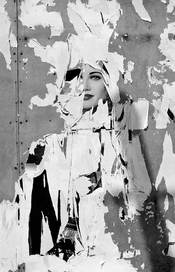
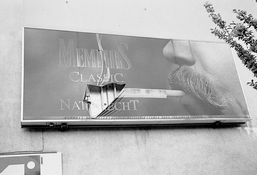
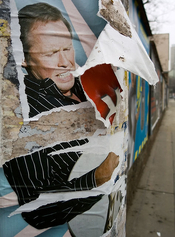
IMG_5712.jpeg IMG_5719.jpeg IMG_5720.jpeg IMG_5722.jpeg IMG_5725.jpeg


Tutorial and movitvation

I was wondering if there would be any interest in a tutorial describing the complete workflow and aimed at beginners and advanced users.
The motivation for this are my memories of starting out, which were not easy and may still discourage people from wanting to work hybrid.

My other hobby, DIY repair of photographic equipment from the 1980s, complements the topic, as I also use repaired cameras for my practical photography work.

I find my subjects on my walks through Vienna with my camera, and my main concern is always the visual impression rather than technical perfection. The famous brick walls for assessing the imaging performance of my lenses are therefore rare 😉

Cameras and lenses from Nikon, Canon, Minolta, Olympus, Leica, Tamron, Tokina and Vivitar are used.

I have presented some of my photos here on PHOTRIO:
 
OP
OP
Andreas Thaler

Andreas Thaler

Subscriber
Joined
Nov 19, 2017
Messages
4,822
Location
Vienna/Austria
Format
35mm
Hardware for image editing with Photoshop: Investment is worthwhile, but only at longer intervals

Photoshop is more enjoyable to work with the more hardware resources it can utilize.

Here, I'm getting a powerful PC with a monitor for professional use that will last for arround ten years, extended on-site manufacturer's warranty included. It's a larger investment, but it's worth it.

So after eleven years I have just replaced my HP Workstation Z230 with Eizo CG243W with the combination below.

I've never had a problem, and if Microsoft hadn't ended support for Windows 10 this fall, I would have continued using it. However, the computer was starting to struggle with Photoshop, and displaying images in Adobe Bridge (a digital asset organization tool and file browser) was taking increasingly longer.

HP Z2 G9 Workstation
  • i9 14900K 14. Generation 24-Core
  • 64GB RAM DDR5 4,8 GHz
  • 2x2 TB NVMe SSD
  • Windows 11 Pro
  • NVIDIA RTX A4000 ADA 20 GB
  • 10TB HDD Ironwolf Pro

Monitor EIZO CG 2700 X

This monitor is larger and has an even higher resolution, which is also good for your eyes 😌

With this configuration, editing image files with high pixel counts and layers runs smoothly, which is also noticeable when dragging the sliders in Photoshop; everything runs without lag. Image previews in Bridge and Windows File Explorer are created quickly.

Of course, it is also possible with a smaller budget, especially if you work with less high-resolution image files and do not use adjustment layers that require resources.


Color management is a must

Anyone who spends hours editing images in Photoshop wants the colors they see and correct on the monitor to also appear on the printer and on other screens and displays. Without color management, disappointment is inevitable.

The topic is simpler today than it was a few years ago. The monitor either calibrates and profiles itself, or you do it using a measuring device. This brings the monitor to standard values and creates a color profile that describes how the monitor interprets RGB values. This is different for every device.

Color management captures this profile and compares it with the color profiles of other devices, such as a printer. The result is largely consistent colors without major deviations; a print reflects light while a monitor emits it. This must be taken into account with regard to color intensity and viewing environment.

Easy-to-use color management tools are now available for calibrating and profiling printers:

 
Last edited:
OP
OP
Andreas Thaler

Andreas Thaler

Subscriber
Joined
Nov 19, 2017
Messages
4,822
Location
Vienna/Austria
Format
35mm
Color film development using the C41 process: at home or in a minilab

In contrast to the development of silver-based black-and-white films, the development of color films is a standardized process.

Instead of adjusting contrast and sensitivity through modified development, the goal with C41 is a consistent process. At 38.5 degrees Celsius (101,3 Fahrenheit), the film is passed through the individual chemicals, with precise temperature and time control.

This is a somewhat unexciting and laborious process that can be performed in a film developing tank with a temperature-controlled water bath or, more conveniently, in a processor.

I have been working with one of the first copies of the Filmomat processor since 2017, which develops films almost independently:


An equally good option is to have films developed in a minilab. This is fully automated and quick, although the quality depends on the operator's care of the machine.

Manual development in suspended tanks, which are offered by specialist labs, is more expensive because they are said to handle films more gently.

I am completely satisfied with a good minilab.
 
Last edited:
OP
OP
Andreas Thaler

Andreas Thaler

Subscriber
Joined
Nov 19, 2017
Messages
4,822
Location
Vienna/Austria
Format
35mm
Classic film scanner or digitizing with a camera

I've been working with a Nikon Super Coolscan 5000 ED, which is designed for professional use, since 2008. However, it's no longer serviced or offers spare parts, but DIY or professional repair is possible:


If my second Coolscan fails as a backup, I'll have to decide whether to buy another film scanner or digitize my films with a digital camera.

You don't have to do the scanning yourself either; there are providers for that.

I run the Coolscan through VueScan, which is constantly being developed and replaces the discontinued software from the scanner manufacturers.

Performance, stability, and service are top-notch, but it has very few editing tools for adjusting scans. But that's a good thing, since I can then edit my scans in Photoshop, which offers virtually unlimited options.
 
Last edited:
OP
OP
Andreas Thaler

Andreas Thaler

Subscriber
Joined
Nov 19, 2017
Messages
4,822
Location
Vienna/Austria
Format
35mm
Converting

Color negative film produces complementary colors, which are masked by an orange mask.

There are Photoshop plugins for converting the colors and removing the mask, but you can also do it yourself in Photoshop.

I work with NegativLabPro, which provides a neutral color representation for me with the option to easily manipulate it. Fine-tuning is then done in Photoshop.


Color negative film and color management

Unlike slide film, there's no way to integrate the scanner into color management for color negative film.

While you can ensure the characteristic color reproduction of a slide film with color targets, this option isn't available for color negative film.

However, this only matters if you want or need to capture color-accurate images, such as when reproducing a color painting.

But that's not my job, so I adjust the colors in Photoshop the way I want, within the limits of what's possible.
 
Last edited:
OP
OP
Andreas Thaler

Andreas Thaler

Subscriber
Joined
Nov 19, 2017
Messages
4,822
Location
Vienna/Austria
Format
35mm
That's my workflow, so far.

I'll be continuing in Photoshop and its techniques soon.

I'd like to use recent shots I'll be taking early in the morning in Vienna to escape the summer heat. The light is also more interesting at this time than at midday.

Stay tuned!
 

koraks

Moderator
Moderator
Joined
Nov 29, 2018
Messages
22,606
Location
Europe
Format
Multi Format
While you can ensure the characteristic color reproduction of a slide film with color targets, this option isn't available for color negative film.

Yes, it is. I think there's even a thread about this on Photrio. However, the practical utility is kind of limited.

Thanks for the write-up so far; I think the most pressing questions people will have at this point is "but how do you get good colors from your color negative scans?” I assume you'll touch upon this in later posts?
 
OP
OP
Andreas Thaler

Andreas Thaler

Subscriber
Joined
Nov 19, 2017
Messages
4,822
Location
Vienna/Austria
Format
35mm
Yes, it is. I think there's even a thread about this on Photrio. However, the practical utility is kind of limited.

This is the first time I've heard of this. I'm interested.

How does it work?

Thanks for the write-up so far; I think the most pressing questions people will have at this point is "but how do you get good colors from your color negative scans?” I assume you'll touch upon this in later posts?

As best as I can 😌

I associate "good colors" with being free of color casts.

You could also include a gray card in your photo motif and adjust the white balance later in Photoshop, but that's not very practical when walking.

Good reference surfaces are paved roads. They aren't neutral gray, because they reflect some of the skylight or colors, but they're a useful starting point.

It's all a matter of taste, because a neutrally filtered photo doesn't necessarily make a good photo.

Photoshop has photo filters with which you can adjust warmth/coolness, but you can also overlay any color over the image.

Fortunately, Negative Lab Pro is very good at converting to color-cast-free images; you can also adjust them in the application.

And there are other options; I'll demonstrate them with examples.
 

koraks

Moderator
Moderator
Joined
Nov 29, 2018
Messages
22,606
Location
Europe
Format
Multi Format
How does it work?
Long story short, you can photograph a color checker (this could be something like an IT8 target), run it through the entire process (i.e. develop the film, scan it and then do e.g. a linear inversion) and then use the digital output to construct an ICC profile. So basically you would treat much of the processing as a black box and profile it in an end-to-end kind of way. A digital camera could be profiled in the same way. A free software suite to do this with is ArgyllCMS, which doesn't excel in user-friendliness, but it's really powerful. And free.

And there are other options; I'll demonstrate them with examples.
Cool, I'm anticipating those when you get round to it. I'm also/primarily asking for the community at large based on the awareness that there's an insatiable hunger for techniques to get to a desirable end result. I know what works for me, but I also understand that this approach doesn't work for everybody else.
 
OP
OP
Andreas Thaler

Andreas Thaler

Subscriber
Joined
Nov 19, 2017
Messages
4,822
Location
Vienna/Austria
Format
35mm
Since I decided to repair a Canon T90 before taking photos in Vienna, which I would like to use later, I am using an older photo here.


Converting a Vuescan RAW DNG file with NegativeLabPro


raw0001.jpg


This is a 3670 x 5626 pixel scan with an original file size of 118.31 MB.

It's a Vuescan RAW DNG file.

See here for more information:


2.jpg


I import the photo into Lightroom Classic ...


3.jpg


... and apply NegativLabPro with the default settings.

A slight cyan tint is visible.


Remove color cast: White Balance tool in the Camera Raw filter


4.jpg


I open the image as 16 bit Tiff in Photoshop.


A1.jpg


Open Camera Raw Filter.


B1.jpg


Color - activate pipette.


C1.jpg


Select a reference area for gray in the photo and measure it with the pipette.

For this I use the asphalt floor, which is gray in color.


D1.jpg


The three RGB values for this point vary, meaning they are not color-neutral.


E1.jpg


By clicking on the reference area, the filter sets this point to gray.


F1.jpg


Now the three RGB values are almost the same and the color cast is removed.
 
OP
OP
Andreas Thaler

Andreas Thaler

Subscriber
Joined
Nov 19, 2017
Messages
4,822
Location
Vienna/Austria
Format
35mm
Color Cast Removal: Create a Hue/Saturation Adjustment Layer

This technique creates a mask that can be combined with a Hue/Saturation adjustment layer to specifically edit an area of the image.

The mask can be adjusted if necessary.


I.jpg


Selection - Color range - pipette.


II.jpg


Click the eyedropper on the area you want to select.

Areas of the same tonal value will be captured throughout the entire image.

The grayscale preview shows the selected areas in white.

The tolerance slider allows you to reduce or enlarge the selected area.


III.jpg


In the Channels tab, an alpha channel is created as a mask (green arrow) which can be saved (red arrow).


IV.jpg


The alpha channel as a gray value mask.


V.jpg


Loading the mask as a selection.


VI.jpg


Click on RGB. The image with the selection will now appear.


VII.jpg


Creating a Hue/Saturation Adjustment Layer.


VIII.jpg


Now you can edit the selected area with the saturation slider.

Reducing the saturation makes the color cast disappear or lessens it.


IX.jpg


The adjustment layer can be seen in the Layers tab and can be deactivated by clicking on the eye icon to see the image in its previous state.

With Layer - Merge Layer to Background, the adjustment layer is permanently merged into the image. Changes are no longer possible.
 
OP
OP
Andreas Thaler

Andreas Thaler

Subscriber
Joined
Nov 19, 2017
Messages
4,822
Location
Vienna/Austria
Format
35mm
200.jpg


The adjustment layer mask can be adjusted.


300.jpg


To partially delete the effect, for example, you can select the brush in the tool palette with the color black.


100.jpg


When you paint over the image, the effect is removed. The color cast is visible again.


400.jpg


The edits are visible on the mask in the alpha channel.

The mask can, of course, also be edited with other tools and varying opacity.

The effect can be applied to varying degrees by using shades of gray.
 
OP
OP
Andreas Thaler

Andreas Thaler

Subscriber
Joined
Nov 19, 2017
Messages
4,822
Location
Vienna/Austria
Format
35mm
One of the few plugins I've been using for years are PhotoKit™, PhotoKit Sharpener™, and PhotoKit Color™ from PixelGenius.

Now freeware, they allow for subtle color and tonal adjustments.

These tools utilize Photoshop's capabilities, and you can continue editing photos in Photoshop as usual.

For example, you can save the changes as adjustment layers, which can then be further edited as desired.


AAA.jpg


Here I use the RSA Color Correction Set from PhotoKit Color 2 to correct color casts.


BBB.jpg


One of the three filters usually comes close to the desired result, here it is RSA Gray Balance Fine.


CCC.jpg


If desired, the filter is automatically created as an adjustment layer with a layer mask that can be edited.


DDD.jpg


Here I edited the layer mask with a black brush to exclude this area in the image.
 
OP
OP
Andreas Thaler

Andreas Thaler

Subscriber
Joined
Nov 19, 2017
Messages
4,822
Location
Vienna/Austria
Format
35mm
Removing color casts with the Channel Mixer as an adjustment layer

This technique is older; it was developed when Photoshop did not yet have the convenient setting options with the Camera Raw filter, which is specifically designed for photo editing.


1.jpg


Setting a measurement point to the reference point for gray.


2.jpg


Creating a channel mixer adjustment layer.


3.jpg


The RGB values for the reference point are shown at the bottom left of the Info palette.

89, 91, and 78 indicate that the location is not color-neutral.


4.jpg


The channel mixer allows you to change the proportions of the three colors red, green, and blue.

The info palette shows the set values.

89 (RED) should be the target value for all three channels.

Here I adjust the green channel.


A5.jpg


All three channels are now set to 88 (89 could not be achieved for all channels, but that does not matter as long as all channels have the same value).


A6.jpg


So the reference point is set to color-neutral gray and the color cast is removed.
 
OP
OP
Andreas Thaler

Andreas Thaler

Subscriber
Joined
Nov 19, 2017
Messages
4,822
Location
Vienna/Austria
Format
35mm
Post-processing with photo filters

After removing a color cast, images almost always require some post-processing.

Often, complete removal isn't desirable, because in reality, for example, the skylight or other colors in the surroundings are reflected.

The photo filters in Photoshop can be used intuitively as adjustment layers for toning photos that have already been de-colored.


Alpha.jpg


Warming Filter (85) preset.


B.jpg


Cooling Filter (80) adjustet.


If the photo filters are created as an adjustment layer, you can add a layer mask and edit the effect, for example with the brush.
 
OP
OP
Andreas Thaler

Andreas Thaler

Subscriber
Joined
Nov 19, 2017
Messages
4,822
Location
Vienna/Austria
Format
35mm
Color cast removal with plug-ins

If removing color casts in Photoshop is too complex or time-consuming for you, you can also use plug-ins.


0.jpg


Here I have an older version of the well-known NIK filters, which was adopted by DXO.


000.jpg


This allows you also to easily add color casts at the touch of a button 😉

What is pleasing about these filters is that they already allow for many setting options in the application and can, if desired, be created as a setting level for further selective processing.


These are the techniques I use for color cast removal.

There are many other options and tools available.

I've yet to encounter a perfect color cast removal at the touch of a button.

You can see it in my sample photos: regardless of the technique, the photos usually require selective post-processing.

With strong color casts, areas often have to be masked to be edited independently.

Film scans don't always work as well as raw files from digital cameras, which are much more robust when it comes to color correction.

But that's film - it has character 😌
 
Last edited:
OP
OP
Andreas Thaler

Andreas Thaler

Subscriber
Joined
Nov 19, 2017
Messages
4,822
Location
Vienna/Austria
Format
35mm
To present the image, I would correct it like this:

Y.jpg


At which I am very satisfied with the 100 percent view:

X.jpg


11. Nov. 2024; Portra 800; Nikon F4E; Nikkor 24/2.8 AF-D; Wien
 
Last edited:
OP
OP
Andreas Thaler

Andreas Thaler

Subscriber
Joined
Nov 19, 2017
Messages
4,822
Location
Vienna/Austria
Format
35mm
IMG_6932.jpeg


The Nikkor 24/2.8 AF-D produces wavy distortion, which I was only able to partially remove with the Camera Raw filter in Photoshop. Compare the two magenta lines with the (imaginary) straight lines in the image.

I'll be using the PTLens plug-in here, which likely has a correction profile for this lens as well.

Unfortunately, PTLens is no longer being developed, but it's still the best correction tool for removing distortion for many older lenses.

Distortion of straight lines is unsightly. Even if I want to preserve the characteristics of my lenses, this must be addressed 😌

I'll be demonstrating this tomorrow.
 
OP
OP
Andreas Thaler

Andreas Thaler

Subscriber
Joined
Nov 19, 2017
Messages
4,822
Location
Vienna/Austria
Format
35mm
Distortion correction with PTLens


A.jpg


PTLens includes a variety of lens profiles, including profiles for classic lenses like the Nikkor 20/2.8 AF-D used here, which produces noticeable wave-like distortion.

It's easy to use.

The image is loaded either via the standalone application or the Photoshop plug-in version of PTLens.

If EXIF data is available, the corresponding profile is automatically selected. If not, as in this case, you search manually in the profile directory.

On the left is the original photo and on the right is the corrected version.

I also contributed to this a few years ago and sent test photos for some FD lenses to the author, who then created the profiles and added them to the directory 😌

PTLens is no longer available for download on the author's website,


but Google finds this link

 
Last edited:
OP
OP
Andreas Thaler

Andreas Thaler

Subscriber
Joined
Nov 19, 2017
Messages
4,822
Location
Vienna/Austria
Format
35mm
Tone adjustment with adjustment layers


1.jpg


In this photo I want to darken the bright area in the top right.

There are several ways to do this.

One, perhaps the most intuitive, is the Burn tool.

With this tool, you move over the area you want to edit to achieve darker tonal values, just like in a darkroom.

The disadvantage is that it's a destructive method, meaning the image is irreversibly altered.

Adjustment layers offer more flexibility.

They are placed over the image and can be adjusted and modified as desired until you decide to merge them with the image.


2.jpg


3.jpg


In the Layers palette, I select the Curve tool. This does not change the image.

This tool allows you to selectively adjust the image.

But I'll choose a different method that I find easier.

Note that the adjustment layer is created along with a layer mask (white here). We'll need it shortly.


4.jpg


Using layer modes, an adjustment layer can be blended with the underlying image in various ways.

I use the "Multiply" mode to darken the image.

The effect is immediately visible, but not yet permanently applied to the image.

The opacity slider can be used to adjust the strength of the effect.

However, I don't want to darken the entire image, just the bright part in the top right.


5.jpg


In the tool palette I select the gradient tool.


6.jpg


With the layer mask clicked, I drag the tool diagonally across the photo and observe the effect.

The gradient is applied only to the layer mask. This means that the adjustment layer affects the image where the mask is white or gray. Black does not cause any changes.

Everything can be changed at any time, added with additional adjustment layers, or deleted. The image is not yet permanently altered.

I'll leave it at that setting.


7.jpg


For comparison, I have deactivated the adjustment layer here.


0.jpg


Once editing is complete, the adjustment layer is permanently merged with the image using "Layer - Merge to Background Layer".


You can edit the layer mask as desired, for example, using the brush instead of the gradient tool.

To do this, invert the adjustment mask from white to black. This deactivates the effect.

A white brush, ideally here set to soft, applies the effect at 100 percent. A medium gray brush applies it at 50 percent. Alternatively, you can also control the strength of the effect with the layer opacity.
 
Last edited:

Chan Tran

Subscriber
Joined
May 10, 2006
Messages
6,803
Location
Sachse, TX
Format
35mm
Hardware for image editing with Photoshop: Investment is worthwhile, but only at longer intervals

Photoshop is more enjoyable to work with the more hardware resources it can utilize.

Here, I'm getting a powerful PC with a monitor for professional use that will last for arround ten years, extended on-site manufacturer's warranty included. It's a larger investment, but it's worth it.

So after eleven years I have just replaced my HP Workstation Z230 with Eizo CG243W with the combination below.

I've never had a problem, and if Microsoft hadn't ended support for Windows 10 this fall, I would have continued using it. However, the computer was starting to struggle with Photoshop, and displaying images in Adobe Bridge (a digital asset organization tool and file browser) was taking increasingly longer.

HP Z2 G9 Workstation
  • i9 14900K 14. Generation 24-Core
  • 64GB RAM DDR5 4,8 GHz
  • 2x2 TB NVMe SSD
  • Windows 11 Pro
  • NVIDIA RTX A4000 ADA 20 GB
  • 10TB HDD Ironwolf Pro

Monitor EIZO CG 2700 X

This monitor is larger and has an even higher resolution, which is also good for your eyes 😌

With this configuration, editing image files with high pixel counts and layers runs smoothly, which is also noticeable when dragging the sliders in Photoshop; everything runs without lag. Image previews in Bridge and Windows File Explorer are created quickly.

Of course, it is also possible with a smaller budget, especially if you work with less high-resolution image files and do not use adjustment layers that require resources.


Color management is a must

Anyone who spends hours editing images in Photoshop wants the colors they see and correct on the monitor to also appear on the printer and on other screens and displays. Without color management, disappointment is inevitable.

The topic is simpler today than it was a few years ago. The monitor either calibrates and profiles itself, or you do it using a measuring device. This brings the monitor to standard values and creates a color profile that describes how the monitor interprets RGB values. This is different for every device.

Color management captures this profile and compares it with the color profiles of other devices, such as a printer. The result is largely consistent colors without major deviations; a print reflects light while a monitor emits it. This must be taken into account with regard to color intensity and viewing environment.

Easy-to-use color management tools are now available for calibrating and profiling printers:


Why don't you use Eizo software so that you can do hardware calibration of your monitor?
 

albireo

Member
Joined
Nov 15, 2017
Messages
1,398
Location
Europe
Format
Multi Format
Hi, thanks for sharing this.

You are doing a lot of post processing after the already processed output of NLP.

I don't use NLP (I don't use or need Adobe Lightroom) but I thought you pay for NLP (and pay dearly) for it to give you a usable, and sometimes bang-on inversion out of the box and spare you the need for further lengthy processing?

If post-processing is something you enjoy or master (I don't) why not simply manually invert using the curves (e.g. Koraks' method), and then tweak as above?
 
OP
OP
Andreas Thaler

Andreas Thaler

Subscriber
Joined
Nov 19, 2017
Messages
4,822
Location
Vienna/Austria
Format
35mm
This clearly shows the difference between Photoshop and other image editing programs, such as Adobe Lightroom.

With Photoshop, you can literally change every pixel, but there's no predefined workflow; you have to gather the tools yourself and use them selectively.

Lightroom is ideal for quickly making global adjustments to a large number of photos, but less so for making detailed changes.

You can combine the two programs, which makes sense, as this allows you to edit the photos that need detailed changes.
 
OP
OP
Andreas Thaler

Andreas Thaler

Subscriber
Joined
Nov 19, 2017
Messages
4,822
Location
Vienna/Austria
Format
35mm
Why don't you use Eizo software so that you can do hardware calibration of your monitor?

I'm using Color Navigator 7 with the new Eizo monitor.

This saves the monitor profile in Windows 11 and integrates it into the color management system.

Alternatively, a colorimeter or spectrophotometer can also be used, but I already have a sensor integrated into the monitor.

However, other tools are needed for calibrating and profiling printers and scanners; see the link to X-Rite above.
 
Photrio.com contains affiliate links to products. We may receive a commission for purchases made through these links.
To read our full affiliate disclosure statement please click Here.

PHOTRIO PARTNERS EQUALLY FUNDING OUR COMMUNITY:


Ilford ADOX Freestyle Photographic Stearman Press Weldon Color Lab Blue Moon Camera & Machine
Top Bottom