How do you scan Velvia 50?

Kentmere 200 Film Test

A
Kentmere 200 Film Test

  • 0
  • 0
  • 6
Full Saill Dancer

A
Full Saill Dancer

  • 0
  • 0
  • 54
Elena touching the tree

A
Elena touching the tree

  • 6
  • 6
  • 137
Graveyard Angel

A
Graveyard Angel

  • 8
  • 1
  • 115
Norfolk coastal path.

A
Norfolk coastal path.

  • 3
  • 4
  • 142

Recent Classifieds

Forum statistics

Threads
197,767
Messages
2,763,931
Members
99,463
Latest member
Antaras
Recent bookmarks
0

Ariston

Member
Joined
Jan 20, 2019
Messages
1,658
Location
Atlanta
Format
Multi Format
I developed my first roll of Velvia 50 and, thankfully, didn't screw it up. The colors are amazing... on my light table. But I am having trouble getting the scan to look as good as the negative. I have posted a frame with the best I can do with added processing, but is there something I can do to get the scan to look more like the negative right out of the scanner?

I use the Epson V550. I have everything off except "color restoration" and "color control: continuous auto exposure".

I have tried it without color correction and there is a weird color cast to the film. I am thinking about downloading Silverfast to see if they have a Velvia profile that does better...

Velvia RVP 50 Amicalola012 (2) resized.jpg
 

1kgcoffee

Member
Joined
Jan 19, 2017
Messages
500
Location
Calgary
Format
Medium Format
You need to go to the levels control. First crop theoff so so the rebate is not visible. Then set the dmax and dmin to level that you see fall off. Next go down to red green blue separately and set minimum and maximum levels. You can fine-tuned he's to get colour balance that is more agreeable to you. you can also change the curve levels but I do not do this. Now you can expand crop and scan.

It will never look as good as on the loght table but it's not too bad.
 
Joined
Aug 29, 2017
Messages
9,295
Location
New Jersey formerly NYC
Format
Multi Format
Congratulations. I love Velvia 50. I shoot 120 medium format and scan on a V600, very similar to your V550. I use Epsonscan software also. Never have used other scan software. I scan at 2400, 16 bit. Save scans as tiffs. Here are my Velvia 50 scans.
https://www.flickr.com/search/?sort...1&tags=velvia&user_id=55760757@N05&view_all=1

Do not use "Color Restoration" That's for faded prints or faded film, not for properly exposed film or prints that have normal color.

Some methods I have used: 1. Scan on Auto. Uncheck sharpening. Save that for post processing and sharpen a lot. Problem with Auto, is you might clip especially the white.
2. Scan flat totally. Click on Configuration button at bottom. Check the third button down to shut off all adjustments. Uncheck everything on the first panel as well. The resultant scan may look dark and faded colors. But once you adjust Levels (black and white points) in post processing program, the colors and exposure will be near normal. Then adjust to taste. Sharpen a lot, maybe 125. YOu'll have to pay with this until you learn the best for yourself. Remove all dust spots using the clone or other spot removal brash.
3. An in-between approach. Click COnfiguration and then click top button but unclick Auto COlor COrrect. Then go back to first panel and click on Histogram. Set levels by placing the left and right arrow just outside where the black and white ends are. Leave middle arrow alone. Change output to 0 and 255. Uncheck any sharpening or anything else. You can select ICE to eliminate most dust spots. But it doubles the scan time. Or you can wait to do spot removal in post. Sharpen a lot maybe 125.

Finally, I don;t try to match the colors on the film itself. The colors you'll get from the above will look like the ones on my Flickr page. Plus, no one including you will compare the results with the slide film in their other hand. As long as the colors look great to you, and they will, who cares if they don't exactly match? Trust me. They will look pretty close anyway.

Good luck. Tell us had to made out and post some photos.
 
Joined
Aug 29, 2017
Messages
9,295
Location
New Jersey formerly NYC
Format
Multi Format
You need to go to the levels control. First crop theoff so so the rebate is not visible. Then set the dmax and dmin to level that you see fall off. Next go down to red green blue separately and set minimum and maximum levels. You can fine-tuned he's to get colour balance that is more agreeable to you. you can also change the curve levels but I do not do this. Now you can expand crop and scan.

It will never look as good as on the loght table but it's not too bad.
Good point about the rebate. I use the auto setting or if that doesn't work, then I set the crop zone manually. Once you set the first one, you can copy the crop size and paste the copy over the other images. I don't bother setting each of the three red green blue separately, just the one overall. What do you mean by "setting the dmax and dmin to levels that don't fall off"? What do you mean by "Now you can expand crop and scan."
 
Joined
Aug 29, 2017
Messages
9,295
Location
New Jersey formerly NYC
Format
Multi Format
One other thing. The advantage of scanning totally flat is that it's fast - it takes me three minutes to scan three 6x7 medium format images without ICE. Also, you never have to scan again. If you do adjustments during the scan rather than in post, and later you don't like the results or just want to change it, you have to go find the film and scan it again. Also, you have to then repeat the removals of the dust spots.

Try it different ways and see what approach works best for you. Everyone develops their own methods. It can be frustrating at times. Don't blow your brains out. I promise it will get easier. :smile:
 
OP
OP

Ariston

Member
Joined
Jan 20, 2019
Messages
1,658
Location
Atlanta
Format
Multi Format
You need to go to the levels control. First crop theoff so so the rebate is not visible. Then set the dmax and dmin to level that you see fall off. Next go down to red green blue separately and set minimum and maximum levels. You can fine-tuned he's to get colour balance that is more agreeable to you. you can also change the curve levels but I do not do this. Now you can expand crop and scan.

It will never look as good as on the loght table but it's not too bad.
Thanks for the tips! - I do make sure the rebate is out of the frame.

Congratulations. I love Velvia 50. I shoot 120 medium format and scan on a V600, very similar to your V550. I use Epsonscan software also. Never have used other scan software. I scan at 2400, 16 bit. Save scans as tiffs. Here are my Velvia 50 scans.
https://www.flickr.com/search/?sort=date-taken-desc&safe_search=1&tags=velvia&user_id=55760757@N05&view_all=1

Do not use "Color Restoration" That's for faded prints or faded film, not for properly exposed film or prints that have normal color.

Some methods I have used: 1. Scan on Auto. Uncheck sharpening. Save that for post processing and sharpen a lot. Problem with Auto, is you might clip especially the white.
2. Scan flat totally. Click on Configuration button at bottom. Check the third button down to shut off all adjustments. Uncheck everything on the first panel as well. The resultant scan may look dark and faded colors. But once you adjust Levels (black and white points) in post processing program, the colors and exposure will be near normal. Then adjust to taste. Sharpen a lot, maybe 125. YOu'll have to pay with this until you learn the best for yourself. Remove all dust spots using the clone or other spot removal brash.
3. An in-between approach. Click COnfiguration and then click top button but unclick Auto COlor COrrect. Then go back to first panel and click on Histogram. Set levels by placing the left and right arrow just outside where the black and white ends are. Leave middle arrow alone. Change output to 0 and 255. Uncheck any sharpening or anything else. You can select ICE to eliminate most dust spots. But it doubles the scan time. Or you can wait to do spot removal in post. Sharpen a lot maybe 125.

Finally, I don;t try to match the colors on the film itself. The colors you'll get from the above will look like the ones on my Flickr page. Plus, no one including you will compare the results with the slide film in their other hand. As long as the colors look great to you, and they will, who cares if they don't exactly match? Trust me. They will look pretty close anyway.

Good luck. Tell us had to made out and post some photos.
Alan, when I scan flat, it has a weird color cast that is most definitely not in the film. It seems like it would be MORE work to correct this in post. Does yours give a weird color cast? I will scan one flat when I get a chance and upload it so you can see what I mean. 120 is definitely next for me once I have this down pat. This film is unbelievably beautiful, and it is expired film I got from Matt!
 
Joined
Aug 29, 2017
Messages
9,295
Location
New Jersey formerly NYC
Format
Multi Format
Don't use expired film. You're worth fresh film. Are the colors right on the film? With transparency like Velvia you can tell. But with negative color film, you don;t know what you got. Stick with fresh film.

In any case, scanning flat will give you dark results with colors not right. Once you move the histogram levels (white and black points), (before scan or in post) everything will jump into correct color and exposure. Maybe only a little tweaking afterwards. IF you find it easier to adjust levels with Epsonscan, then do that. Just make sure you're not clipping because you won;t be able to correct in post.
 
OP
OP

Ariston

Member
Joined
Jan 20, 2019
Messages
1,658
Location
Atlanta
Format
Multi Format
The colors are spot on looking at the light table. It seems to have been stored well. In any case, I won't buy more, because I want to incentivize Fuji to keep making it. I bought a batch to learn with.
Don't use expired film. You're worth fresh film. Are the colors right on the film? With transparency like Velvia you can tell. But with negative color film, you don;t know what you got. Stick with fresh film.

In any case, scanning flat will give you dark results with colors not right. Once you move the histogram levels (white and black points), (before scan or in post) everything will jump into correct color and exposure. Maybe only a little tweaking afterwards. IF you find it easier to adjust levels with Epsonscan, then do that. Just make sure you're not clipping because you won;t be able to correct in post.
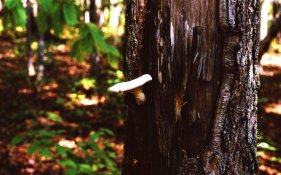
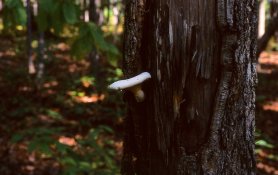
Thank you for all the help, Alan. I think I am getting the hang of it with a lot of trial and error. Here is my latest attempt, though I seem to have a halo around the mushroom. Regardless, I am loving this film!

Velvia RVP 50 Hiawasee027 Resized.jpg
 
OP
OP

Ariston

Member
Joined
Jan 20, 2019
Messages
1,658
Location
Atlanta
Format
Multi Format
i'll have to pull out the negative and look - I may have had to choose between the shadows and the highlight, I can't remember. I'm not great at post processing, because I hate being in front of a computer.

I'll have to get used to the limited range of this film. I have a lot of shots where I was unable to get everything I wanted, but it's helping me learn, and from what I see it is worth the effort.

Thank you for the help!
 

MattKing

Moderator
Moderator
Joined
Apr 24, 2005
Messages
52,120
Location
Delta, BC Canada
Format
Medium Format
This film is unbelievably beautiful, and it is expired film I got from Matt!
Don't use expired film. You're worth fresh film. Are the colors right on the film? With transparency like Velvia you can tell. But with negative color film, you don;t know what you got. Stick with fresh film.
I resemble that :D!
Alan's advice is generally good, but that frozen Velvia batch I sold recently was/is in excellent condition.
Or at least that is what my tests and my customers have told me.
By the way, you aren't working with a negative, you are working with a slide or transparency (take your pick).
And my overwhelming reaction is that you are using too much contrast!
 
OP
OP

Ariston

Member
Joined
Jan 20, 2019
Messages
1,658
Location
Atlanta
Format
Multi Format
I resemble that :D!
Alan's advice is generally good, but that frozen Velvia batch I sold recently was/is in excellent condition.
Or at least that is what my tests and my customers have told me.
By the way, you aren't working with a negative, you are working with a slide or transparency (take your pick).
And my overwhelming reaction is that you are using too much contrast!
Ha! I realized I had said negative but didn't bother fixing it because I didn't think the term confused anyone.

I will look at the contrast, but it was a quick job trying to get the punchiness into the scan that I see in the "negative". Like I said, I really don't like post processing, so it is something I will have to work at. But hey, if I enjoy a lot of contrast, so be it! :D

The main struggle is balancing the scan side and the post-scan side of the work. I think I have got the scan to where it gives me the most options with processing, but nothing is coming close to the look of the film. It is SATURATED... and quite contrasty, to be honest.

EDIT: Another thing that is making this hard for me is how different it looks on different screens! I do not have any expensive monitors, and they certainly aren't calibrated.
 

MattKing

Moderator
Moderator
Joined
Apr 24, 2005
Messages
52,120
Location
Delta, BC Canada
Format
Medium Format
Two shots from the batch - one in extremely mixed lighting. Apologies that the other still has too much dust.
08b-2015-11-08-res-800.jpg 38k-2015-11-08-res-800.jpg
 
Joined
Aug 29, 2017
Messages
9,295
Location
New Jersey formerly NYC
Format
Multi Format
I resemble that :D!
Alan's advice is generally good, but that frozen Velvia batch I sold recently was/is in excellent condition.
Or at least that is what my tests and my customers have told me.
By the way, you aren't working with a negative, you are working with a slide or transparency (take your pick).
And my overwhelming reaction is that you are using too much contrast!
Matt, I didn't mean to include frozen film. I have some expired Velvia right now, but it's in the freezer. Heck, I might actually have a roll or two in the car getting older as well. I try to encourage people to use fresh film. It's hard enough to scan correctly exposed film with good colors. Adding the problems of film shifting just doesn;t seem worth it. It costs so much for gas just to drive around to get the shots. Then you have to pay the pro lab and post office to handle developing and shipping. My time is worth it too. What if you get the shot of a lifetime only to see it ruined because the film is old? Any savings from buying expired film is an illusion from my standpoint. I understand film is getting expensive. But I don't think that's the place to save money.
 
Joined
Aug 29, 2017
Messages
9,295
Location
New Jersey formerly NYC
Format
Multi Format
OP
OP

Ariston

Member
Joined
Jan 20, 2019
Messages
1,658
Location
Atlanta
Format
Multi Format
Well, that didn't last! I tried to develop two more rolls while hanging out with my son, and grabbed the 1st Developer again... instead of the blix!

The feeling of victory has been snatched away.

Sadface.
 
OP
OP

Ariston

Member
Joined
Jan 20, 2019
Messages
1,658
Location
Atlanta
Format
Multi Format
Revisiting the blown out mushroom - The film is fine, the mushroom is not blown out. I re-scanned again, and again made sure that the full histogram was being scanned, but it still came out clipped. When I scanned super-flat and dark, as Alan suggested, the detail was there. However, there is still a halo around the mushroom that I don't know how to get rid of. This seems to be an artifact of scanning around a bright spot, and I do not have the processing skill to remove it. Flat scan below:

Mushroom Test002 resized.jpg


And here it is with level adjustments and sharpening... and with the halo still there:

Mushroom Test Edited.jpg
 

1kgcoffee

Member
Joined
Jan 19, 2017
Messages
500
Location
Calgary
Format
Medium Format
Good point about the rebate. I use the auto setting or if that doesn't work, then I set the crop zone manually. Once you set the first one, you can copy the crop size and paste the copy over the other images. I don't bother setting each of the three red green blue separately, just the one overall. What do you mean by "setting the dmax and dmin to levels that don't fall off"? What do you mean by "Now you can expand crop and scan."

I've found that epson scan doesn't always do a great job with the colour balance, especially WRT to negative colour film. But I'm OCD with these sorts of things.

What I mean is about setting dmax and dmin in the levels adjustment (or histogram) is to set the black point to the lowest observable point, and the white point to the highest. Sometimes I clip the whites a little. Epson scan will usually clip a substantial amount of information from the negative.
 

1kgcoffee

Member
Joined
Jan 19, 2017
Messages
500
Location
Calgary
Format
Medium Format
I crop only the image itself, leaving out the black border so that the black point is whatever is in the image, and so as to not interfere with the colour balance. Then I crop the border back in so I have the full image to work with, but with the colour balance and levels of the image.
 
Photrio.com contains affiliate links to products. We may receive a commission for purchases made through these links.
To read our full affiliate disclosure statement please click Here.

PHOTRIO PARTNERS EQUALLY FUNDING OUR COMMUNITY:


Ilford ADOX Freestyle Photographic Stearman Press Weldon Color Lab Blue Moon Camera & Machine
Top Bottom