- Joined
- Jul 28, 2009
- Messages
- 76
- Format
- Medium Format
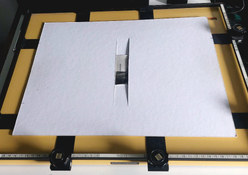
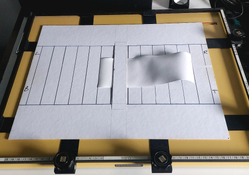
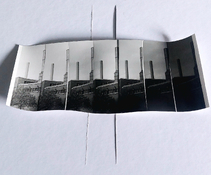
As we all know, making a test strip by progressive exposures produces an arithmetic series of times: not deal when exposure follows an exponential curve.
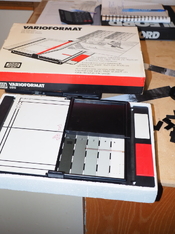
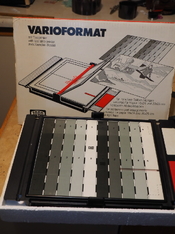
Back when my college had a color darkroom, we were able to make test prints with 10 individual filter combos because we had these ingenious printing frames. They had, for lack of the better word, swinging "doors" on them. Two rows of five. Great in the monochrome darkroom too because we didn't have to rely on the fussy test print method, and we could test out different contrast filters.
I don't know if these things exist anymore, and I don't even know what to call them. We called them "barn doors," which seems unlikely to turn up any matches on eBay.
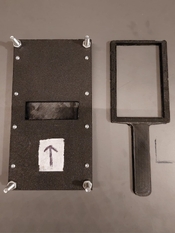
I made a very primitive version by taking one half of an 8x10 paper box, taking the cardboard insert that fits inside it, cutting it into 5 pieces, and attaching little knobs to each. But it wasn't a great solution.
Have you ever worked with similar devices, and were they always DIY? Thanks.
Back when my college had a color darkroom, we were able to make test prints with 10 individual filter combos because we had these ingenious printing frames. They had, for lack of the better word, swinging "doors" on them. Two rows of five. Great in the monochrome darkroom too because we didn't have to rely on the fussy test print method, and we could test out different contrast filters.
I don't know if these things exist anymore, and I don't even know what to call them. We called them "barn doors," which seems unlikely to turn up any matches on eBay.
I made a very primitive version by taking one half of an 8x10 paper box, taking the cardboard insert that fits inside it, cutting it into 5 pieces, and attaching little knobs to each. But it wasn't a great solution.
Have you ever worked with similar devices, and were they always DIY? Thanks.