How do meter and ultimately produce an image that is always in shadow?

spain

A
spain

  • 1
  • 0
  • 34
Humming Around!

D
Humming Around!

  • 4
  • 0
  • 57
Pride

A
Pride

  • 2
  • 1
  • 124
Paris

A
Paris

  • 5
  • 1
  • 199

Recent Classifieds

Forum statistics

Threads
198,419
Messages
2,774,693
Members
99,611
Latest member
Toonces
Recent bookmarks
0

hoffy

Member
Joined
Jan 21, 2009
Messages
3,071
Location
Adelaide, Au
Format
Multi Format
Recently I have started a little project (maybe, who knows, I never go through with these things).

This project involves architecture photography. On the weekend I went to shoot a building, that's facing SSW*. In Australia, this pretty much means the front of the building will always be in shadow.

I decided to get up early to take it just after sunrise. Thankfully it was a bit overcast, so the light was (hopefully) OK. I metered it straight on.

It got me thinking - if I had travelled a long distance and it was a clear morning, how would have I metered it as to not blow out the sky? My thoughts would be to meter just for the shadows in the building and deal with it post later (whether digitally or under the enlarger).

I'm curious to understand how others handle this situation.

Cheers

*I'm assuming that for those in the norther hemisphere, it would equate to a building facing N to NNE
 

Sirius Glass

Subscriber
Joined
Jan 18, 2007
Messages
50,306
Location
Southern California
Format
Multi Format
I would use my Pentax Digital Spot Meter set on box speed and use that reading set to Zone 2 or 3 to get the Zone 5 setting. Then take that Zone 5 setting to set the camera.
 

wiltw

Subscriber
Joined
Oct 4, 2008
Messages
6,431
Location
SF Bay area
Format
Multi Format
If the shot were taken digitally, and shot RAW, one could determine what exposure places mid-tone subject area in the middle of the histogram, let the shadow areas fall where they may, then brighen the shadows during post processing the RAW files.

If the shot were using film, then you have three approaches...
  1. shoot as above and understand the shadow ares are simply portrayed at their brightness of the scene, or
  2. shoot knowing that you are recording the shadow areas a bit brighter, with skies brightened a similar amount
  3. shoot as in #1, but lift the shadows with supplmental lighting (flash)
What you wish to achieve in the shot is what approach should be taken.
 
OP
OP
hoffy

hoffy

Member
Joined
Jan 21, 2009
Messages
3,071
Location
Adelaide, Au
Format
Multi Format
What you wish to achieve in the shot is what approach should be taken.
Valid point.
Ultimately, I want to ensure that the main facade of the building is properly exposed. There is a porch, which I am happy to be exposed as in shadow. I would like to not completely blow out the sky, but if I did, so be it.

In this instance, I metered using an incident meter, for the main facade.
 

wiltw

Subscriber
Joined
Oct 4, 2008
Messages
6,431
Location
SF Bay area
Format
Multi Format
Valid point.
Ultimately, I want to ensure that the main facade of the building is properly exposed. There is a porch, which I am happy to be exposed as in shadow. I would like to not completely blow out the sky, but if I did, so be it.

In this instance, I metered using an incident meter, for the main facade.
But the subjective part is what exactly is 'properly exposed'?! If you recorded for inherent scene brightness, is that for the sunny conditions behind the house facade, or is it for the shady conditions in which the front of house lies? Sunny 16 or Shady 5.6? And that comes back to 'what do I want to achieve'?
  1. With one you get nice blue skies but somewhat dark detail in the shade.
  2. With the other, you get nicely exposed house facade but unsaturated overexposed sky.
  3. You might expose for something 'in between' f/16 and f/5.6
With film you can only supplement the amount of light falling into the shaded front. With digital you have control of the Shadow control during postprocessing of RAW files.

[edit: I just shot this to exemplify what I wrote above. I did no posprocessing to lighten shadows, mimicing the inability to alter film shots.]
sunny_between_shade.jpg


My side fence in shade, clear blue sky in background. First shot Sunny 16, third shot Shady 5.6, second shot 'in between', all shot at ISO 400:
  1. 1/1250 f/10
  2. 1/400 f/10
  3. 1/125 f/10
The series exemplifies the fact that unless you use supplemental lighting to brighten shadow areas, the sky will be colorless.
 
Last edited:
Joined
Sep 10, 2002
Messages
3,583
Location
Eugene, Oregon
Format
4x5 Format
Classic backlit subject. There are a couple approaches.

One I use often is to wait for an overcast day with featureless sky behind the façade. Then just meter for the façade, placing the dark areas in the desired Zone and developing (or using the appropriate paper grade) to get the lighter areas on the façade where you want them and then just simply letting the sky go blank white. This was a really common approach in the days of blue-sensitive and orthochromatic films and is still really aesthetically valid.

If you want to keep detail in the sky/clouds/background, you can also try compensating development (assuming you're working in black-and-white), pre-flashing the printing paper to hold highlights, etc. Good old print manipulations like dodging and burning help here a lot. If you really don't want to "blow out the sky" and you're making darkroom prints, exposing and developing "normally" and then using split-grade printing techniques in addition to all the other tools available is one way to optimize the rendition of such a scene.

Lots of black-and-white tricks are available; many fewer if you're working with color. In this latter case, lighting is everything; waiting for the proper light (think time of day and cloud conditions), using some fill-in (maybe there's a building across the street that, when lit, reflects fill light back on to the façade you're trying to photographs, etc.

Then there's always re-thinking the composition, or just abandoning the shot altogether.

Best,

Doremus
 
Last edited:
Joined
Jan 31, 2020
Messages
1,280
Location
Germany
Format
Multi Format
I wouldn't worry about the sky. One way to think of it: the orientation is an essential part of the architecture, so it that side is always backlit, portray it that way.
 

Sirius Glass

Subscriber
Joined
Jan 18, 2007
Messages
50,306
Location
Southern California
Format
Multi Format
I wouldn't worry about the sky. One way to think of it: the orientation is an essential part of the architecture, so it that side is always backlit, portray it that way.

Including the sky, especially for a back lit subject where the dark shadow details are desired, is a good way to mess up all the work done. I never take a light reading of the sky. The sky will always end up as it is supposed to be and we do not need to help it. [The sky is big enough to take care of itself.]
 

MattKing

Moderator
Moderator
Joined
Apr 24, 2005
Messages
52,607
Location
Delta, BC Canada
Format
Medium Format
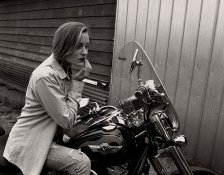
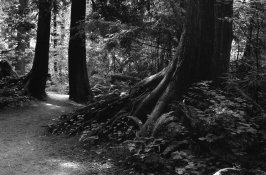
Many of my best people photos were exposed using open sky illumination - essentially soft, in shadow light.
Make use of the light in the form it presents. If we expect to see shadows where shadows are found, the exposure will work:
46b-res.jpg
Or perhaps:
Forest Path-Near & Far 3.jpg
 
Last edited by a moderator:

reddesert

Member
Joined
Jul 22, 2019
Messages
2,377
Location
SAZ
Format
Hybrid
The eye and brain can process a larger dynamic range than photographic detectors (film or digital) can usually handle at one shot, or than can be represented on paper or a monitor. So these problems of making a high-contrast scene look natural are always around.

Another approach that I don't think has been mentioned yet is to selectively darken the sky with a yellow filter (for B&W film) or a polarizer. With a polarizer, the darkening of blue sky depends on the angle to the sun, so choosing the time of day can help. It can make distracting gradients with wide angle lenses that take in a lot of sky, though.
 

gone

Member
Joined
Jun 14, 2009
Messages
5,505
Location
gone
Format
Medium Format
Your film choice and development will greatly influence things here, otherwise you'll just get what you describe, grey values. Tri-X, Rodinal, overdevelopment, overexposure, Delta 3200, these are some things that should help. The last thing you want to deal w/ is a weak negative that has flat values.
 
Joined
Aug 29, 2017
Messages
9,360
Location
New Jersey formerly NYC
Format
Multi Format

Sirius Glass

Subscriber
Joined
Jan 18, 2007
Messages
50,306
Location
Southern California
Format
Multi Format
So, you advise the OP to place the building --main subject-- as low as Zone 2
?? I beg to differ.

I would not put it in Zone 2, that would be the OP's decision. I would put it in Zone 3 or Zone 4, making the decision when I am there to evaluate the situation. I was stating advice to be used in general at the discretion of the photographer at that place and time using their own experience.
 

wiltw

Subscriber
Joined
Oct 4, 2008
Messages
6,431
Location
SF Bay area
Format
Multi Format
I would not put it in Zone 2, that would be the OP's decision. I would put it in Zone 3 or Zone 4, making the decision when I am there to evaluate the situation. I was stating advice to be used in general at the discretion of the photographer at that place and time using their own experience.
As my photos in post 5 show, zone 2 placement is far too dark...even about Zone 3.66 is a bit dark.
 

John Koehrer

Subscriber
Joined
Apr 3, 2004
Messages
8,275
Location
Aurora, Il
Format
Multi Format
The ND grad isn't gonna help cuz it's a straight horizon that will darken the sky AND the front of the building.
Can you darken just the sky in post processing?


What is this "post processing" you speak of?:tongue:
 

Craig75

Member
Joined
May 9, 2016
Messages
1,234
Location
Uk
Format
35mm
Just stick a filter on if it's black and white.

Or just drop a sky into the picture afterwards.

Or just burn sky in if you want that grainy clouds effect.

That would be my three choices.
 
Photrio.com contains affiliate links to products. We may receive a commission for purchases made through these links.
To read our full affiliate disclosure statement please click Here.

PHOTRIO PARTNERS EQUALLY FUNDING OUR COMMUNITY:


Ilford ADOX Freestyle Photographic Stearman Press Weldon Color Lab Blue Moon Camera & Machine
Top Bottom