If you develop your own film, you'll have absolute control over your entire process, assuming that you do your own printing. The quality of your negatives will probably increase as well. On the flip side, if something goes wrong, you only have to look in the mirror for the reasons. This will allow you to better obtain a negative that will help you realize the initial visualization.
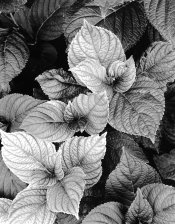
Regarding getting good blacks and whites, ensure that you're giving the negative ample exposure and sufficient development. This will ensure that you have good local contrast in the shadows (which will impart richness), and good separation in the highlights. Avoid underexposing your negatives, since your shadows will be thin, and you'll end up with flat black areas, which will lack depth. Overdevelop, and you'll loose separation in the highlights.
When printing, evaluate the negative you're printing. Is it highlight-dominant (a high-key image), or do shadows dominate? This will tell you how you want to approach the print. Personally, if a print is shadow-dominant, I'll work with the shadows, and then the highlights. For a normal contrast scene (both shadows and highlights), or a higher-key print, I'll work with the highlights first, then the shadows. This works for me, it may or may not work for you.
Also, realize that not every print needs a white and a black. Let the negative (and the contact print - you do make contact prints, right?) tell you how to print the image, in combination with your initial visualization.
Take lots of notes. Learn what works. Learn what doesn't. Experiment. Don't be afraid to fail. Strive to succeed.
And, above all -have fun.


