• Welcome to Photrio!
    Registration is fast and free. Join today to unlock search, see fewer ads, and access all forum features.
    Click here to sign up

HELP! Identify this stain

Recent Classifieds

Forum statistics

Threads
202,853
Messages
2,846,600
Members
101,570
Latest member
Justgregor
Recent bookmarks
0

boyreverend

Member
Allowing Ads
Joined
Sep 16, 2016
Messages
2
Location
NC
Format
Medium Format
open
Hi. See attached stain.

I just finished batch printing in 16x20 trays 5 11x14 prints from same negative.

2 minutes in ILFORD PQ, 10-20 seconds in Ilfostop, 4 minute Kodak rapid fix (part A), 5 minute running water, 5 minute Permawash, 5 minute running water (stain realized here).

I used tongs and my fingers interchangeably, but I think that I have done a good job of not cross-contaminating. Reckon not.

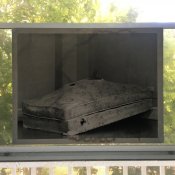
Where do I need to be more careful? This is a red/purple/brown/black stain on the front and back of image (see attached). Can anyone identify which of these chemicals made the stain? How come the stain is just on a couple?

Link to image here:
https://drive.google.com/open?id=0B-hKOy-hiiMcUE4zdmxwRTRFakE

Thx :smile:
 

Attachments

  • image.jpeg
    image.jpeg
    948.3 KB · Views: 173
If it's fiber based paper, the wash is way too short.
 
If it's fiber based paper, the wash is way too short.
Manufacturer describes the process I use as archival. Permawash is supposed to reduce final wash time for double-weight fiber based prints to 5 minutes (from about 6 hours).
 
Manufacturer describes the process I use as archival. Permawash is supposed to reduce final wash time for double-weight fiber based prints to 5 minutes (from about 6 hours).
IMHO. Yes Permawash reduces wash time for DW FB paper, but it the wash should be at least 15-20 minutes. This is based on my assumption that it's a fixer stain. How are you washing your prints? You have to have free-flowing water between your prints. If they're stuck together, it's an ineffective wash. It's best to wash prints in small batches than trying to wash the whole lot at once.

I'm sure other APUGers will have some insight on your stain issue.
 
On the other hand the stain kind of "works" with the ruined mattress theme.
 
when you put the prints in the fixer and stop and developer do you agitate?
when you put the print in the perma wash, do you wash it first as perma wash's instructions say
( fix - rinse - perma wash - wash )
are you agitating it in the perma wash as the instructions say?
and are the prints 1 at a time? how are you washing and fixing them
back to back and face to face and shuffling them in the chemistry and wash water ?
what i describe is what you should be doing, whether the images are RC or FB.
back to back and emulsion to emulsion and hand work assures the prints are getting FIXED and
then washed and the wash water needs to be filled in a tray and dumped, and filled and dumped
at least 20 times ...
a lot of people don't agitate their prints in the fix, if you don't, you might end up with
poorly fixed and stained prints.
sorry to see the stains its always a drag when things look good, until the very end ...

good luck !
john
 
Last edited:
To me, it looks like the edges are pretty fogged, too. Is it old paper and could it have been pre-exposed to something else? Humidity might even help cause something like this. And the 4 minutes for rapid fix seems long to me, though I use Ilford. The longer the fix, the longer the wash. I've used Perma Wash before at the 5-5-5 and didn't get any stains. There's something else going on here (though I think the times from Heico are optimistic).
 
When your chemicals are more or less fresh, this is more likely to be caused by the paper. My guess is that is old and fogegd, probably stored in a damp place as well. Could you tell us more about the paper you used and where and when you bought it?
 
It has to be a fix problem. Wash problems usually do not appear until a day or so has passed.

You said "part a" of the fix. What did you mean by that?

PE
 
I have had similar stains if I have insufficiently washed the holding clips of the Nova system after they have been through the fixer cycle and then wetness drools down the next print in the developer cycle.
 
I have had similar marks due to lack of agitation. The print was swimming up in the bath, the emulsion facing upwards, and the chemicals started drying to the print and form permanent marks. Two bath fixing with suficient agitation should solve the problem.
 
Photrio.com contains affiliate links to products. We may receive a commission for purchases made through these links.
To read our full affiliate disclosure statement please click Here.

PHOTRIO PARTNERS EQUALLY FUNDING OUR COMMUNITY:


Ilford ADOX Freestyle Photographic Stearman Press Weldon Color Lab Blue Moon Camera & Machine
Top Bottom