Darrin
Member
Hi all!
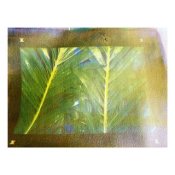
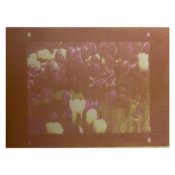
I just made my first gum print with the photo formulary kit. Everything went well but I think I have that yellow stain. I did what the directions in the kit said but it’s still there. Is this an actual stain or just the yellow of the yellow watercolor? What do you guys do to get rid of it? Thanks!
I just made my first gum print with the photo formulary kit. Everything went well but I think I have that yellow stain. I did what the directions in the kit said but it’s still there. Is this an actual stain or just the yellow of the yellow watercolor? What do you guys do to get rid of it? Thanks!