First Azo Prints

IMG_7114w.jpg

D
IMG_7114w.jpg

  • 1
  • 0
  • 33
Cycling with wife #1

D
Cycling with wife #1

  • 0
  • 0
  • 26
Papilio glaucus

D
Papilio glaucus

  • 1
  • 0
  • 20
The Bee keeper

A
The Bee keeper

  • 1
  • 4
  • 147
120 Phoenix Red?

A
120 Phoenix Red?

  • 7
  • 3
  • 149

Recent Classifieds

Forum statistics

Threads
198,178
Messages
2,770,700
Members
99,573
Latest member
A nother Kodaker
Recent bookmarks
0

bennoj

Member
Joined
Mar 7, 2005
Messages
98
Location
Seattle, WA
Format
Multi Format
Today was the big day... I had developed the film 2 weeks ago but circumstances prevented me from printing last week and earlier this week (damn job!), so today I headed into the darkroom with chemicals, printing frame, negatives, 300 watt lamp and a box each of Grade 2 and Grade 3 8x10 Azo.

The first order of business was setting up the printing area. I figured a way to attach the lamp housing onto one of the enlargers so that I could adjust the height as I needed. Screwed in the bulb, plugged it in and turned it on. Light! Great! Turned it off, got out the printing frame so I could mark the center of illumination, turned the lamp back on.... POP! One dead $25 floodlight bulb that had lasted all of 10 seconds & one decidedly not happy photographer.

So, off to Home Depot to see what kind of replacement I could get on short notice. I already knew they didn't have 300 watt R40's as I'd looked before I'd mail-ordered the first one. The best I could do was a 120 watt R40, so I figured I'd make do. Back to the darkroom, test the lamp... no problems. Sigh of relief from photographer.

Into the sink room to mix my developer, etc. No problems there except for nice black stains on my left hand because I forgot to put on gloves before opening the amidol. Hopefully it will wear off in a few days. Then finally I was ready to print!

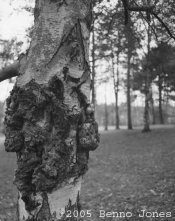
I already knew that most of my negs were thinner than recommended for Azo printing, but figured with the lower wattage bulb they might be workable. I pulled the densest of my negs and got set up... now I came to a quandry... how long an exposure? I'm doing this totally on my own with no expert advice handy to look at my neg and say 'Hmmm try XX seconds on that one', so I just guessed blindly. 'I'll try 30 seconds and see what we get'. So 30 seconds of exposure and then into the dev... An image appears, it works! 1 minute in the dev, into the stop, into the fix... after 2 minutes in the fix I turn on the overhead and behold! My first Azo print! 30 seconds wasn't a bad guess but I did 2 more of that neg at 20 and 45 seconds to see how they look tomorrow morning when they're dry.

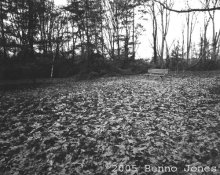
I worked through 5 negs and 13 prints with exposures ranging from 30 seconds to 3 seconds. The 150 watt lamp turned out to be just fine (I guess even my dense negs aren't dense enough). I'll try to scan a couple of the best to post tomorrow after I press them.

Yippee!
 

John Bartley

Member
Joined
Sep 12, 2004
Messages
1,386
Location
13 Critchley
Format
8x10 Format
bennoj said:
The best I could do was a 120 watt R40, so I figured I'd make do. ............ The 150 watt lamp turned out to be just fine (I guess even my dense negs aren't dense enough). I'll try to scan a couple of the best to post tomorrow after I press them. Yippee!

Same experience here, same bulb (lamp), same times. I've searched everywhere on the web that I can think of to find the temperature (K) ratings of R40 bulbs - can't find it, but.......I have a feeling that the 120watt probably runs in the 2500-3000K area and the 300watt runs in the 3500-4000K area??? So even though it's a "hotter/brighter" bulb, the 300 watt may require a longer exposure time due to it operating at a higher frequency. No-one around here stocks R40-300watt bulbs.
 

Mongo

Member
Joined
Jan 17, 2004
Messages
960
Location
Pittsburgh,
Format
Multi Format
I started out printing on Azo with a 150W bulb because it was all I could get locally...and I haven't bothered looking for anything else. Even with my densest negatives (and I've gotten some great, long-scale negatives using Efke100 and Pyrocat-HD) the 150W works just fine.

Even if the move to a 300W bulb would cut my printing times in half, it's not like the printing time is the majority of the time that I work with this process. I've never had to print for longer than 45 seconds...the time in the developer is longer than that. Besides, longer printing times mean more leisurely dodging and burning.

Congratulations on your first Azo work. One warning (although it's too late now): the stuff's addictive.
 

c6h6o3

Member
Joined
Oct 16, 2002
Messages
3,215
Format
Large Format
castilg said:
If you know where to find the lamps can you guys let me know
Thanks

I've posted it what seems like millions of times both here and on the Azo forum. I can't imagine why these things are so hard to find. I've obtained security clearances with less bother than getting one of these damned lamps. Go to Grainger.com and do a keyword search on '2V411'.

BTW, if your Azo is the new stuff (i.e. not made in Rochester) you'll need at least 1-1/2 minutes in the Amidol. I give mine two minutes. I sure miss that 1 minute grade 2.
 
OP
OP
bennoj

bennoj

Member
Joined
Mar 7, 2005
Messages
98
Location
Seattle, WA
Format
Multi Format
Ok, 5 prints attached here if I did it correctly... All in all I'm pretty happy for my first time with new paper, new chemicals, etc. A couple of the prints have reddish spots on the back. Not enough wash? Any suggestions? I'm following Michael & Paula's workflow as described on their website, but had to skimp a bit on the wash times they recommend as the owner of the darkroom I'm working in only lets me final wash for 15 minutes (water rates are high as we didn't have much rain/snow this winter).

The images are not the greatest in the world (boring to me as I've shot these scenes many times, but they make for good references when starting a new process as I have an idea as to how they should look), but comments are welcome.
 

Attachments

  • Arboretum_01.jpg
    Arboretum_01.jpg
    56.9 KB · Views: 218
  • Arboretum_02.jpg
    Arboretum_02.jpg
    75.7 KB · Views: 213
  • Arboretum_03.jpg
    Arboretum_03.jpg
    84.3 KB · Views: 226
  • Arboretum_04.jpg
    Arboretum_04.jpg
    40.3 KB · Views: 239
  • Arboretum_05.jpg
    Arboretum_05.jpg
    65.1 KB · Views: 239

Mongo

Member
Joined
Jan 17, 2004
Messages
960
Location
Pittsburgh,
Format
Multi Format
bennoj said:
...as the owner of the darkroom I'm working in only lets me final wash for 15 minutes (water rates are high as we didn't have much rain/snow this winter).

Benno-

No harm in continuing to wash them later on at home. If you want to keep these prints for a while (and I think you should!), then it's "Better safe than sorry" time for the washing.
 

donbga

Member
Joined
Nov 7, 2003
Messages
3,053
Format
Large Format Pan
castilg said:
If you know where to find the lamps can you guys let me know
Thanks

I got mine at the local Kroger food store. They ain't hard to find, at least in my local area.

Don Bryant
 

noseoil

Member
Joined
Oct 6, 2003
Messages
2,887
Location
Tucson
Format
Multi Format
Benno, very nice job for your first round of printing.

The good thing about azo is that a minimum size of darkroom and equipment is needed. You can get by with 4 trays, a sink, a bare bulb hanging from the ceiling, some neutol-wa, stop and fixer. For printing all you need is a sheet of glass, felt or foam backing board, azo and time. Weston worked in a tiny room with a bare bulb and his prints worked out well.
 

c6h6o3

Member
Joined
Oct 16, 2002
Messages
3,215
Format
Large Format
noseoil said:
Benno, very nice job for your first round of printing.

The good thing about azo is that a minimum size of darkroom and equipment is needed. You can get by with 4 trays, a sink, a bare bulb hanging from the ceiling, some neutol-wa, stop and fixer. For printing all you need is a sheet of glass, felt or foam backing board, azo and time. Weston worked in a tiny room with a bare bulb and his prints worked out well.

I agree with all of the above except the neutol-wa. There is no substitute for Amidol.
 

c6h6o3

Member
Joined
Oct 16, 2002
Messages
3,215
Format
Large Format
Donald Miller said:
Do you mean hypo clearing agent?

No, he means 'Was plain hypo used to fix the prints?' as opposed to rapid fixer.
 
OP
OP
bennoj

bennoj

Member
Joined
Mar 7, 2005
Messages
98
Location
Seattle, WA
Format
Multi Format
I used plain hypo as fix and did use a hypo clearing agent.
 

noseoil

Member
Joined
Oct 6, 2003
Messages
2,887
Location
Tucson
Format
Multi Format
Light bulb printing

Benno, Jim has posted that Amidol is best for azo printing, and I cannot disagree with him on this point. However, don't let amidol stand in your way. The Neutol-wa (1:7 for 1:30) is fine for seeing what is in a print, for that matter, so is plain old dektol (1:2 for 1:00).

I've attached 3 contact prints from 4x5 shots to illustrate my point. The first is an efke 25 negative, exposed and developed for enlarging paper, printed on grade 2 azo. Second is efke 100 on grade 2 azo. Third the same shot on grade 2 fiber exposed for enlarging.

Hope this gives you some idea of what you can do with a bare bulb and minimum of equipment. tim
 

c6h6o3

Member
Joined
Oct 16, 2002
Messages
3,215
Format
Large Format
noseoil said:
Benno, Jim has posted that Amidol is best for azo printing, and I cannot disagree with him on this point. However, don't let amidol stand in your way. ... tim

Don't let it stand in your way of getting started, but do get some Amidol. I use Neutol sometimes. But, if you're going to make the investment in chemistry, large format negatives developed especially for contact printing, etc. you don't want to skimp at precisely the point where the rubber really meets the road. The fact that you're making such an effort says that you're shooting for 'no compromises' silver printing. In my opinion, any other print developer is the biggest compromise you can make.

Are you in on Greg Davis' buy? There might still be a slot left in one of the groups.
 
OP
OP
bennoj

bennoj

Member
Joined
Mar 7, 2005
Messages
98
Location
Seattle, WA
Format
Multi Format
As noted in my initial post in this thread, I am using amidol. I am very happy with the overall look of the prints, although I know I can do a better job at fine-tuning the exposures and doing some burning on a few (the shot of the park bench is too dark overall, but a lighter version is too light in the bottom area of leaves, so I need to re-print that one with the lighter exposure used for the background and sky and burning in the foreground. However, given the thinness of that negative, I would probably be best served by going back and re-shooting to get a denser negative that will require a longer exposure time. The light version of the current neg is printing in 3 seconds, not a lot of time for print manipulation! What impresses me about the paper/developer combination is the fact that even though the print is overall too dark, there is still detail to be seen in the shadows - nothing blocked up completely.

Incidentally, the two shots of the tree with the large scar are on Grade 2 Azo, the others (thinner negs) on Grade 3.
 

juan

Member
Joined
May 7, 2003
Messages
2,706
Location
St. Simons I
Format
Multi Format
I also use a 120-watt R-40 bulb - I found a 300-watt bulb at Grainger (thanks to Jim) and promptly broke it. Then I thought about it and realized that Michael A. Smith, IIRC, uses a 300-watt bulb at about 4-feet above the paper. The bulb holder I made puts the bulb only about a foot and a half above the paper. At that distance, the 300-watt would probably have been too bright. So, using your enlarger to put the bulb closer to the paper will probably work just fine for you. I'd caution everyone to be sure to get a "floodlight" not a spotlight. They look identical and are packaged very similarly - but the floodlight has a beam that spreads across the paper - the spotlight will produce a very hot spot in the center with significant fall off towards the edge of the paper. I learned this the hard way.
juan
 

David

Member
Joined
Sep 10, 2002
Messages
309
Location
Melbourne, V
Format
ULarge Format
Hi Juan,
How do you keep from blinding yourself with the bulbso close to the paper? :cool: David
 

c6h6o3

Member
Joined
Oct 16, 2002
Messages
3,215
Format
Large Format
juan said:
I also use a 120-watt R-40 bulb - I found a 300-watt bulb at Grainger (thanks to Jim) and promptly broke it. Then I thought about it and realized that Michael A. Smith, IIRC, uses a 300-watt bulb at about 4-feet above the paper. The bulb holder I made puts the bulb only about a foot and a half above the paper.

I don't think Michael and Paula's setup has the bulb quite that far away. It's probably closer to 3.5 ft. I use 3 ft. exactly and their exposures are a little longer than mine for an identical print.

1.5 feet seems awfully close. I think I'd want it to be at least two feet away, if only to make sure that you're getting good even illumination across your printing frame.

Joe Freeman tells me that his exposure times with the new grade 3 are annoyingly long, so he's thinking about going down to two feet away. I still have enough of the old grade 3 so that I won't have to worry about it for a while.
 

juan

Member
Joined
May 7, 2003
Messages
2,706
Location
St. Simons I
Format
Multi Format
Mine may be closer to two feet - I've never actually measured it. But the inverse square law works here, as well as with negative exposure, so if you have the bulb closer to the print, you can get away with lower wattage. And you're correct that one needs to be sure of getting good, even illumination across the paper.

Jim, thanks for the heads up on the Grade 3 - I'll be ordering more soon and didn't realize it had changed, too.
juan
 
Photrio.com contains affiliate links to products. We may receive a commission for purchases made through these links.
To read our full affiliate disclosure statement please click Here.

PHOTRIO PARTNERS EQUALLY FUNDING OUR COMMUNITY:


Ilford ADOX Freestyle Photographic Stearman Press Weldon Color Lab Blue Moon Camera & Machine
Top Bottom