Finally processed C-41

Couples

A
Couples

  • 1
  • 0
  • 32
Exhibition Card

A
Exhibition Card

  • 2
  • 0
  • 67
Flying Lady

A
Flying Lady

  • 6
  • 1
  • 89
Wren

D
Wren

  • 2
  • 0
  • 53

Recent Classifieds

Forum statistics

Threads
199,039
Messages
2,785,160
Members
99,787
Latest member
jesudel
Recent bookmarks
0

Truzi

Member
Joined
Mar 18, 2012
Messages
2,651
Format
Multi Format
After years of procrastinating, I finally developed C-41 last Saturday.

It came out a bit weird - can someone tell me what I did wrong?

attachment.php


Just kidding...

attachment.php


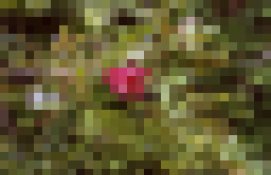
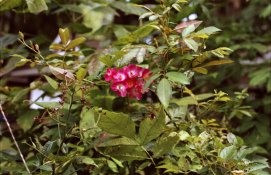
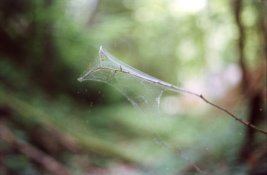
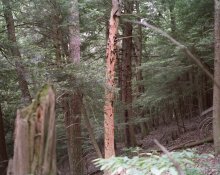
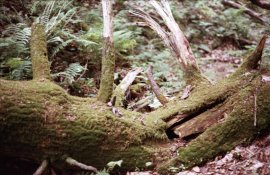
Straight scans - I let the scanner do it's thing, and have made no post-scan adjustments other than cropping out the carrier.

I was too excited to see what I got, so didn't flatten the negatives (forced air heat in the winter makes the air very dry). I will have to rescan later.

Developing was a bit more involved than expected, but fairly easy. Aside from a few poorly loaded reels, I did not have any major issues. I have a total of 20 rolls to practice on, some expired and some fresh - all shot explicitly as practice rolls. I'm slowly getting the hang of the procedure before doing "important" rolls.

Styrofoam coolers and aquarium heaters were used for tempering baths - it took me a couple weeks to get temperatures adjusted and reliable (I only have so much time to play after work). I can certainly see why people spend a lot of money on equipment, but this setup will hold me over for a while.

I had a Digibase mini kit that was several years old, and part C was purple. Instead I used a liquid Tetenal kit I bought in case this happened (and I have a powdered kit as a backup to the backup). I used Kodak indicator stop, the Digibase separate bleach & fix, and a home-mixed formalin based stabilizer per PE's posts. My best friend and I split a liter of fresh developer and each did a tank simultaneously.

My first roll was milky green when wet, and dried to have a slight yellow-greenish cast in the mask. My friend's roll had the normal orange cast when dry. At first I thought it was because one was Kodak Gold and the other Portra.

Comparing my negatives to a drug-store mini-lab processed negatives, I found the mini-lab was just a tiny bit better, but still seemed a little yellow. I get a slight magenta cast on scans from both my negatives and those from the mini-lab (which I can't seem to correct without getting a different cast, lol).

Even though I RTFM several times, when it came time to mix the developer, I still did it wrong - mixing the parts together before adding the water. I suspect this might explain the mask tint. The fact that my first try is so close to the mini-lab tells me something about the drug store; there is no way my first attempts were without errors.

My best friend's first roll did have the normal orange cast, though. I then remembered she was a bit slow with the developer (longer than 3:15), so I compensated on later rolls and had better results.

Thanks to everyone on APUG for the help - this is why I came here. Even in threads I read but never posted to, I found a lot of valuable information.

Lets see if I can attach a few more images (all de-rezed to 800 by x pixels):
 

Attachments

  • 1t.JPG
    1t.JPG
    203.9 KB · Views: 241
  • 2t.JPG
    2t.JPG
    91.7 KB · Views: 232
  • 3t.JPG
    3t.JPG
    234.8 KB · Views: 241
  • 5t.JPG
    5t.JPG
    192.4 KB · Views: 222
Last edited by a moderator:

bvy

Member
Joined
Jul 22, 2009
Messages
3,285
Location
Pittsburgh
Format
Multi Format
Good for you! I processed about 50 rolls before my process and workflow actually stabilized. I still make tweaks here and there. Change one variable at a time.
 

sagai

Member
Joined
Oct 29, 2014
Messages
309
Location
Hungary
Format
Multi Format
Your scanner and also your scanner software could contribute to color shifts regardless their corresponding manual says.
I suspect that each scanner has it is own colour space, further unless you calibrate your monitor, scanner, printer, whatever else, you could get surprising results by any of these.

I am using Tetenal with no problem at all.

Mentioning Portra that film could cause some headache only because I have always have to set white balance right in photoshop whereas for fuji negs I have never really had to.
 
OP
OP
Truzi

Truzi

Member
Joined
Mar 18, 2012
Messages
2,651
Format
Multi Format
I'm sure most of the problems are mine, not the manufacturers'.

The Digibase bleach was the right color, and I bleached no less than the minimum recommended time (often 50% to 100% longer); the same with the fix. Still, I don't know enough to rule this out, though I thought retained silver would make the mask darker/"browner."
Increased development did improve the mask color. I was getting ready to re-bleach when I realized my friend's roll had the correct mask. I suppose it would be a really good idea for me to do a bleach-bypass just to have an example on hand for future comparison. I've only done 8 rolls so far, so I think I may stop at the stop bath on one just to see what it is like dry. I can always bleach and fix it at a later date.

When I get a CD from that drug store mini-lab, those scans are also tinted. Their prints are balanced adequately, but inkjet, so I've only gotten prints there twice; I don't like the look, or even the feel, of ink prints. I have been uploading scans to get RA-4 prints in the mail.

I had borrowed an Epson scanner with an auto-feed, and it does well at correcting when run in automatic, but the quality isn't as good as manual scanning. My brother recently gave me his Canoscan 8600F, so I'm trying to get the hang of it. It is a better scanner, but it's auto settings aren't as good/idiot-proof. I may have to sign-up for DPUG just to get a decent scan, lol.

Ultimately I want to wet-print, so I consider the scanning process temporary. I have a couple cheap color enlargers I hope to also stop procrastinating on.

My cheap Hanns G monitor cannot be calibrated, but the cast shows on many different monitors, computers, and operating systems - so it is there in some form. I'm sure my scanning leaves a lot to be desired, but with the negative mask being not-quite-orange, I have to think part of this is my process and not computer-related.

So far I am quite pleased - beyond the typical "new thing" excitement. Except for the misloaded reels, I have done better than my local Walgreen's before they started sending film to Fuji (which I'd be fine with if they wet-printed and returned the negatives). Our Drug Mart is better than our Walgreen's was, and I think I'm close to it's level. Hopefully I'll soon be close to the level of any random drug store mini-lab of the late 90s, early 00's. I think I can get to the level of our area's only remaining pro shop chain, but that will take some work.
 
OP
OP
Truzi

Truzi

Member
Joined
Mar 18, 2012
Messages
2,651
Format
Multi Format
Damn, apparently editing typos last nite broke the original images (which was a bad joke). I'll do it again:

It came out a bit weird - can someone tell me what I did wrong?

attachment.php


Just kidding:
attachment.php
 

Attachments

  • 4p.JPG
    4p.JPG
    74.8 KB · Views: 477
  • 4t.JPG
    4t.JPG
    240.3 KB · Views: 477

Sirius Glass

Subscriber
Joined
Jan 18, 2007
Messages
50,391
Location
Southern California
Format
Multi Format
The first time is the scariest and the hardest. After that it gets easier and better. Now you are really doing quite well. Enjoy. Congratulations.
 

rowghani

Member
Joined
Jan 28, 2015
Messages
268
Format
Med. Format RF
Awesome work. I started processing my own E6 stuff a year ago and its still fun. Funny thing the hardest part for me has been putting the film on the reels. :wink:
 

Sirius Glass

Subscriber
Joined
Jan 18, 2007
Messages
50,391
Location
Southern California
Format
Multi Format
Now what is my excuse for not doing RA4 printing??? I have the enlarger with the color head; I have the chemicals; I have the paper; damn it when am going to get off my @$$ do finally do it!! :mad:
 
OP
OP
Truzi

Truzi

Member
Joined
Mar 18, 2012
Messages
2,651
Format
Multi Format
Now what is my excuse for not doing RA4 printing??? I have the enlarger with the color head; I have the chemicals; I have the paper; damn it when am going to get off my @$$ do finally do it!! :mad:

I hear you - late summer 2010 I had decided I would be doing my own c-41 within 5 years, so I am only 6 months late...
... but I had just about all I needed for it two years ago.
 

Sirius Glass

Subscriber
Joined
Jan 18, 2007
Messages
50,391
Location
Southern California
Format
Multi Format
Oh, good. That means I still have time. :smile:
 

Wayne

Member
Joined
Jul 8, 2005
Messages
3,614
Location
USA
Format
Large Format
I've been doing it for 2 years and I just finished my first box of paper.

Anway Truzi your first scans look like my first scans. The straight scan does not indicate what you can do with an RA-4 print, at least on my scanner (Epson 4990). I'm sure I could calibrate it somehow but I don't care. I only use the scan as a very rough check to decide if I want to print it in the darkroom. The scan is never used for anything else
 
OP
OP
Truzi

Truzi

Member
Joined
Mar 18, 2012
Messages
2,651
Format
Multi Format
Thanks for the comments.

Overall, everything came out acceptably, and I've sometimes had worse results from mini-labs, though only in the past six years. I had expected to really botch this attempt, and it might have been better if I had - it would have made the eventual slight cast less frustrating.

An advantage of scanning is that it's easy to undo something and try again. I'm not going for perfection (I just take snapshots), but it was difficult to adjust the scans. Removing one hue gave me another - which I didn't see until the next day because it was not the hue I was trying to remove, and my mind compensated after working on a few rolls, frame by frame. It reminds me of trying to tune an older engine, where the dwell offsets the timing, which offsets the dwell, etc. (I eventually converted it to HEI).

Ultimately, though, I don't want to scan. I was beginning to dread the thought of doing this on paper.

I just scanned a couple rolls that I had managed to get a more correct base color on (and had flattened), and it seems much easier to balance in The GIMP. This makes me feel a lot better about wet-printing. It also gave me flashes of all the posts reiterating "process control." You know who you are :smile:

Getting better negatives is actually motivating me to procrastinate less - though I'll have to get up to speed printing B&W first (and I've had absolutely everything I need for B&W printing for three years, lol).

This weekend I will be more careful so I can continue to get better negatives, and next time I will be more careful mixing the developer.
 

bvy

Member
Joined
Jul 22, 2009
Messages
3,285
Location
Pittsburgh
Format
Multi Format
There's nothing like pulling a wet print, dripping color, out of a tray or drum. I scan all my negatives as digital contact sheets -- i.e. for reference. But nothing compares to wet printing.
 

Mick Fagan

Subscriber
Joined
Sep 13, 2005
Messages
4,421
Location
Melbourne Au
Format
Multi Format
I'm doing a wild guess here, but the fact you are saying that when you correct for one colour cast, you get another, no matter how hard you try, tells me something. Now I am basically a wet printer for colour, never done anything computer colour wise with colour film, always a darkroom. But I would think the same parameters with crossover may apply.

Being very simple, if the three colours when viewed on a graph do not basically run parallel with each other, with the worst case scenario where one of the colours crosses over another colour layer then back again, you will have exactly what you are describing when doing colour prints with an enlarger.

The fact that you mentioned your dried film did look different to the other dried film, does indicate it is possible there is something not quite right. It is very possible to get things very wrong with just one drop of contaminate material somehow ending up in the developer.

Just thinking out loud.

Mick.
 

chuck94022

Member
Joined
Jan 11, 2005
Messages
869
Location
Los Altos, C
Format
Multi Format
For a first attempt, not bad. But you describe so many added variables that no one could possibly tell you why your results came out "weird".

My recommendation: follow the developer instructions as precisely as possible in your first attempts, including precise temperatures and times. Use the manufacturer provided chemicals, don't substitute at any point in the process. Use fresh chemistry.

Make sure your temps are really spot on, and your fresh chemicals are properly mixed. Make sure everything (water bath AND chemicals) are fully within spec.

With all that done, your first faults are much easier to track down. Then, once you have a handle on the proper process, you can start tweaking a bit at a time.

Regarding temps, do you have an accurate thermometer? A mechanical one used for paper or B&W development is probably not going to be accurate enough for the above suggestions. Later, as you are comfortable with the process and tolerances, you can probably get away with something less precise, but when starting, I recommend investing in a good accurate digital probe. A Kaiser digi-thermo has served me very well, and it isn't too expensive.

If you search my old threads, you'll find I've spent a lot of time building home brew tempering baths for color processing. I would recommend against the aquarium heater approach for a lot of reasons - they don't get hot enough unless you tweak them, and the ones I've tried are too weak to really bring up a bath and chemistry to temps in the short amount of time I usually have available for this hobby.

I've since moved away from my functional, cheap, but somewhat fragile solution to an Anova sous vide based tempering bath. That is a perfect alternative to my home brew setup, and if you have the cash, in my opinion a worthwhile investment.

You're going to have a ton of fun with color development, but if you start from a very stable set of first runs, you'll have less frustration down the road as things go awry. And your own process tweaks will be much easier to understand.

Good luck!

-chuck
 
OP
OP
Truzi

Truzi

Member
Joined
Mar 18, 2012
Messages
2,651
Format
Multi Format
The "weird" comment was a joke, and I first posted a pixelated image, then the real one. For some reason, after an edit, the images do not show in the first post. I tried to re-do this bad joke in post 7.

I don't think I will truly be able to master this until I start wet printing. The computer makes it too easy to repeatedly try and fail until I get acceptable balance. Even if I were to become good at correcting images, that doesn't mean a negative is within normal parameters.

There is a cast. Some is from the scanner because I don't know how to tweak the settings in a meaningful way (I have an academic understanding, but don't know how to apply it). The film base shows an off cast, though, so I know part is my processing. However, it's not far from the drug store processed negatives. I know this isn't saying much, but I think it can reduce the possibilities. I suspect there is an effect of under-development and other artifacts from having mixed the developer in the wrong order, though I don't know enough about color chemistry to know if that could be a factor (I do know mixing order can be important in general).

A major problem is I do not know how to adjust the colors. I've not looked at a graph (which is odd, since its a computer, and I work in IT), so I will try that. Basically, I saw magenta in the scan, so backed it down and/or raised cyan or green or blue - just stabbing in the dark. I consulted with a friend at work who does (digital) photography professionally, and he pointed out the software I used basically slides between two colors instead of having a separate control for each - he said it would be easier to learn with the latter.


I finished my first batch; I've done the equivalent of 18 36-exposure rolls. I was careful my first session, adjusted on my second (improving my results), was sloppy on purpose for the third, and was extra careful on the fourth.

The second and last sessions came out the best. Oddly, the sloppy session was not too bad; they are useable if not acceptable. I'm surprised - I had expected bad results would resemble a Warhol painting.

Also, my Kodak Portra (only in 120) had a more normal colored base in all but the sloppy session. Keep in mind this is relative to my experience, so it seems normal to me, and may not be truly "normal." It seems the Kodak Gold 200 has a different base color from Portra when I keep all my parameters the same.

The Portra all scan well, and autolevels in The GIMP evens things out very well, with the occasional coolness (very slight touch of blue). I'm toying with ImageMagick scripts, and they do better, but I really need to wrap my head around them first.

I removed the adjustment lever on the aquarium heaters so I could reposition them, and this lets me get higher temperatures. I got tap water close to the correct temp (dubiously measured with the B&W thermometers, lol), then let the aquarium heaters sit for a few hours, making adjustments as necessary. I did this after work for two weeks until I was confident I had it where I wanted. I measured the temperature of the fluid inside the bottle as well as outside. I did learn the adjustment will stick so long as I use the same volume of water in the bath. If I were to use a smaller container, or less water, I'd have to go through the process of setting it again.

I think these are my major concerns:

Mixing developer parts together, then adding the water, despite having RTFM. I was thinking of too many new things at once and just wasn't paying attention.

Confirm my temperatures. I used glass Kodak B&W thermometers. They agree with each other, and accuracy is "guaranteed" to .5 degree within the B&W processing temps - but who knows how far off they are at color temps.

It's difficult for me to fill the steel tanks quickly.


If anyone has suggestions or a critique, I'm all ears, but I am not technically asking for help yet - I figure I won't be at a level good enough and consistent enough to ask for help until I work through another 10 - 20 rolls. I'll be ready when each roll consistently has the same wrong-colored mask, lol (they are the same, just varying intensity).
I was just excited to have finally done this and felt compelled to share it with people who care about film, of which I only know two in real life.
 

dabsond

Subscriber
Joined
May 22, 2015
Messages
228
Location
Dover, DE
Format
Multi Format
I have been following this thread from the beginning and thought I would add my two cents. It took a while for me to take the plunge into C41 processing. I only started developing BW a year ago. After the initial apprehension I found it to be easier than BW. For BW I use HC110 and HP5+ film. I ordered the Unicolor C41 kit and thoroughly read the instructions. It seems the main concern is temperature management. Here is my work flow. I store my chemicals in plastic containers including one just with distilled water for the pre-soak. I place the pre-soak, developer and blix in a tub and fill with the hot tap water. I place a digital thermometer in the developer. It is a cheap thermometer I found at Harbor Freight. I then have time to load my films onto the reals in a changing bag. By the time I have this finished the chemicals are warming up and I just have to wait about an additional 20 minutes until they hit 102 degrees F. When the developer hits 102, all chemicals should be very close in temp, I start the pre-soak. I remove all the bottles from the water and follow the kit directions. So far, I have been very pleased with the results. Attached is a photo from earlier in the year. It is a shot on Ektar 100. I find all of the talk about regulated water baths interesting, but for me it is a pretty simple affair.

attachment.php
attachment.php
 

Attachments

  • water bath.jpg
    water bath.jpg
    386.9 KB · Views: 341
  • 2015_10_12_CR_35_005.jpg
    2015_10_12_CR_35_005.jpg
    654.4 KB · Views: 388
OP
OP
Truzi

Truzi

Member
Joined
Mar 18, 2012
Messages
2,651
Format
Multi Format
I like your minimalist setup, dabsond. In concept I did similarly, but I tend to over think and over complicate things; I ended up with three coolers and heaters, two thermometers, etc.

So, on a lark I decided to not let the scanner do any adjustments, no matter how bad the previews looked. The scans have a cast and are too dark, contrast is bad, etc. - but the auto features of The GIMP can now correct things much better. Not up to APUG standards but close to what I'd get from a mini-lab. I learned, at least with this scanner, to not make adjustments until I have a file.

With a full-time job, and 6 credit hours of grad school, I only have time to scan a roll a night... unfortunately, I now have to rescan eight rolls.

As I said before, the mask is too light/yellowish, so something is wrong with my processing, but apparently not as wrong as I'd thought.

I'm beginning to think wet printing will be easier than I anticipate - fewer things to mess up (and I know I will mess them up).
 

wblynch

Member
Joined
Feb 9, 2009
Messages
1,697
Location
Mission Viejo
Format
127 Format
Some flatbed scanners like the Epsons get confused if you don't crop the frame down to the image itself and it messes up the color. I have already said too much
 
OP
OP
Truzi

Truzi

Member
Joined
Mar 18, 2012
Messages
2,651
Format
Multi Format
Here's another of my home-developed photos, posted mostly to see how PNGs fair on the new software. (and now to see if editing my typos breaks the attachment).

RockyRiverReservation.png


RockyRiverReservation.png
 
Last edited:

Kilgallb

Subscriber
Joined
Oct 14, 2005
Messages
813
Location
Calgary AB C
Format
4x5 Format
I use Dabsond's method with the addition of a one shot stop bath after development. I find the blix temperature and time have little effect on image quality. I start the pre-soak as soon as the temperature reaches 104 which is the recommendation for a roller drum.

Once you figure out you do not need 0.5 degree accuracy on blix the process is a lot easier.
 
Joined
Jul 31, 2012
Messages
3,360
Format
35mm RF
If you don't mind me piggybacking on your thread Truzi I have a question. After all of these years doing photography the only process I haven't done myself is C-41. I recently bought a Jobo press kit (powder, same as Tetenal I believe) and I was wondering if the Blix can be split into separate bleach and fix steps to maximize the quality. Possible? Not necessary?
 
Photrio.com contains affiliate links to products. We may receive a commission for purchases made through these links.
To read our full affiliate disclosure statement please click Here.

PHOTRIO PARTNERS EQUALLY FUNDING OUR COMMUNITY:


Ilford ADOX Freestyle Photographic Stearman Press Weldon Color Lab Blue Moon Camera & Machine
Top Bottom