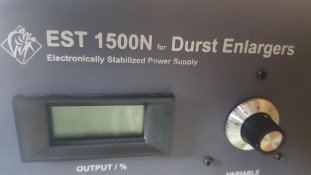
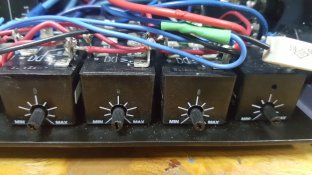
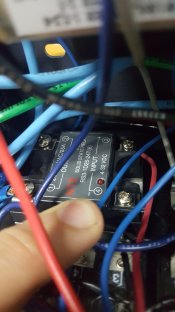
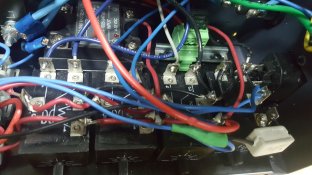
Durst EST 1500 N power supply by Durst-pro-USA

untitled

untitled

  • 2
  • 0
  • 32
Crow

H
Crow

  • 2
  • 2
  • 43
part 2

A
part 2

  • 5
  • 0
  • 144
Sonatas XII-32 (Homes)

A
Sonatas XII-32 (Homes)

  • 1
  • 1
  • 166
Thirsty

D
Thirsty

  • 5
  • 0
  • 1K

Recent Classifieds

Forum statistics

Threads
199,398
Messages
2,791,073
Members
99,893
Latest member
Notnx
Recent bookmarks
0
Joined
Jun 23, 2008
Messages
105
Location
Kiev, Ukraine
Format
Multi Format
20190516_233616 1K.jpg 20190516_233638 3K.jpg 20190516_233723 3K.jpg 20190516_233740 3K.jpg 20190516_233746 3K.jpg 20190516_233834 3K.jpg 20190516_233836 1K.jpg 20190516_233901 3K.jpg 20190516_233942 1K.jpg 20190516_233604 3K.jpg 20190516_233554 3K.jpg 20190516_233528 3K.jpg 20190516_233503 3K.jpg 20190516_233447 3K.jpg

There was an issue about this enlarger power supply in the other thread on this forum. As it was a hint from another member that it was a little bit off-topic to continue the technical discussion there so I continue on here.

As I wrote before:

" We did spend last week with my father rechecking / resoldering / revisioning two of EST1500-N Power Supply units (that is how I came to this post and we got 8 pcs from Jens 10 years ago with enlargers for big school darkroom project).
Only now we took 2 first "mint" units from the packaging for testing with CLS1840/2000.

Unit is not well made. Solder on some joints was already falling off. Soldering and mounting were made so sloppy that resonated with a sign "made in the USA" on the front and price Jens was paid.
100% solder joints were an absolute must for resoldering. With our huge experience with Durst-pro-USA "mint" equipment and service - that power supply was just one more proof-of-principle.

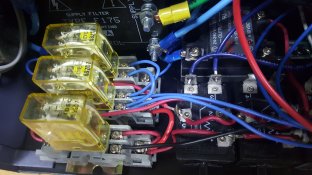
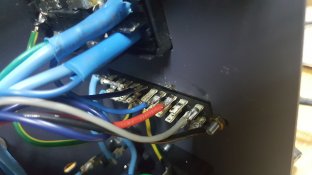
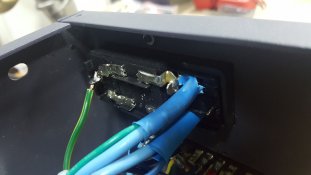
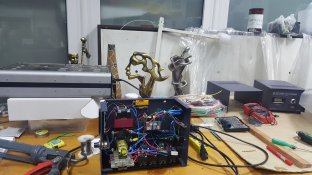
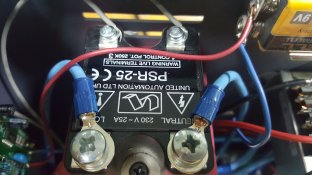
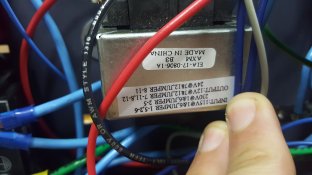
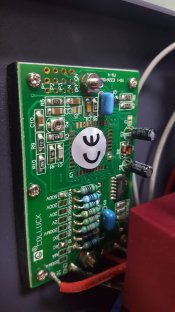
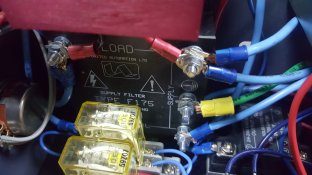
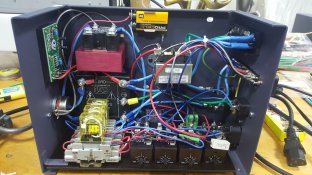
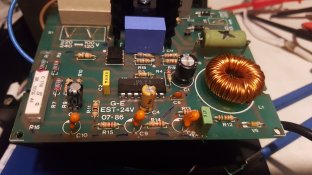
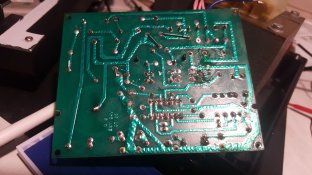
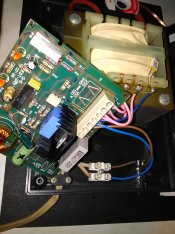
Technically the unit is rather simple and built (I could make images if you need or find some on "Durst CLS 1840, 220 volt equipment problem" thread on another forum) around one PWM regulator 50-75 USD priced, 4 time delay relays, 1 power SSR, 3 relays, 1 diod bridge, 24V tranformer, and regulator PCB knob connected with soldered wires. I think you could build one from scratch from photos. You need a plug for the head but I think you could take one from your previous one."

Here are full images of this unit as was promised:

20190516_233616 1K.jpg
20190516_233638 3K.jpg
20190516_233723 3K.jpg
20190516_233740 3K.jpg
20190516_233746 3K.jpg
20190516_233834 3K.jpg
20190516_233836 1K.jpg
20190516_233901 3K.jpg
20190516_233942 1K.jpg
20190516_233604 3K.jpg
20190516_233554 3K.jpg
20190516_233528 3K.jpg
20190516_233503 3K.jpg
20190516_233447 3K.jpg
 

ic-racer

Member
Joined
Feb 25, 2007
Messages
16,605
Location
USA
Format
Multi Format
Thanks for the pictures and description. Looks like the timer/relays are the key to getting the lamp, fan and shutter all to behave as needed.
Looks like it would be even easier to build if one left off the voltage adjustment. From what I recall on the website, that was to extend lamp life. A reasonable cause due to the limited supply of lamps.
 
OP
OP
Serg Lavrenchuk
Joined
Jun 23, 2008
Messages
105
Location
Kiev, Ukraine
Format
Multi Format
" I'm curious as to what all is in it. It does not look too complicated. I have never seen one, I only have the picture here: "

From what I could understand from experimenting with it: PSR25+F175 are power regulators (phase control - not PWM and I thought).
It is possible to control max power to what input 220V sine would be cut to - so this power supply could be used to regulate the power of Colamp2000 and Colamp1000 (or any other W lamp).
From output view just like in our EST 501 power unit and without the option of lamp stand by (preheated) mode as in HL2501-2506-Optromat done.

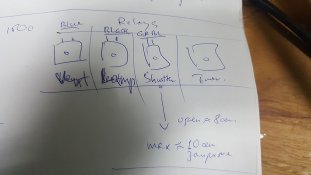
Here preheating was done by adding 4 timer relays (at the bottom right).

Right one as It appeared controls time delay when 220V input would be applied to the transformer and diode bridge to get 24 volts for other 3 relays + load relay control.
And so controls time delay for the shutter to open after the first relay would receive 220V to control terminals from the external timer.

The second one controls the time delay when the shutter would be closed.
The third one controls the time delay before the lamp would power off.
The last one controls the time delay before the cooling fan for the lamp and reflector stop working.

The transformer also gives constant 24V ac for the small lamps in the head all the time EST1500N is ON.

As I think logic looks like: we trigger 10 sec EXP from the timer. Last start to glow. In 3-4 seconds shutter is started (depending from 1st relay delay). In 10 seconds timer ends and 220v is removed from 1st relay. 24 volts are removed from 2-3-4.
They start their count down. In about 3-4 sec 2nd drops 24ac from the shutter and it gets closed.
3rd relay counts down 2-3 more seconds and drops 24DC from load SSR that cut 220V from the lamp and it goes off.
4rd relay counts down some xx second and cut AC from colling fun.

Total exposure time is 10 sec and set on a timer but out sync on these 2-3 seconds. Exposure starts not when the timer starts and stops not when the timer stops.
That makes masking with looking at a timer little tricky + avoid the possibility to make exposures smaller than this 3-sec lag.

Also, I can't set up this unit to make lag before the shutter opens less than 3 sec for one example and 5 sec for the second example. Looks like minimum time somehow depends on components used in the exact unit.

Cooling fan time could be adjusted in very big margins. I decided to use 45 seconds for Fan delay taken from the experiment for how long 2506 (Fan equipped with temp sensor) would cool itself after 1 min exposure.

I got no manual from Jensen for these units (sure - manuals didn't exist) - so all written above is my personal guess and need to be checked.
 
OP
OP
Serg Lavrenchuk
Joined
Jun 23, 2008
Messages
105
Location
Kiev, Ukraine
Format
Multi Format
Looks like it would be even easier to build if one left off the voltage adjustment. From what I recall on the website, that was to extend lamp life. A reasonable cause due to the limited supply of lamps.

If you take off the voltage adjustment you take off the stabilization also. So you need to think of something instead. For example to use schematics used in durst EST501 as the easiest one but with "bigger" parts.

Wrote you this line and decided to check are there any stabilisation in this regulator.
http://www.farnell.com/datasheets/20576.pdf

Can't find any proof of that.
 

Chan Tran

Subscriber
Joined
May 10, 2006
Messages
6,877
Location
Sachse, TX
Format
35mm
I would try to change the light bulb to 24V. Then I simply use a standard regulated 24VDC power supply. I had the dichroic head for the Beseler CB7. It has 2 200W lamp. I simply replace the transformer with 2 10A 24VDC power supplies. The voltage is rock solid.
 
OP
OP
Serg Lavrenchuk
Joined
Jun 23, 2008
Messages
105
Location
Kiev, Ukraine
Format
Multi Format
I think that is good way to go as 24v 250w lamps would be last to go (as they are used in professional light systems). I also think to buy some dozen for cls501 head till they are 10usd and present in local markets.

We had to play with copying reflectors and colamps 2000 ourselves as we had several enlargers supplied by Jensen with no reflectors and half lamps paid. So now we would play 220v 2000W till the end of last lamp.
 

AgX

Member
Joined
Apr 5, 2007
Messages
29,973
Location
Germany
Format
Multi Format
Here preheating was done by adding 4 timer relays (at the bottom right).

Preheating a lamp on a shutterless enlarger makes no sense to me. Or does preheating mean staying under the glow-temperature?

Maybe I am completely off track ....
 
OP
OP
Serg Lavrenchuk
Joined
Jun 23, 2008
Messages
105
Location
Kiev, Ukraine
Format
Multi Format
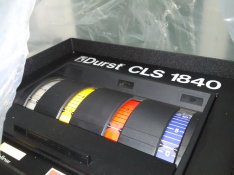
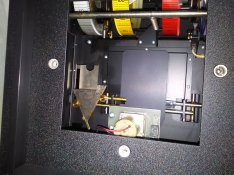
CLS1840 and 2000 heads have shutters in them. At least ones that are on the table at the moment.
Will make the images now.

Preheating from zero to 100% in 2-3 seconds. Then the shutter opens.

IMG_20190517_130120.jpg IMG_20190517_130113 2K.jpg
 

AgX

Member
Joined
Apr 5, 2007
Messages
29,973
Location
Germany
Format
Multi Format
Thank you, especially for this photo! I was ignorant on this. Should have looked into my archive first...
 

ic-racer

Member
Joined
Feb 25, 2007
Messages
16,605
Location
USA
Format
Multi Format
From what I have gathered, the CLS1840 head is a newer design. This is the shutter on my CLS2000 which I believe is form 1992 (though designed in the 1980s):
CLS 2000 shutter.jpg
 

ic-racer

Member
Joined
Feb 25, 2007
Messages
16,605
Location
USA
Format
Multi Format
Fun fact. Everyone knows Ansel Adams had a 8x10 (11x14 actually) enlarger in his home. That was highly unusual at the time.

What many don't realize is that the Durst L1840 8x10 enlarger was designed, put into service and discontinued all in the time since Ansel Adams' death.

Screen Shot 2019-05-19 at 11.15.17 AM.png
 
Last edited:
OP
OP
Serg Lavrenchuk
Joined
Jun 23, 2008
Messages
105
Location
Kiev, Ukraine
Format
Multi Format
:smile: you made my morning,
Maybe my DeVere headless 11x14 condenser machine would also work one day as Mr. Jensen is also dead now.

Jensen DeVere.jpg


As for your EST 2000, i think that looks like a bigger copy of EST 500 unit. Here below some photos, I have made of my EST 500 power unit while repair (problem appeared in optocoupler being short-circuited).
Maybe somebody would get the help of them.

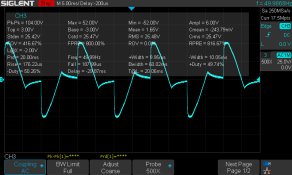
20190305_040556 3K.jpg 20190305_040733 3K.jpg IMG_20190226_103012 2K.jpg SDS00004.png

The last one is the image (from scope) of how stabilized output supplied to the enlarger headlamp looks like (when the unit is working).
 
OP
OP
Serg Lavrenchuk
Joined
Jun 23, 2008
Messages
105
Location
Kiev, Ukraine
Format
Multi Format
That was some fiasco today with testing our 8 mint and factory packed EST 1500 N units from the storage shelf.
3 of 8 didn't start up and it was due to solder joints have being fallen off or forgotten to add solder.

after that

3 of 8 had problems with display blinking all the time without result on it while powering the lamp (regulation is working with the knob but you do not know how much output you get).
2 of 8 had problems with a display showing 002-004 all the time without result on it while powering the lamp (regulation is working with the knob but you see 0 voltage\power? on display).
1 of 8 started from the first time and showed voltage/power/something changing with knob (but 4 digits instead of 3).
2 of 8 started from the first time and showed RMS voltage applied to Colamp2000 (3 digits). "Good" ones.

On the first look that was the problem with the Display/measuring PCB.
But interchanging displays with power regulator showed that all displays that were blinking are working fine with power regulators that worked well with own displays.
So the problem was not with display PCB but regulator itself (maybe its "filter unit").
At the moment I think that the filter unit of the regulator pair do not stabilize well so the display goes crazy with measuring Vrms.

Connecting display directly to 220v line from the wall showed "220" on all the blinking and working displays.
That is why it was considered that the author meant "Vrms" measurement on this unit.

We still hope that 2 units that displayed "002-005" are just misconnected displays but not overall bad units.

Nice thing that made me smile about this design today was to find out that one of the yellow relays on the left is operated by 220v directly
from the on/off switch and commutate 9v from the battery to the display (some guys were wondering what 9v battery is there for).


PS "Sergey, EST1500 N-2000 have variable load, this is completely new advanced technology."
 

DREW WILEY

Member
Joined
Jul 14, 2011
Messages
14,158
Format
8x10 Format
Ansel made an oxen-drawn cart when he could have just gone out and bought a Ferrari. ... well, if he could have afforded it back then, which he probably couldn't. Most of his mural sized prints were actually made by an appropriately equipped pro lab in SF under his supervision. As for Mr Jensen, he was notorious for delivering less than you actually paid for, if you were
lucky enough to receive anything.
 
Photrio.com contains affiliate links to products. We may receive a commission for purchases made through these links.
To read our full affiliate disclosure statement please click Here.

PHOTRIO PARTNERS EQUALLY FUNDING OUR COMMUNITY:


Ilford ADOX Freestyle Photographic Stearman Press Weldon Color Lab Blue Moon Camera & Machine
Top Bottom