

When I use a scanner the scanner software does a good job converting to positive but when I use the camera I have a hard time converting to positive using Photoshop. I know some people use some kind of plug in but without the plug in how is best to do the conversion?
-
Welcome to Photrio!Registration is fast and free. Join today to unlock search, see fewer ads, and access all forum features.Click here to sign up
You are using an out of date browser. It may not display this or other websites correctly.
You should upgrade or use an alternative browser.
You should upgrade or use an alternative browser.
Digitizing negative film, how to convert to positive?
-
H
- Thread starter Chan Tran
- Start date
Recent Classifieds
-
Free French lens probably early XIXcentury
- Started by Gaston 012
-
For Sale Ilford 4x5 FP4+ (Expired June 2023)
- Started by CreationBear
-
For Sale Beseler Audible/Repeating Enlarging Timer w/ foot switch
- Started by CreationBear
-
For Sale Tanks n hangers
- Started by CreationBear
-
For Sale 5x7 Fidelity Elite Film Holders
- Started by Jammoh
Forum statistics
djdister
Subscriber
In Photoshop I invert the image first, re-save it, then open it in Camera Raw to fine tune color balance, exposure and contrast, before opening in Photoshop again for other adjustments.
Koraks has a good write up on it.
What I do:
1. Convert from RAW to TIFF in RawTherapee using (optional) Adobe 1998 color profile and a linear ICP for your digital camera.
2. (optional but helpful): For each roll, take a picture of an unexposed frame. Paste this as a layer over your exposed frame (should have same exposure as all other frames on roll) and Gaussian Blur it about 20px to remove the film grain. Then use the Divide blending mode. Flatten the image. This will help get rid of the color of the film base and also help take care of any stray light that is getting into your imaging system. It only works if you use the same exposure on all frames and your imaging system remains still, in a constant position for all frames.
2. Invert the image.
3. Use Curves on each color channel to pick the black point. Use the area just outside the image if there is no black on your image. The curves should be a straight line that you are adjusting the starting point.
4. If there is white in your image, use Curves on each color channel to pick the white point. If there is no white, play around with each channel until it looks relatively neutral toned. The curves should be a straight line that you are adjusting the endpoint.
5. Use Curves on each channel to adjust the midtones until it seems there is no color cast. It will look like you are bowing each curve in the middle.
6. Use Curves on all channels to adjust the overall contrast of the image. Generally a gentle S-shape pulling down the shadows slightly and increasing the highlights slightly is what I like to do for most images. This expands the midtone range. Your preferences may vary.
I use Gimp but the last time I used Photoshop it had all these functions with the same names.
Last edited:
I'm confused... If you upload the file into photoshop, you should be able to use the short cut "control+I" to convert to a positive... How old is your version of PS?
vandergus
Member
This is the simplest way I've found to do a manual conversion.
1. Open file in Camera Raw.
2. Use the white balance eye dropper and select the film border.
3. Finish opening the file in Photoshop
4. Create a levels layer for inversion. On the "Output Levels" slider drag the white point all the way to the left and the black point all the way to the right.
5. Crop the frame to just the exposed image area.
6. Create a levels layer for contrast correction.
7. Alt+click on the "Auto" button. Select "Optimize contrast on each channel".
8. Create a levels layer for color correction.
9. Select individual color channels and drag the midpoints to correct color cast. Blue channel usually needs the most correction, then green. Red doesn't need much.
That should give you a flat, balanced image that contains all the data on the negative. Final color and tone adjustments can be handled with additional layers in Photoshop or later on in Lightroom.
Grain2Pixel is a free photoshop plugin that I also use. It gives ok results but it can be automated, so I typically use it to make preview images of the entire roll. Then use the manual inversion process to get a more polished final image for the keepers.
How do we know he is dealing with RAW files, though?
Pioneer
Member
If my scanner dies I'll just buy another one or go back to my enlarger.
Conversion problems is why I choose to shoot chromes.
OP
OP
How do we know he is dealing with RAW files, though?
I am sorry but I do shoot raw. I would prefer to do as much as possible with Adobe Camera Raw before going into Photoshop.
runswithsizzers
Subscriber
^ What he said. Except I would say Open the file rather than Upload. And for a Mac, the keys are "Command + I"If you upload the file into photoshop, you should be able to use the short cut "control+I" to convert to a positive
Open the file in Photoshop. If it is a RAW file, then this is always a two-step process. RAW files always open first in ACR (Adobe Camera Raw) where you may, or may not, want to make some initial adjustments before handing the photo over to Photoshop. Most files from a scanner are probably not RAW files, unless you have done some custom settings in the scanner software. But I do recommend setting your digital camera to record RAW files whenever possible.
In Photoshop, either use the keyboard shortcut mentioned above,
... or you can find the Photoshop "Invert" command in the menus:
Image > Adjustment > Invert
at least that's how it works in the Mac version
No plug-in needed, really.
vandergus
Member
^ What he said. Except I would say Open the file rather than Upload. And for a Mac, the keys are "Command + I"
Open the file in Photoshop. If it is a RAW file, then this is always a two-step process. RAW files always open first in ACR (Adobe Camera Raw) where you may, or may not, want to make some initial adjustments before handing the photo over to Photoshop. Most files from a scanner are probably not RAW files, unless you have done some custom settings in the scanner software. But I do recommend setting your digital camera to record RAW files whenever possible.
In Photoshop, either use the keyboard shortcut mentioned above,
... or you can find the Photoshop "Invert" command in the menus:
Image > Adjustment > Invert
at least that's how it works in the Mac version
No plug-in needed, really.
This isn't going to get you a good looking photo. You still have to correct for the orange film base, adjust the contrast (the exposure information on the negative scan is usually all clustered in the center of the histogram), then do further color balancing to get it to look right. Some film needs more balancing than others, but they all need a little.
Conversion is not simply inversion. There's more to it than that.
Last edited:
@runswithsizzers haha yes that is right. I have PS on my Mac, and also on my PC. Going back and forth between gives me a headache 
I am sorry but I do shoot raw. I would prefer to do as much as possible with Adobe Camera Raw before going into Photoshop.
I have new version of PS on my PC. When I open a RAW file, I can convert it there... Are you using an older version? I have CS5 on another computer, and I am unable to do that...
runswithsizzers
Subscriber
You are correct, sir! Silly me, I *assumed* we were talking about black and white film. insert shame-faced smiley hereThis isn't going to get you a good looking photo. You still have to correct for the orange film base, adjust the contrast (the exposure information on the negative scan is usually all clustered in the center of the histogram), then do further color balancing to get it to look right. Some film needs more balancing than others, but they all need a little.
For color film, I can tell you how I do it, but I use Lightroom. Not everyone who has access to Photoshop also has access to Llghtroom but if you are subscribed to the Adobe Photography Plan, you have both.
I do all my negative conversions completely in Lightroom using the Negative Lab Pro plug-in (NLP).
The NLP plug-in is not cheap, and it is not all that easy to learn how to use, but once I got the hang of it, I started getting pretty good results. In the past few years all my film has been b&w, so it's been a while since I used NLP for color. It looks like recent updates to NLP have made it even more powerful.
Last edited:
djdister
Subscriber
How do we know he is dealing with RAW files, though?
You can open files other than RAW in Camera Raw - I've opened TIFFs and JPGs in Camera Raw when I wanted to use its abilities (for example, white balance, perspective correction) to process before opening in Photoshop. Try it sometime...
OP
OP
You are correct, sir! Silly me, I *assumed* we were talking about black and white film. insert shame-faced smiley here
For color film, I can tell you how I do it, but I use Lightroom. Not everyone who has access to Photoshop also has access to Llghtroom but if you are subscribed to the Adobe Photography Plan, you have both.
I do all my negative conversions completely in Lightroom using the Negative Lab Pro plug-in (NLP).
The NLP plug-in is not cheap, and it is not all that easy to learn how to use, but once I got the hang of it, I started getting pretty good results. In the past few years all my film has been b&w, so I got out of the habit using NLP for color, but recent updates to NLP have made it even more powerful.
I did say I don't want to use a plug in.
OP
OP
I have new version of PS on my PC. When I open a RAW file, I can convert it there... Are you using an older version? I have CS5 on another computer, and I am unable to do that...
I am using ACR 17.5
runswithsizzers
Subscriber
Do people just copy the settings from the first adjusted picture and apply them to the rest of the photos?
OP
OP
Do people just copy the settings from the first adjusted picture and apply them to the rest of the photos?
If it's the same roll of film then yes. You may need to adjust the exposure a bit. Different roll of film (even of same type unless same batch and refrigerated) will requires different color balance. That's the pain when I did the printing in the darkroom and that was why I bought a scanner. The adjustments needs when I scan can be used to determine the filter settings on the enlarger.
- Joined
- Jan 14, 2007
- Messages
- 689
- Format
- Medium Format
I have been tempted in using an old slide copying machine that is equipped with a dichroic color head as the light source for scanning negatives using my Sony a7. It is just like color heads of color enlargers. I have been wondering if the CMY filters when applied properly can convert the colors just like a color enlarger does in wet printing in a darkroom . As a result I hope I will only need very small amount of photoshoping. That machine had a price tage around $2k long long time ago. I picked one up cheaply though. I have yet to dig it out to try it. Any one know if this is a right idea?
Attachments
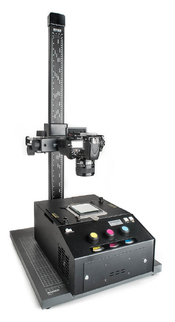
No, they can't convert anything, but you can dial the filters so as to 'cancel out' the orange mask, which helps to get the color curves to overlay more neatly, which in turn has some theoretical advantages in terms of digital signal quality. However, if you shoot in RAW on a camera like yours, its color resolution is already plenty to capture everything in a typical color negative - which has a limited density range anyway.I have been wondering if the CMY filters when applied properly can convert the colors just like a color enlarger does in wet printing in a darkroom
You theoretically could use the filters to capture three consecutive exposures, one for each color channel, and that way circumvent crosstalk problems arising from the camera's color response (which isn't exactly clean). Some argue that this gives better color rendering after the inversion. However, this also depends quite strongly on the rest of the digital workflow; it's easy enough to start out with a good digital file and mess things up with poor color balancing. Conversely, even a mediocre digital capture can be bent into a presentable color image as long as no image data are clipped. As a result, the question is how much practical use such a multi-channel capture mode has for typical consumer use.
I can imagine some benefits for archival/cultural heritage applications where color data are captured at several channels (more than just 3) to fully characterize the film, then do the same for paper, and that way be able to reconstruct the colors of existing but deteriorated prints in collections.
- Joined
- Jan 14, 2007
- Messages
- 689
- Format
- Medium Format
Thanks a lot for the quick response. What you said is encouraging. I did hope that the dichroic color head will allow me to get rid of the orange cast of the negatives. So I will only need to do a simple inverse of the image captured by the digital camera to obtain a reasonable positive image. I understand that much of post (color) adjustment will be necessary still to achieve optimal result. That's a much more technical topic to get into (for me to learn honestly). Thanks again for confirming that it is a right thinking of using a dichroic head light source as the first step to scan negatives using a digital cam.
| Photrio.com contains affiliate links to products. We may receive a commission for purchases made through these links. To read our full affiliate disclosure statement please click Here. |
PHOTRIO PARTNERS EQUALLY FUNDING OUR COMMUNITY:  |