

I've had two of this model of analyzer(The last one works great and I gave it to my friend),And this time when I was calibrating the one I keep for use,when I change to m and y channel the needle just stay in the left(even with largest aperture)
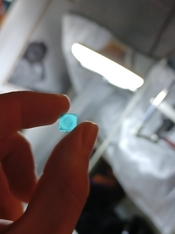
I think it's because those filters in the probe are dirty,and finally I found this piece of plastic filter which cover the sensor.
I took it off and, y channel still stay on the left,And as always they only move when I put a flashlight on them.
Anyone knows what this filter do? and is there any possibility to repair it or just put it in the trash bin
Really appreciate for help and any advice
I think it's because those filters in the probe are dirty,and finally I found this piece of plastic filter which cover the sensor.
I took it off and, y channel still stay on the left,And as always they only move when I put a flashlight on them.
Anyone knows what this filter do?
and is there any possibility to repair it or just put it in the trash binReally appreciate for help and any advice
 Now I know what it is

 )
)
 Unfortunately I never could find them
