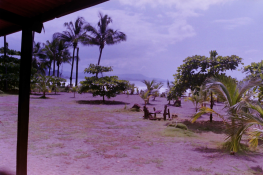
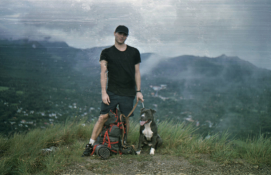
Color issues with C41 development. Inconsistent results

Diner

A
Diner

  • 1
  • 0
  • 43
Gulf Nonox

A
Gulf Nonox

  • 5
  • 2
  • 46
Druidstone

A
Druidstone

  • 7
  • 3
  • 99
On The Mound.

A
On The Mound.

  • 1
  • 0
  • 58
Ancient Camphor

D
Ancient Camphor

  • 6
  • 1
  • 68

Forum statistics

Threads
197,801
Messages
2,764,672
Members
99,478
Latest member
BS Taylor
Recent bookmarks
0

perrodelsur

Member
Joined
Nov 12, 2020
Messages
16
Location
Panama
Format
35mm
Hello!

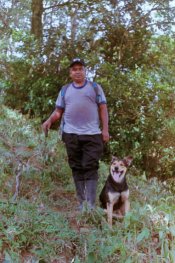
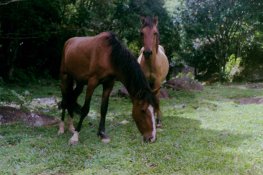
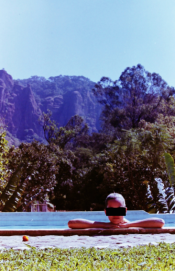
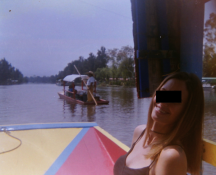
I've been developing film for over a year, sadly its still a hit and miss regarding color precision.

Sometimes I get it correctly with little to no changes needed, but 3 out of 5 times I get a magenta shade over the whole film (it can shift to green in some occasions). Is there any way to consistently avoid this?

Process is always the same:
1. Pre-heat Developer and Blix to 102 F`/39C
2. Pour Developer for 3.5 mins with instructed agitation, then I pour Dev back into the container
3. Pour Blix for 6.5 min with instructed agitation, then I pour Blix back into the container
4. Wash for 3 min
5. Stabilize for 1 min
6. Dry

Kodak ultramax 400
C41 unicolor

Should I add a wash inbetween somewhere? In that case should I dispose my current chemicals and get new ones?

Image 1.png
Image 2.png
 

Rudeofus

Member
Joined
Aug 13, 2009
Messages
5,056
Location
EU
Format
Medium Format
Which software do you use for creating these images from negative scans? Many of my original scans look like this, but it is not certain whether that's a development or a post processing issue. Whenever I wet print my negatives I get normal looking colors.
 
OP
OP

perrodelsur

Member
Joined
Nov 12, 2020
Messages
16
Location
Panama
Format
35mm
To be honest I use a cheap Scanza scanner, but Ive always tought that the issue was with the negatives since they do look reddish when this happens.

I feel that I would be "cheating" if I rely more on photoshop instead of fixing my developing process.

Should I try a better scanner maybe?
 

koraks

Moderator
Moderator
Joined
Nov 29, 2018
Messages
21,235
Location
Europe
Format
Multi Format
In virtually all cases, it's impossible to say anything about the color quality of c41 negatives on the basis of scans. Maybe the negatives are bad, maybe they're good. Nobody knows at this point.

Scanning and particularly color correction is an art&skill. Don't expect magic out of the box.
 

Donald Qualls

Subscriber
Joined
Jan 19, 2005
Messages
12,137
Location
North Carolina
Format
Multi Format
If you don't have crossover (highlights with one cast, usually magenta, and shadows with the opposite, usually green, and can't be corrected out with filters or software), color cast is more likely to be the scanner/scanning software than the development. Crossover comes from differences in amount of development of the color layers in the film, so (for instance) the cyan (bottom) layer gets a lower contrast than the magenta, while yellow (top layer) gets the most. This usually comes from temperature drops, insufficient agitation, or exhausting developer -- but unless you're getting crossover, overall casts are due to scanning problems (or filter selection errors in printing, like too little magenta filter causing a magenta cast everywhere in the print).
 
OP
OP

perrodelsur

Member
Joined
Nov 12, 2020
Messages
16
Location
Panama
Format
35mm
If you don't have crossover (highlights with one cast, usually magenta, and shadows with the opposite, usually green, and can't be corrected out with filters or software), color cast is more likely to be the scanner/scanning software than the development. Crossover comes from differences in amount of development of the color layers in the film, so (for instance) the cyan (bottom) layer gets a lower contrast than the magenta, while yellow (top layer) gets the most.

Hmm now Im starting to believe that I might have crossover issues, because it is hard to fix the magenta and green cast over the final results.

Developer was new, so I guess it could be a temperature or agitation issue. Is there a way to identify for sure the issue with the negatives (before considering a new scanner)?

I want to keep progressing with the technique but its somewhat frustrating to lose pictures over this errors :sad:
 

Donald Qualls

Subscriber
Joined
Jan 19, 2005
Messages
12,137
Location
North Carolina
Format
Multi Format
The only easy way (with an untrained eye, like yours and mine) is to scan a negative as a slide, with no corrections applied, and send the file to someone who has experience -- or make a darkroom print (which few color film users can manage). I'm sure there are some with expert eyes here who can/will help. Be sure to include some of the unexposed rebate (between frames, perhaps) with the image so it can be used to correct the mask during manual inversion.
 

foc

Subscriber
Joined
Jun 30, 2010
Messages
2,499
Location
Sligo, Ireland
Format
35mm
Can you show a picture of a strip of your negatives, please.
Something like this.

34905468870_0fceb75f28_w.jpg
 

Rudeofus

Member
Joined
Aug 13, 2009
Messages
5,056
Location
EU
Format
Medium Format
An expensive scanner will not necessarily fix the issue, my Epson V700 plus vuscan frequently produces images like that.

You can try the following: take a color negative, which has been developed by a professional lab. If you see the same strange colors, then you will have to find an efficient way to fix these color errors. If these strange magenta colors are specific to film developed by you, only then should you start varying your development procedure.
 

MattKing

Moderator
Moderator
Joined
Apr 24, 2005
Messages
52,148
Location
Delta, BC Canada
Format
Medium Format
Welcome to Photrio.
Do you have a negative that came out well and includes something you can include in future rolls that can serve as a test subject?
A colour check card is perfect, but a stuffed toy can also suffice.
If so, take that item and include it in a shot or two on two different rolls. Send one to a professional lab, and develop the other yourself. That will give you a useful source of comparisons.
 
OP
OP

perrodelsur

Member
Joined
Nov 12, 2020
Messages
16
Location
Panama
Format
35mm
Can you show a picture of a strip of your negatives, please.
Something like this.

View attachment 259228


Hello, Thank you for your time!

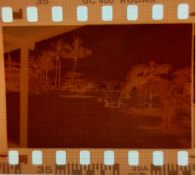
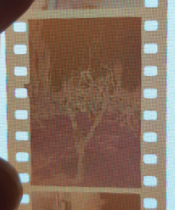
This would be the negatives, what do you think?

Im just noticing that I did not edit the pictures, I guess I had the feeling that if I needed to edit the picture its because I failed in some part of the process.

Ill get some test rolls to check the color of my home developing vs. lab.

Image 5.png
Image 1.png

Test 1.png
Image 2.png
 

MattKing

Moderator
Moderator
Joined
Apr 24, 2005
Messages
52,148
Location
Delta, BC Canada
Format
Medium Format
Looks okay to me :whistling::wink::D
upload_2020-11-12_19-51-23.png


(after a minute or so of simple edits to the positive image that resulted from the scan).
The negatives themselves look pretty normal.
The scan is most likely the source of your difficulties.
 

Mesabound

Member
Joined
Aug 31, 2020
Messages
50
Location
US
Format
Multi Format
I agree, negs look fine. Are you letting the Scanza invert the image? My own cast issues were greatly reduced by scanning the raw negative image and then inverting it myself in Photoshop or through a program such as Negative Lab Pro. The scanning forum could possibly be of assistance, though I also think the Scanza itself is probably not doing you any favors (though Rudeofus is right in that a better scanner isn't necessarily a cure-all).

Also, there is no failure to be found in needing to tweak film images in post to achieve ideal results. This is extremely common as far as I know, if not totally standard.

Edit - This is what the attached image looks like after auto white balancing and slightly turning down magenta highlights in LR Image 2.jpg

Perhaps a touch cool, but a few finer adjustments and you'd be there IMO.

Horses (again, minor wb adjustment): Image 1.jpg
 
Last edited:

foc

Subscriber
Joined
Jun 30, 2010
Messages
2,499
Location
Sligo, Ireland
Format
35mm
Thanks for posting the photos of the neg strips.
As has been already said, your negs look good.
You should be happy with your C41 processing. Your negs look clean and right contrast, the orange mask looks fine, the edge markings are sharp and readable.
Now it only a matter of getting your scanning and colour correction right.
 
OP
OP

perrodelsur

Member
Joined
Nov 12, 2020
Messages
16
Location
Panama
Format
35mm
Thank you all for the feedback, its greatly appreciated!
I was feeling discouraged, now Ill focus on improving the editing skills
 

Cholentpot

Member
Joined
Oct 26, 2015
Messages
6,669
Format
35mm
I'm going to chime in, you can ignore me if you'd like.

I had the same issue for a while. I could not figure out what the problem was. Development was at 102, I used a souse vide and everything. But my colors were wrong.

I raised the temp by 2-3 degrees to compensate for the drop and it worked. I was told it was my post, my method, everything. It turns out when I erred on a higher temp my film would come out far better.

Scan from development at 102
hddf7ZL.jpg


and 104+
ppyrfB7.jpg


Second photo was developed using a wrung out kit and still came out better then the fresh development of photo one. And to get the 102 photo to look even close to good took a lot of post. Photo 104 was a quick edit.
 
OP
OP

perrodelsur

Member
Joined
Nov 12, 2020
Messages
16
Location
Panama
Format
35mm
I'm going to chime in, you can ignore me if you'd like.

I had the same issue for a while. I could not figure out what the problem was. Development was at 102, I used a souse vide and everything. But my colors were wrong.

I raised the temp by 2-3 degrees to compensate for the drop and it worked. I was told it was my post, my method, everything. It turns out when I erred on a higher temp my film would come out far better.

Scan from development at 102

Second photo was developed using a wrung out kit and still came out better then the fresh development of photo one. And to get the 102 photo to look even close to good took a lot of post. Photo 104 was a quick edit.

Hello! I just tried developing a new batch, increasing the temperature and sadly colors still feel off. I increased the time of the development 30 more seconds and blix 30 more seconds but it does not seem to affect.

Im thinking maybe its because I agitate using the rotation stick and not the inversion method and that somehow affects the development process.
I guess Ill get a bunch of test rolls and just start trying random stuff (increasing temp, extending times, more agitation and so on) and recording the results.

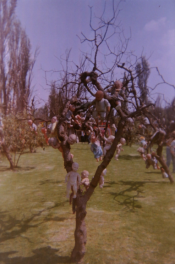
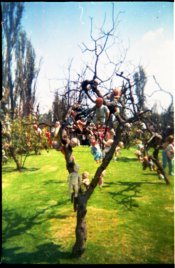
Heres 1 shot:
Original Scan:
Image 15.png
Edited Result:
Image 16.png

Also, I dont think its the scanner, I dug out an old negative developed by a lab and scanned it with the same settings I used on the new ones and it needs little to no edits:
Lab developed (scanned with same settings and scanner as others):
Image 12.png

Im a bit frustrated that Im not getting results like the 2nd picture of Cholenpot, but I really appreciate everybodys feedback and interest. Ill share the test results as soon as I have them in case its usefull to anybody here!
 

Cholentpot

Member
Joined
Oct 26, 2015
Messages
6,669
Format
35mm
Hello! I just tried developing a new batch, increasing the temperature and sadly colors still feel off. I increased the time of the development 30 more seconds and blix 30 more seconds but it does not seem to affect.

Im thinking maybe its because I agitate using the rotation stick and not the inversion method and that somehow affects the development process.
I guess Ill get a bunch of test rolls and just start trying random stuff (increasing temp, extending times, more agitation and so on) and recording the results.

Heres 1 shot:
Original Scan:
View attachment 259706
Edited Result:
View attachment 259707

Also, I dont think its the scanner, I dug out an old negative developed by a lab and scanned it with the same settings I used on the new ones and it needs little to no edits:
Lab developed (scanned with same settings and scanner as others):
View attachment 259705

Im a bit frustrated that Im not getting results like the 2nd picture of Cholenpot, but I really appreciate everybodys feedback and interest. Ill share the test results as soon as I have them in case its usefull to anybody here!

I use the swizzle stick, never had an issue.

Do you leave the tank suspended or holding in the hot water bath while developing? What temp is your prewash/soak?

EDIT

I threw one of your negative scans into photoshop and inverted it then adjusted in LR. While it's very low rez I think something is off with your scanning and post adjustment.

Colors look pretty good here.
0jWGxFD.jpg
 
OP
OP

perrodelsur

Member
Joined
Nov 12, 2020
Messages
16
Location
Panama
Format
35mm
I dont leave the tank inside the bath but weather here is pretty hot should not be an issue. I presoak the film with 39C water for 1 min. I also use a souse vide

I think you are right on the 2nd part, I went back to the Lab developed film and re-scanned one more photo and it comes with the weird red cast. So after comparing I think Im having 2 issues with the developing process:

1. Negatives come out too thick due to excessive agitation. I use the agitation stick for 10secs every 30 seconds, it might be too much? (I thought this would be the equivalent of the 4 inversions in the instruction of the C41 kit).
Lab negatives look "thinner", so my negatives are more saturated and it only makes the color issues worst.
Home negative
Image 18.png

Lab negative
Image 17.png

2. Scanner leaves a red cast over all images. Its a cheap $80 Kodak Scanza, I do think it might be time to upgrade if I want to improve my process.
Home scan of LAB negative:
Image 20.png
Lab scan of Lab negative:
Image 19.png
Home scan of Home negative:
Image 22.png
Lab scan of Home negative:
Image 23.png

If this is the case:
good news is that my process is not that bad, and I wouldn only need to reduce the agitation time maybe to 5secs every 30 seconds.
bad news I might need to invest in a better scanner.
 

Attachments

  • Image 21.png
    Image 21.png
    809.1 KB · Views: 109

koraks

Moderator
Moderator
Joined
Nov 29, 2018
Messages
21,235
Location
Europe
Format
Multi Format
Im thinking maybe its because I agitate using the rotation stick and not the inversion method and that somehow affects the development process.
This does seem to be causing problems looking at the dense edges and lower density center part of the film. Not sure if it's the only cause of your problems (I think something else might be going on as well), but I'd try a different agitation method.
Is your blix going to completion? I have a feeling it isn't.
 

Mesabound

Member
Joined
Aug 31, 2020
Messages
50
Location
US
Format
Multi Format
Cholentpot, would you mind divulging the stock used on the 104 degree still life? Your results have me second guessing my own processing! Really excellent.
 

Rudeofus

Member
Joined
Aug 13, 2009
Messages
5,056
Location
EU
Format
Medium Format
I threw one of your negative scans into photoshop and inverted it then adjusted in LR. While it's very low rez I think something is off with your scanning and post adjustment.
The main question is: did you have to adjust the slope of individual color channels after inversion, or just their height? Is there color crossover, or just different color balance?
 

Cholentpot

Member
Joined
Oct 26, 2015
Messages
6,669
Format
35mm
Cholentpot, would you mind divulging the stock used on the 104 degree still life? Your results have me second guessing my own processing! Really excellent.

I'm using a standard C-41 press kit. The film used in 104 photo is Portra 400NC slit down from a 70mm bulk roll.

The main question is: did you have to adjust the slope of individual color channels after inversion, or just their height? Is there color crossover, or just different color balance?

I use a slightly modified photoshop action from iamthejeff. Photos go back to lightroom after for post adjustment. Files are massive.
 

Rudeofus

Member
Joined
Aug 13, 2009
Messages
5,056
Location
EU
Format
Medium Format
I use a slightly modified photoshop action from iamthejeff. Photos go back to lightroom after for post adjustment. Files are massive.
Can you find out, whether this "photoshop action from iamthejeff" adjusts contrast, or just color balance? Color balance adjustments are expected, but color cross over would indicate a color development error.
 
Photrio.com contains affiliate links to products. We may receive a commission for purchases made through these links.
To read our full affiliate disclosure statement please click Here.

PHOTRIO PARTNERS EQUALLY FUNDING OUR COMMUNITY:


Ilford ADOX Freestyle Photographic Stearman Press Weldon Color Lab Blue Moon Camera & Machine
Top Bottom