

Hi all,
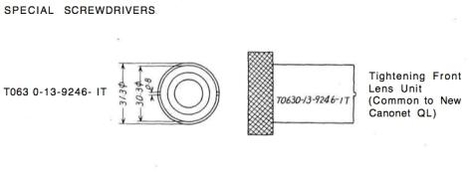
I have a friend who has been looking for Canon tool T063 0-13-9246-IT. He has been searching for the last two years with no luck. We're in the process of trying to get one fabricated, but I thought I would post here in case any one had leads on where to find one. Schematic is attached. Thanks!
I have a friend who has been looking for Canon tool T063 0-13-9246-IT. He has been searching for the last two years with no luck. We're in the process of trying to get one fabricated, but I thought I would post here in case any one had leads on where to find one. Schematic is attached. Thanks!

 ) is a machinist divider. There are adjustable but more stable than pliers. They are not the strongest for rotational force, but you can grab the two legs with pliers (slip joint better than needle nose) or an adjustable wrench to keep the legs from splaying, etc. They come in different sizes.