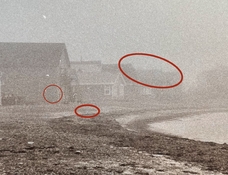
Hi! I got these blueish spots on a print after bleach and redevelopment, I have included a picture of the print and circled general areas where the blueish spots are but they are not easy to see on the pictures of the print. Even on the print itself they are quite subtle but apparent enough to discard the print. My developper is Ansco 130 1+1 and I diluted it 1+20 for the redevelopment. The bleach is a simple 10g Potassium ferricyanide and 5g Potassium bromide in 1L. The paper is Ilford Classic Matt. Redevelopment lasted for 5 minutes and was followed by a Thiocarbamide bath. Of course there was a rinse of a few minutes in running water in between each stage. I finished with a second fix bath and a long rinse. The fixer is not exhausted but is not fresh at all (Legacy pro Neutral fix). The spots seems to have appeared during the redevelopment stage and were the about the first thing to show up. As redevelopment progressed they were less and less obvious and even less so after the toning. The aim of all this was to do a reversed split sepia toning with sepia in the shadows instead of the highlights. It's a succes except for the fact that I have a few of those spots. If someone is able to point out what could be the cause and how to prevent it that would be really great.
Many thanks!
Many thanks!