Bad news, good news.

Sombra

A
Sombra

  • 0
  • 0
  • 10
The Gap

H
The Gap

  • 5
  • 2
  • 55
Ithaki Steps

H
Ithaki Steps

  • 2
  • 0
  • 74
Pitt River Bridge

D
Pitt River Bridge

  • 6
  • 0
  • 81

Forum statistics

Threads
199,004
Messages
2,784,486
Members
99,765
Latest member
NicB
Recent bookmarks
0

FOTOCAT

Member
Joined
Aug 11, 2006
Messages
5
Format
Medium Format
In getting back into large format, I wanted to share some bad news and some good news.
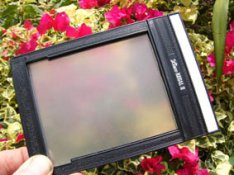
The bad news-I spent weeks retesting my film choices, developing techniques, etc. and was satisfied with everything except a consistent lack of fine focus of my negatives. Checked everything-focusing loupe, eyeglasses, scanner and enlarger focus, etc---still mushy! Suddenly the lights came on, and a quick check of the focal plane of my ground glass revealed that I was almost 3/16" off after replacing the Fresnel on my Wista field camera. An accurate shim job brought it to the film plane--how stupid!
The good news-my choce of TMax-RS developer with TM-100 has not only performed well, but the mixed developer has performed repeatedly after being mixed for over six months-an admirable shelf life.
 

Vaughn

Subscriber
Joined
Dec 13, 2006
Messages
10,102
Location
Humboldt Co.
Format
Large Format
Glad the bad news resoloved itself into good news!

I bought a used Zone VI 8x10 from Midwest Photos 11 or so years ago. It came with a frensel that was mounted between the GG and the lens (directly in front of the GG). I don't care for frensels so I removed it. Now, my negs have always seem to be in focus (barring operator error, anyway), but several months ago I got worried -- was that frensel suppose to have been there? Have I just been lucky because I usually stop down to f/64 or 90 and DoF has taken care of my mistake?

So I check the distance to the GG and compared as best as I could to the distance to the film plane. It seems to be the same. Whew!!!

Perhaps the previous owner sold it to Midwest Photo because they could never get a sharp neg out of it. My gain, anyway!

vaughn
 

jstraw

Member
Joined
Aug 27, 2006
Messages
2,699
Location
Topeka, Kans
Format
Multi Format
What's the best way to determine whether the ground glass and the film plane are the same? Micrometer?
 

Vaughn

Subscriber
Joined
Dec 13, 2006
Messages
10,102
Location
Humboldt Co.
Format
Large Format
What's the best way to determine whether the ground glass and the film plane are the same? Micrometer?

LOL! That is why I said I did it "the best I could"! I just took the back off, put a ruler across the back (on the "frontside" -- the side towards the lens) and then used a second ruler to measure from the first ruler down to the GG. The I put in a film holder in the back, removed the slide and measured the same way down to the holder.

I suppose I should have had a piece of film in the holder, but since the ruler was only in 1/16ths, and my eyes at that working distance aren't that great (too close with my glasses, too far without them), the .004" thickness of the film would not have made much difference in terms of my accuracy.

I was looking for a difference close to the thickness of the frensel. Did not find it, so I am assuming I am in good shape.

I would not mind hearing from other Zone VI 8x10 owners (mine is pre-Calumet ownership -- serial number 270, non-bail handle) about their GG and frensel set-ups.

Vaughn
 

rwyoung

Member
Joined
Apr 18, 2006
Messages
708
Location
Lawrence, KS
Format
Multi Format
What's the best way to determine whether the ground glass and the film plane are the same? Micrometer?


Low-tech way is to have a straight edge and a second shorter straight "thing" with a small diameter and lastly a marker of some kind.

Place straight edge corner to corner across the part you wich to check for depth. Use the second straight element perpendicular to the surface, against the straight edge. Use your marker to put a tic on the second element. Measure a few places across the surface, and switch to the opposite set of corners for your straight edge. A small right-angle block can be used to make sure you have the perpendicular bit at right angles to the straight edge before marking.

If you use an unsharpened pencil or similar bit of wood, you can make the tic marks with a penknife or razor blade, rotating the pencil slightly between measurements.

When done you can see the average depth of the film/glass plane, the differentials corner to corner and make the appropriate adjustments. No need to physically measure things for absolute lengths since you just need to adjust until the differential measurements are zeroed.


Yet another way is to use a tape measure extending out from the front of the lens, on axis with the lens. Focus on the ground glass a particular tic on the measure, call it the 8 ft mark. Now switch and shoot (maximum lens apeture) a single sheet of film. When developed if all is right with the alignments (but only at that part of the screen/holder) it will show the focus also at the 8 foot mark. Any difference in film/glass plane will make a different mark be in focus. This isn't quite as efficient as the first method because you are checking only one part of the plane and it requires the time and material expense of film per test. On the other hand you can detect very small errors, especially if you have sufficient bellows draw to do close focus and thus have very shallow depth of field.
 
Last edited by a moderator:

razzledog

Member
Joined
Aug 23, 2004
Messages
66
Location
Melbourne. A
Format
Multi Format
Sacrifice a double dark?

A very handy method of checking the film plane/ground glass relationship is to sacrifice a standard 4x5 double dark. I replace the metal divider with a 2mm piece of ground glass. Only use Lisco Regal or Fidelity Elite late type holders with the plastic dark slides. They can be knocked apart in seconds with the use of a vice and hammer.
The glass adopts the same position as the film plane and can be used to quickly check the camera in question.
Depth from edge of the holder to the film plane should be 5mm, but you really need to use a caliper not a ruler!
Remember to use the converted holder with the glass facing shiny side out.
Use of a fresnel can be risky as I've seen them vary in thickness by as much as half a millimeter. At least you can check it against the simple slip in G/G.

If my Polaroid rangefinders are adjusted to match the image focused on this ground glass screen I get sharp results every time. Use a loupe of at least 4x mag and check sharpness right across the glass. :wink:
 

Sparky

Member
Joined
Jun 19, 2005
Messages
2,096
Location
Los Angeles
Format
Multi Format
Use of a fresnel can be risky as I've seen them vary in thickness by as much as half a millimeter.

Fresnels should really only be used (temporarily) OVER the GG for composing, and then removed for focussing, n'est-ce pas?
 

Vaughn

Subscriber
Joined
Dec 13, 2006
Messages
10,102
Location
Humboldt Co.
Format
Large Format
Fresnels should really only be used (temporarily) OVER the GG for composing, and then removed for focussing, n'est-ce pas?

Too bad one can't use them for composting....
 

razzledog

Member
Joined
Aug 23, 2004
Messages
66
Location
Melbourne. A
Format
Multi Format
Graflok fresnel

Many of the Graflok backs incorporate a fresnel fitted on the lens side of the ground glass and the frame is manufactured accordingly. Fitting a G/G only results in a descrepancy of around 1 to 1 1/2 millimeters...so be sure to check it out. :smile:
 

Attachments

  • Ground glass from a holder apug.jpg
    Ground glass from a holder apug.jpg
    60.1 KB · Views: 81

resummerfield

Subscriber
Joined
Jan 28, 2005
Messages
1,467
Location
Alaska
Format
Multi Format
A very handy method of checking the film plane/ground glass relationship is to sacrifice a standard 4x5 double dark. I replace the metal divider with a 2mm piece of ground glass. Only use Lisco Regal or Fidelity Elite late type holders with the plastic dark slides. They can be knocked apart in seconds with the use of a vice and hammer.
The glass adopts the same position as the film plane and can be used to quickly check the camera in question.
Depth from edge of the holder to the film plane should be 5mm, but you really need to use a caliper not a ruler!
Remember to use the converted holder with the glass facing shiny side out.......
Good idea, but you need to account for the 0.007-inch or so thickness of the sheet film. So when you have the holder apart, remove about 0.007-inch from the plastic, to allow the frosted side of the gg to be in the same plane as the emulsion side of the film.

I find a depth micrometer is the most accurate way to measure..... for 4x5, the depth should be 0.197-inch, less the 0.007-inch of the film, or 0.190-inch to the frosted gg side, or to the film in the holder. Without the film in the holder, use the 0.197-inch measurement. And remember, the ANSI standards allow +/- 0.007-inch tolerance.
 

razzledog

Member
Joined
Aug 23, 2004
Messages
66
Location
Melbourne. A
Format
Multi Format
Film thickness?

That`s very accurate calc Eric! I have had perfect results using this method when using FP4, Delta 100, Velvia, Astia and E100VS. I guess the real accuracy lies with who's eye is checking the focus, it's more a brain function than a mechanical operation.

I manufacture my own screen printed glass that's baked in an oven...these give excellent results without the need for a fresnel.....

The glass is slightly thicker, thus a tighter fit than the double dark's original divider, so maybe that makes up for the thickness of the film.....all I know is that after many hundred's of exposures, I'd trust my focusing, using these holders to be correct anytime, depending on the condition of my eyes at the time! :tongue:
 
Photrio.com contains affiliate links to products. We may receive a commission for purchases made through these links.
To read our full affiliate disclosure statement please click Here.

PHOTRIO PARTNERS EQUALLY FUNDING OUR COMMUNITY:


Ilford ADOX Freestyle Photographic Stearman Press Weldon Color Lab Blue Moon Camera & Machine
Top Bottom