I am looking for some guidance on how to repair a Kostiner 16x20 Archival Print Washer (the version with an inlet, outlet and over flow port).
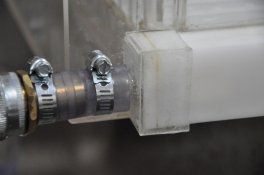
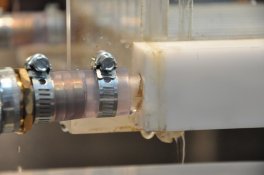
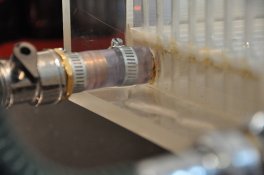
Repair 1 - Inlet and outlet ports are both leaking (photo 1 and 4)
-Would silicone chaulking applied liberally around the ports be a suitable repair?
-Speciality product like Weld-On 16 or another Weld-On product?
-Other approaches?
Repair 2 - Inlet port mounting plate seam is leaking (photo 1)
-Silicone?
-Another APUG post suggested additional white plexiglass over the seam with Weld-On Number 16 Solvent Cement, could the solvent cement be used by it self on the outside seam?
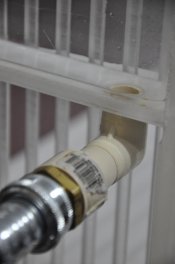
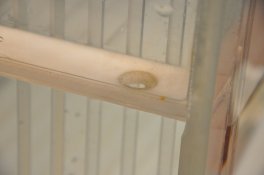
Repair 3 - Overflow port tube has broken off (photo 3)
-I was going to drill out the hole to remove old glue and then silicone back in place
-Based on question above would the Weld-on be a better solution?
Thank you in advance for any experience or suggestions you can offer.
Best regards
Todd
Repair 1 - Inlet and outlet ports are both leaking (photo 1 and 4)
-Would silicone chaulking applied liberally around the ports be a suitable repair?
-Speciality product like Weld-On 16 or another Weld-On product?
-Other approaches?
Repair 2 - Inlet port mounting plate seam is leaking (photo 1)
-Silicone?
-Another APUG post suggested additional white plexiglass over the seam with Weld-On Number 16 Solvent Cement, could the solvent cement be used by it self on the outside seam?
Repair 3 - Overflow port tube has broken off (photo 3)
-I was going to drill out the hole to remove old glue and then silicone back in place
-Based on question above would the Weld-on be a better solution?
Thank you in advance for any experience or suggestions you can offer.
Best regards
Todd
Attachments
Last edited by a moderator: