Anyone interested in testing my little script?

A street portrait

A
A street portrait

  • 0
  • 0
  • 0
A street portrait

A
A street portrait

  • 0
  • 0
  • 15
img746.jpg

img746.jpg

  • 2
  • 0
  • 26
No Hall

No Hall

  • 0
  • 0
  • 32
Brentwood Kebab!

A
Brentwood Kebab!

  • 1
  • 1
  • 99

Recent Classifieds

Forum statistics

Threads
198,784
Messages
2,780,814
Members
99,703
Latest member
heartlesstwyla
Recent bookmarks
0

JaZ99

Member
Joined
Jan 6, 2009
Messages
68
Format
Medium Format
Hi, my usual scanning workflow is to scan negative (any one, b&w or color) as positive, then reverse it using logarithm curve, and then fine tune the image in the Lighroom.

I've developed simple script to speed up this task and I decided to share it with others. I would appreciate any feedback regarding this (bad or good).

The script is here: negfix8

Regards, Janusz
 

Tim Gray

Member
Joined
Sep 2, 2006
Messages
1,882
Location
OH
Format
35mm
I'll check it out. I checked out negfix7 some months ago, and I followed it down the rabbit hole to a massive reexaming of how I do color neg scans. To make a long story short, I tried ColorPerfect (pretty good stuff), wrote my own script inspired by yours to use ImageMagick to process raw scans, investigated Vuescan and Silverfast's capabilities, before finally ending up on my final process.

I got pretty decent results out of your script but better one's out of the one I wrote. With the caveat that there was an expectation that you take the output of the script into Photoshop to fine tune it. The final gamma/contrast settings were something that I think are impossible to automate and need human intervention.

However, at the end of all this, I found it best just to bring the raw scan into Photoshop and invert myself. Then, simply setting the end points of the RGB curves appropriately give me the best color I've ever gotten out of film. Of course, you could start with an already inverted scan from Vuescan, etc., but I find Photoshop gives me more control over this and I usually had to make tweaks anyway, so doing it all in Photoshop is actually faster for me.
 

Stealth3kpl

Member
Joined
May 15, 2010
Messages
25
Format
35mm RF
I found it best just to bring the raw scan into Photoshop and invert myself. Then, simply setting the end points of the RGB curves appropriately give me the best color I've ever gotten out of film.

I'd like to see a definitive explanation of colourneg scanning. Everyone seems to do something different. I wrote this. However, I'm never really that happy with the colours from this prolonged process so I started to change to something that sounds like your process, Tim (ie raw from Vuescan, invert in Capture NX, find end points of RGB, click on grey things until the colours look right then mess with contrast/curves. Lately I've just been neg scanning with silverfast (which annoyingly clips high and lowlights but I think TonyJuliano is getting back to me on that) then clicking greys until I'm happy). I think there's a trick I'm missing somewhere when it comes to colour balancing. I've recently discovered the Densitometer in Silverfast and its equivalent in NX so I can watch how greys alter through the range as each colour curve is adjusted - the aim, presumably, is to have rgb values equal for grey tones from black to white so that darks don't have a colour cast, and whites don't have another. I've never seen anything about this on the net - maybe I've made it up? Also, should the gamma of each rgb curve be adjusted to balance, or dragging each curve itself?
What is very frustrating for me is that I know there are hundreds of photographers getting excellent scanning and colour balancing results but there is very little about it on the web, and what there is seems incomplete. It's hard to understand why each film or hybrid forum doesn't have a decent sticky on the tricks of the trade.
As an example of my personal frustration, the first pic here is colorperfect, and the second is just messing with levels. They both look rubbish to me.
Would you consider doing an idiot-proof explanation of your work flow?
Pete
 

Attachments

  • ColorPerfect.jpg
    ColorPerfect.jpg
    108.2 KB · Views: 106
  • Levels.jpg
    Levels.jpg
    97.8 KB · Views: 85
Last edited by a moderator:

Tim Gray

Member
Joined
Sep 2, 2006
Messages
1,882
Location
OH
Format
35mm
I'm working on writing one. Maybe I'll finish it up this weekend. It's a bit too verbose because it documents the twisted trail I followed to arrive there.

What I can't tell you is what differences you might expect with different hardware and software. But most of it should apply.
 
OP
OP

JaZ99

Member
Joined
Jan 6, 2009
Messages
68
Format
Medium Format
With the caveat that there was an expectation that you take the output of the script into Photoshop to fine tune it. The final gamma/contrast settings were something that I think are impossible to automate and need human intervention.

Thank you for your feedback. You are 100% right, you cannot completely automate the process of image making. However, not everyone is using Photoshop and I believe the PS is great tool for photo editors/graphics professionals. Long time ago I've discovered I do not need it, and now I'm using Lightroom exclusively. The Lightroom has everything I need except for negative->positive conversion. And the Lightroom is faster than PS, at least for me. I think that my script may be useful for people who are deploying similar workflow.

I'm looking forward your workflow description, I hope I can learn more from you.

As an example of my personal frustration, the first pic here is colorperfect, and the second is just messing with levels. They both look rubbish to me.

Would you like to try the negfix8 script and compare it with your results? If you don't like the CLI interface, maybe you could share the crop of raw linear scan (gamma=1.0, negative scanned as positive), I can process it for you for comparison.
 

Stealth3kpl

Member
Joined
May 15, 2010
Messages
25
Format
35mm RF
Yes, I'd be interested. I don't know what negfix8 is. Is it a LR3 or Photoshop plug-in? Do you want me to post my linear scan here or send it to you?
Pete
 
OP
OP

JaZ99

Member
Joined
Jan 6, 2009
Messages
68
Format
Medium Format
Yes, I'd be interested. I don't know what negfix8 is. Is it a LR3 or Photoshop plug-in? Do you want me to post my linear scan here or send it to you?
Pete

The link to the script and doc is on the first message. It is an external script, not a plugin.

Tiff file with linear scan can be huge, but if your compressed tiff is smaller that 25MB, you can upload it here: Uploader.pl
You can delete it later on.
 

Tim Gray

Member
Joined
Sep 2, 2006
Messages
1,882
Location
OH
Format
35mm
Long time ago I've discovered I do not need it, and now I'm using Lightroom exclusively. The Lightroom has everything I need except for negative->positive conversion. And the Lightroom is faster than PS, at least for me. I think that my script may be useful for people who are deploying similar workflow.

Ahh, I got you. I have access to Photoshop through work, so it represents a no-cost option for me.

I tried out the newest version of your script. It's pretty nice.

I acknowledge you can get something very quickly with LR/Camera Raw, and with the combination of your script and Camera Raw, I was able to quickly match (and best) some of the minilab scans I've gotten from some 'problem' negatives. These are negatives in tough lighting (tungsten balanced fluorescents, etc.) or that contain a wide scene brightness range. However, I get what I think of as better color using PS, or more importantly, RGB curves.

Here are my two problems with Lightroom/Camera Raw.

- The big problem I have: color balancing seems to be limited to only to moving along the yellow/blue and magenta/green axes. We are missing the cyan/red adjustment. Maybe there's another way to access this and I'm just overlooking it. I know there are the split toning options and the complicated color panel with hue, sat, and luminance. But, a lot of my initial color correction makes use of all three curves, and I'm having a hard time duplicating this in Camera Raw.

Furthermore, these adjustments seem to be limited to moving the midpoint around, and not the endpoints. I'm finding that most of my initial color correction of negatives can be done by merely moving the endpoints of the RGB curves around individually. I can't seem to replicate this in Camera Raw. This is a step that your script does (in addition to the inversion); I find I need to make these adjustments with some visual feedback. The areas where I find this really problematic is with skintones, especially in mixed lighting.

- Contrast changes and curves seems to be luminosity only. This is alright a lot of the time, but it's nice to have the flexibility of switching over to a normal blending mode as well.

If you look at the characteristic curve of a color negative, you see that the RGB layers have different densities for a given exposure, but (roughly) the same gammas. Assuming we can keep the gammas of each layer the same, setting the black point to the right RGB value should take care of most of our color correction. The white point should also be set in conjunction with the same amount of shift. This would cause the RGB characteristic curves to overlay, given use a neutral gray scan and proper color balance. Minor curve adjustments could then deal with mixed lighting or slight gamma differences in the RGB characteristic curves.

As I understand it, your script guesses at the white and black point by reading the min and max densities in the scan and sets the endpoints of the curve accordingly. This is more or less analogous to one of the auto color modes in Photoshop, and should get you pretty close. However, I'm not seeing how Lightroom/Camera Raw gives you the tools to correct for minor errors in that process. If the brightest highlight in the scene is instead a light green, automatically assuming it's bright white isn't going to give you the right color balance. Am I correct that negfix wouldn't get this right? Furthermore, is there an easy way to correct for this in Lightroom? There is Photoshop, just by moving the endpoint of the green curve.

Maybe I'm over thinking all of this. Lightroom certainly does let you process scans quickly to pretty good color. Maybe that's enough.
 
OP
OP

JaZ99

Member
Joined
Jan 6, 2009
Messages
68
Format
Medium Format
There is Pete's image by negfix8 -- no postprocess at all, just converting to jpg.

 
OP
OP

JaZ99

Member
Joined
Jan 6, 2009
Messages
68
Format
Medium Format
Ahh, I got you. I have access to Photoshop through work, so it represents a no-cost option for me.

I do have PS Elements, was bundled with the scanner. :wink:

If the brightest highlight in the scene is instead a light green, automatically assuming it's bright white isn't going to give you the right color balance.

Around negfix5 or 6 I have discovered (and it was really surprise), that it does not matter what is the color of brightest higlight. It is enough if all layers in the film has some highligts, even in different places. Sure, the output will not be perfect, but it will not be bad either. Easy correctable in LR.

The big problem I have: color balancing seems to be limited to only to moving along the yellow/blue and magenta/green axes.

I do not need colors to be perfect, I need to be not false, I mean, close enough.
Bad picture still will be bad, even if all colors are perfect match to the reality.
And to be honest, most of my pictures sucks.

If you look at the characteristic curve of a color negative, you see that the RGB layers have different densities for a given exposure, but (roughly) the same gammas. Assuming we can keep the gammas of each layer the same, setting the black point to the right RGB value should take care of most of our color correction. The white point should also be set in conjunction with the same amount of shift. This would cause the RGB characteristic curves to overlay, given use a neutral gray scan and proper color balance. Minor curve adjustments could then deal with mixed lighting or slight gamma differences in the RGB characteristic curves.

This is the real problem. The curves are not parallel for most films, and sometimes are not even linear. And the curves are moving target even if you keep your chemistry fresh and you obey the procedure. So if you want very precise colors, I think C-41 is no-no.

Look at my Reala characteristic curves:

http://img714.imageshack.us/img714/820/reala120.pdf

Those curves are supposed to be parallel, but they are not because of too much used chemistry.

I've learnt great deal of C-41 negatives during this time, but I'm still slides shooter. Maybe things will change when I will try out new Portra.
 

Tim Gray

Member
Joined
Sep 2, 2006
Messages
1,882
Location
OH
Format
35mm
I like Jaz99's version of this. Here's what I got with default settings in PS. I think there is possibly more to be had depending on your tastes. Adjusting overall contrast, slight color balance, etc. This seems to be a pretty well behaved negative to me - daylight balance with good lighting and good exposure.
 

Attachments

  • rawscan.jpg
    rawscan.jpg
    801.7 KB · Views: 76

Tim Gray

Member
Joined
Sep 2, 2006
Messages
1,882
Location
OH
Format
35mm
Agreed, nothing is perfect :smile: I'm assuming that the curves are linear (in log space), but I know they aren't. Any deviations to this I accept as the characteristic of that particularly film and of film in general.
But back to that point. I think my problem with LR/CR is that I don't know what the heck it's really doing. Some images, taken in non-ideal lighting, need pretty drastic adjustments in the white balance section, and it's unclear to me what that is actually doing. If it's shifting the RGB curves relative to each other, and not just changing the gammas, then it might do the right thing. I don't know. I'll have to investigate more. Unfortunately, I've got to spend time in PS anyway for dust busting and the like.
 

Stealth3kpl

Member
Joined
May 15, 2010
Messages
25
Format
35mm RF
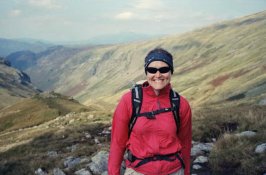
I had another go too. Thanks for going at it for me. At least I know I'm not too far off the ball.
Pete


Levels again.jpg
 
OP
OP

JaZ99

Member
Joined
Jan 6, 2009
Messages
68
Format
Medium Format
I think my problem with LR/CR is that I don't know what the heck it's really doing. Some images, taken in non-ideal lighting, need pretty drastic adjustments in the white balance section, and it's unclear to me what that is actually doing. If it's shifting the RGB curves relative to each other, and not just changing the gammas, then it might do the right thing. I don't know. I'll have to investigate more. Unfortunately, I've got to spend time in PS anyway for dust busting and the like.

Maybe for your style of shooting the LR is not the perfect tool, or you prefer the control the PS is offering. Maybe my pictures were better if I spend more time in postprocessing? :wink: As I'm shooting more and more I do think the technical stuff is important, but the most important thing is answering the question: Is that particular picture is really good? Was it worth pressing the shutter?

BTW LR has cloning/healing tool for dust busting :wink:
 

Tim Gray

Member
Joined
Sep 2, 2006
Messages
1,882
Location
OH
Format
35mm
It's not that I spend more time post processing. PS is faster for me than Lightroom. Throw in the time and extra effort to invert the scan via your script or something similar, especially a big 4000 dpi scan, and it's even worse for me. I do wish LR had just a couple of tools that PS has (or vice versa), because there are some very attractive reasons for using a program like LR.

I saw the healing tool and it's great for small specks of dust but seemed less than ideal for scratches.

I was thinking about the white balance tool in LR some more and do think it is actually the appropriate type of adjustment for what we want to do, so I retract that complaint :D I still have a couple pictures that are harder to correct in LR after running your script, particularly ones with a huge dynamic range. It's doable, but in these cases, it's much faster for me to pop it into photoshop, invert, and adjust the levels.
 
OP
OP

JaZ99

Member
Joined
Jan 6, 2009
Messages
68
Format
Medium Format
It's not that I spend more time post processing. PS is faster for me than Lightroom. Throw in the time and extra effort to invert the scan via your script or something similar, especially a big 4000 dpi scan, and it's even worse for me. I do wish LR had just a couple of tools that PS has (or vice versa), because there are some very attractive reasons for using a program like LR.

Different people - different tools :wink:
I'm sure if you need to use PS for work, it is the fastest and familiar tool to work with. For me there is no point to use PS just for scanning...

I saw the healing tool and it's great for small specks of dust but seemed less than ideal for scratches.

Oh yes, you have the point. Scratches and hair (ocasionally) are headache in LR.
I wish they fix this soon. (Softproofing would be nice too, wouldn't it?)
 

Tim Gray

Member
Joined
Sep 2, 2006
Messages
1,882
Location
OH
Format
35mm
Unfortunately, I don't see Adobe adding features for scan processing any time soon in LR.
 

glhs116

Member
Joined
Jul 4, 2009
Messages
146
Format
35mm
Well, I have been very impressed with the "auto" results from this script. It is just the sort of thing I have been looking for. I shoot a lot of colour neg and am also a Lightroom user.

Can you give us a rundown of the logic and the options? What is the "profiling" option for? Will it give me consistency from frame to frame? How do YOU find yourself using it most of the time?

And thank you so much for sharing!

Sam
 
Photrio.com contains affiliate links to products. We may receive a commission for purchases made through these links.
To read our full affiliate disclosure statement please click Here.

PHOTRIO PARTNERS EQUALLY FUNDING OUR COMMUNITY:


Ilford ADOX Freestyle Photographic Stearman Press Weldon Color Lab Blue Moon Camera & Machine
Top Bottom