Antique Folmer& Schwing 5x7 focal plane shutter repair?

Grape Vines

A
Grape Vines

  • sly
  • May 31, 2025
  • 0
  • 0
  • 7
Plot Foiled

H
Plot Foiled

  • 1
  • 0
  • 26
FedEx Bread

H
FedEx Bread

  • 1
  • 0
  • 28
Unusual House Design

D
Unusual House Design

  • 4
  • 2
  • 67
Leaves.jpg

A
Leaves.jpg

  • 3
  • 0
  • 76

Forum statistics

Threads
197,965
Messages
2,767,385
Members
99,515
Latest member
Omeroor
Recent bookmarks
2

keithostertag

Member
Joined
Feb 11, 2008
Messages
597
Location
Louisville,
Format
Multi Format
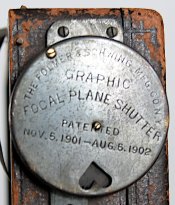
An uncle has given me an antique Folmer & Schwing 5x7 camera (press camera?) circa 1902 that has a focal plane shutter that is jammed. If possible, I sure would like to get this shutter working, or at least understand how to operate it.

Fortunately, there is an instruction sheet taped to the viewing hood (see attached photo).
Unfortunately, it refers to part letters but there is no diagram to show which part is which.

Can any of you point me to or provide a diagram to accompany this set of instructions?

Would any of you be familiar enough with these types of shutters to assist me in repairing it or at least learning how to use it?

Thanks,
Keith

PS-
One other thing I could use is advise on how to clean (or cover?) the deteriorating leather covering on this camera- one cannot hold this camera without getting that rusty brown dust/residue all over yourself...
I also have a Auto Graflex focal plane shutter for this camera, but that will wait until later...


folmer_shutter_1928.jpg
folmer_shutter_instructions_1929.jpg


folmer_shutter_1932.jpg
 

Attachments

  • folmer_shutter_emblem_1930.jpg
    folmer_shutter_emblem_1930.jpg
    671.9 KB · Views: 76

shutterfinger

Member
Joined
Feb 25, 2013
Messages
5,020
Location
San Jose, Ca.
Format
4x5 Format
https://drive.google.com/file/d/0B1...=sharing&resourcekey=0-JlLEG0Yi_nEVpc73579Mpw will tell you how a Graflex Focal Plane Shutter used in Graflex SLR's and Speed Graphics works and how to service them however the controls on your Cycle Graphic are totally different and I will not hazard a guess on how to disassemble the controls.
The shutter in your camera is shot. The crinkled section is what happens to the curtain from poor storage, the strips hanging down on the right are the edges of an aperture that have torn off at the edge of an aperture. The curtain is rubberized silk with .007 inch thick copper stays folded over the edges of the aperture openings. They can be oped with a wood chisel, removed, cleaned and reused. The rubberized coating can be removed with Lacquer Thinner and the silk base reused if the silk is not deteriorated. Tears can be repaired by bonding new material of equal size to both sides of the curtain even if only one side is torn. Golden Heavy Body Artist Paint #1040 Carbon Black https://www.goldenpaints.com/products/colors/heavy-body diluted no more than 1:1 with water painted on in thin layers or with an air brush can be used to recoat a complete curtain or patch pin holes in the curtain and bellows.
I suggest you carefully check the controls for the letters listed in the instructions as they are likely stamped into the metal and may be very difficult to see. Early Graflex SLR's and Speed Graphics controls were Silver plated brass and the use of metal polish will remove the silver plating as its very thin.
Folmer and Schwing used XXX Moroccan leather on their cameras until 1947 when the covering switched to Naugahyde. Using cotton balls or paper towels and 90% Isopropyl Alcohol wipe the leather down to remove the loose and embedded dirt from the leather then using cotton balls give the leather several light coats of Neatsfot oil. https://tandyleather.com/products/dr-jacksons-pure-neatsfoot-oil?_pos=1&_sid=231ef3904&_ss=r
How do you know this camera is 1902 era? There are no recorded records from that time period just some sales receipts with the camera's serial number that have been reported.
Visit https://www.graflex.org/ , sign up on the help board https://www.graflex.org/helpboard/ and post a request for info in the Other Graflex Camera Help section and be patient as a responce may be slow. I'm a major contributor on that site and cannot help further than what I've posted here.
 
OP
OP

keithostertag

Member
Joined
Feb 11, 2008
Messages
597
Location
Louisville,
Format
Multi Format
Thank you so much for your reply! I am confused by your sentence: "They can be oped with a wood chisel, removed, cleaned and reused."... Open the copper stays with a chisel? Could you correct me or elaborate?

The emblem shows a patent "November 5, 1901 - Aug 5, 1902"

Now that you alert me, yes I can see the letters stamped into the metal parts!

Is Neat's foot oil the _best_ oil to use, or the _only_ oil to use?

What would be your advice on what to do with this shutter? I.E. does the obvious damage mean the shutter isn't worth attempting a repair by an inexperienced person? Is the shutter historically valuable in that it should go to an institution/museum or of no particular value and it doesn't matter what happens to it?
 
Last edited:

shutterfinger

Member
Joined
Feb 25, 2013
Messages
5,020
Location
San Jose, Ca.
Format
4x5 Format
Although I'm not a fan of Jo Lommen this page will help you https://lommen9.home.xs4all.nl/renew curtain/index.htm
Neatsfoot oil is what has been recommended for years on Graflex.org by experienced Graflex repairmen and I've had excellent results with it.

As long as the silk base is good strip, recoat, and patch the tears. I've repaired several curtains and some were torn as yours is. There is no standard length for the curtain so salvage yours as it will be needed for measurements to make a new curtain.
The original curtain was .007 inch thick and may swell to .025 inch thick. Bellows cloth for player piano and pump organ repair comes in rolls 54 inches wide and is $$ per yard. Some is cotton based and some is nylon based, use the nylon based. Black rip stop nylon from a fabric store can be used if you coat it yourself.

The camera serial number may be stamped on the bed close to the bed hinge. It will be 4 or 5 digits.
 

shutterfinger

Member
Joined
Feb 25, 2013
Messages
5,020
Location
San Jose, Ca.
Format
4x5 Format
http://www.historiccamera.com/cgi-bin/librarium2/pm.cgi?action=app_display&app=datasheet&app_id=1133
http://camera-wiki.org/wiki/Folmer_&_Schwing
48xx was dated to 1898, 12xxx was dated to 1906.
Due to the shutter control layout, the patent dates makes this a 1902 to 1904 camera.
Do not attempt to remove the controls from the plate. The plate will remove from the body by removing the screws around the perimeter of the plate. The tension roller is at the bottom of the camera.
The Cycle Graphic was used on Circuit Cameras. Do you have a back for the camera?
 
OP
OP

keithostertag

Member
Joined
Feb 11, 2008
Messages
597
Location
Louisville,
Format
Multi Format
Yes, it has a back. I was hoping I could take the back off and use the camera normally without the focal plane shutter... the back seems to be attached with six small screws but I haven't yet attempted to remove the back from the shutter for fear of damaging it. Also, in order to use the back without the focal plane shutter I will need to add pins to fit into the camera body clips in order to hold the back on- what is a good way to add pins to the back for this purpose- use small brads?
 

shutterfinger

Member
Joined
Feb 25, 2013
Messages
5,020
Location
San Jose, Ca.
Format
4x5 Format
In your photo of the curtain/camera back there is no back on the camera. The back will hold a focusing panel with ground glass ad hold film holders or a plate holder. I can just see pins on the sides of the camera at the rear that clips will fit onto. The back should have brass plates attached with screws and a hole to fit on the pin in the camera body.

Correction to post 7. The tension roller shaft is likely attached to the tensioning gear(s) although it does not appear to be.
 
OP
OP

keithostertag

Member
Joined
Feb 11, 2008
Messages
597
Location
Louisville,
Format
Multi Format
Actually... unless I am using the wrong terms... the camera body has clips attached with screws which receive the pins which are embedded in the shutter box. The back is then attached to the shutter box with six screws. So the earlier photos actually show the back attached to the shutter box, just not shown well.

Yes indeed, the back has a focusing ground glass and a film holder with spring.

folmer_schwing_back_detail.jpg
 
OP
OP

keithostertag

Member
Joined
Feb 11, 2008
Messages
597
Location
Louisville,
Format
Multi Format
So I went ahead and removed the back. I am surprised the back is not designed to fit into the back of the body directly... the cutout doesn't fit.

folmer_schwing_back_removed.jpg
 

Sirius Glass

Subscriber
Joined
Jan 18, 2007
Messages
50,233
Location
Southern California
Format
Multi Format
The screws are probably had made and cannot be replaced. Keep any screws and hardware in dishes and it would be better to keep track of exactly which hole each one came from.
 
OP
OP

keithostertag

Member
Joined
Feb 11, 2008
Messages
597
Location
Louisville,
Format
Multi Format
Here's a photo showing how the pin in the shutter will fit into the clip in the camera body. Back is removed in this photo.

folmer_schwing_back_removed2.jpg
 

mshchem

Subscriber
Joined
Nov 26, 2007
Messages
14,395
Location
Iowa City, Iowa USA
Format
Medium Format
That's a awesome camera. Get yourself 1904 bicycle and go take some pictures. The fp shutter and the little viewfinder, you can handhold that baby.

There was a Iowa photographer who used a 5x7 Graflex SLR, documented farm life during the 30's and 40s. 5x7 is great format.
 
OP
OP

keithostertag

Member
Joined
Feb 11, 2008
Messages
597
Location
Louisville,
Format
Multi Format
Here's the previous photo of the shutter controls edited to show the letter designations so I can figure out the instructions. The one thing I haven't yet found- "G", as the instructions read: "To increase the speed turn "B" until the figure desired appears on the index at "G"". I don't know what it means by "the figure desired" or where the "index at G" is located. Does this have something to do with the Exposures legend/chart?

folmer_shutter_1928_with_letters.jpg
 
OP
OP

keithostertag

Member
Joined
Feb 11, 2008
Messages
597
Location
Louisville,
Format
Multi Format
OK, I think I have more figured out... the index at F and G are on the opposite side from the controls.

folmer_shutter_index_at_f.jpg
folmer_shutter_index_at_g.jpg
 
OP
OP

keithostertag

Member
Joined
Feb 11, 2008
Messages
597
Location
Louisville,
Format
Multi Format
So those strips that are hanging down unattached to anything are one end of one side of the aperture. I need to figure out where those free ends should be attached... evidently they have become unattached?
 

shutterfinger

Member
Joined
Feb 25, 2013
Messages
5,020
Location
San Jose, Ca.
Format
4x5 Format
Now this makes sense. The shutter is separable from the body.
The strips that are hanging down attach to a curtain. This shutter may have a capping shutter. A capping shutter will cover the image plane allowing the taking shutter to be wound/released to different apertures with a film holder in place and the darkslide removed.
A picture of the shutter with the back removed showing both top and bottom rollers will help.
 
OP
OP

keithostertag

Member
Joined
Feb 11, 2008
Messages
597
Location
Louisville,
Format
Multi Format
This seems like where the loose ends that are hanging down from the curtain should be attached: that bar is one one end marked "B" and on the other end is the "Index at G".
I'll need to figure out to tension the bars when attaching those loose ends.

folmer_shutter_loose_ends.jpg


folmer_shutter_attach_points.jpg
 

Sirius Glass

Subscriber
Joined
Jan 18, 2007
Messages
50,233
Location
Southern California
Format
Multi Format
So those strips that are hanging down unattached to anything are one end of one side of the aperture. I need to figure out where those free ends should be attached... evidently they have become unattached?

The straps are the sides of the shutter holes in the curtain. I have a Graflex Model D that had the straps snap and I was able to glue them together with Gorilla Glue while I was coached by the Graflex-Graphic repair man how sold it to me.
 

shutterfinger

Member
Joined
Feb 25, 2013
Messages
5,020
Location
San Jose, Ca.
Format
4x5 Format
I use Pliobond LV25 contact cement to attach the curtain to the rollers. https://www.ebay.com/itm/400596857629?epid=2241193682&hash=item5d456ef31d:g:cNwAAOSw~gRV27Mg
Gorilla glue may be too hard when cured.

If you can get the curtain would so that the image frame is open then you can use a leaf shuttered lens to make photos with on the camera.

If screw holes strip cut the end as needed from a round wood toothpick so that it fits the hole. Dip the trimmed toothpick in wood glue then insert into the stripped hole and trim flush with the edge of the frame/camera edge. Use a sharp pointed tool and make a start hole in the center of the filled hole while the glue is wet then install the screw. A small slot screwdriver can be used to make an X across the center of the hole pressing the tip into the repair piece while the glue is wet. Once the glue is dry the tooth pick will have to be drilled to get a screw in if the screw is not installed while the glue is wet.
 
Last edited:
Photrio.com contains affiliate links to products. We may receive a commission for purchases made through these links.
To read our full affiliate disclosure statement please click Here.

PHOTRIO PARTNERS EQUALLY FUNDING OUR COMMUNITY:


Ilford ADOX Freestyle Photographic Stearman Press Weldon Color Lab Blue Moon Camera & Machine
Top Bottom