Another Zone System Question

Frank Dean,  Blacksmith

A
Frank Dean, Blacksmith

  • 10
  • 5
  • 127
Woman wearing shades.

Woman wearing shades.

  • 1
  • 1
  • 99
Curved Wall

A
Curved Wall

  • 6
  • 0
  • 112
Crossing beams

A
Crossing beams

  • 11
  • 1
  • 134

Recent Classifieds

Forum statistics

Threads
198,848
Messages
2,781,823
Members
99,727
Latest member
rohitmodi
Recent bookmarks
0
OP
OP
Hubigpielover

Hubigpielover

Member
Joined
Dec 24, 2016
Messages
405
Location
Thibodaux, La
Format
Multi Format
You don't really need the Zone System to do all this, however. The real advantage of the Zone System is as a tool for visualizing the final print and making your exposure and development choices based on that rather than just making a standard, plain vanilla, "printable" negative. For many, however, this is all the Zone System they need. Learning how to meter effectively and getting all the information they want on the negative lets them print it "any way they want."

That's all I want to do right now is learn the basics of ZS. After I start printing and developing more, I can delve into it deeper. I appreciate the thought out reply. IT actually has helped me out in understanding the ZS.
 
OP
OP
Hubigpielover

Hubigpielover

Member
Joined
Dec 24, 2016
Messages
405
Location
Thibodaux, La
Format
Multi Format
Use the spot meter to take a light reading of the shadow which you want the details to be printed and set that in Zone 2 or Zone 3 as you prefer and print as YOU chose.

I can't wait till I get to make that choice. I was set back a little on the darkroom with this virus (getting supplies) and trying to keep my bathroom dark. I had to come up with a different strategy.
 

jtk

Member
Joined
Nov 8, 2007
Messages
4,943
Location
Albuquerque, New Mexico
Format
35mm
Oh and you will always print to make the picture look good no matter what the exposure was.

ZS is founded on previsualization...followed by metering exposing developing and printing on predetermined paper and paper development.

Slide film is an entirely other kettle of fish.
 

Bill Burk

Subscriber
Joined
Feb 9, 2010
Messages
9,312
Format
4x5 Format
You’re right jtk, previsualization / visualization or whatever one would call it when you have an idea in your mind’s eye of how you want to have the picture turn out... is the great strength of the Zone System. The ZS can be used to get the right exposure and development for the situation... But it’s promise is that you can start with a preconceived notion of how the print will turn out, and you can deliberately expose and develop to set the stage for what you had in mind, and the print will almost naturally come out the way you expected.

I have a related little write-up in the resources. Go to post 15 for updated links...


https://www.photrio.com/forum/threads/divided-attention.127205/
 

138S

Member
Joined
Dec 4, 2019
Messages
1,776
Location
Pyrenees
Format
Large Format
Bruce Barnbaum in a video says to put the shadows you want in Zone 4 while exposing and printing at Zone 3. Anyone tried this out?

In 1960 ASA (ISO) rating changed, all films had the box speed doubled without any change in the manufacturing. This has been generating an incredible source of confusion and heated debate in the last 60 years. Funny...

For a certain Film+Processing Speed point is the amount of exposure a film needs to generate a 0.1D density over film base + fog, A bit it's the minimum amount of exposure that starts generating a significative response.

If developing in "ISO conditions" (Contrast "CI" = 0.62), before 1960 Speed point was at (spot) metered 4 1/3 stops underexposure, after 1960 Speed point was at 3 1/3 stops underexposure, as a 1 stop safety factor was eliminated as box speed was doubled.

That change in 1960 Speed Rating was interpreted differently by different kinds of photographers. For mainstream photographers just a 1 stop safety factor was removed, in 1960 they all started underxposing by 1 stop compared to what they were doing in 1959.

...Instead Fine Art photographers continued doing mostly the same, as by 1959 they were metering well then they started rating the the film speed to the half (one stop slower) to match what they were doing well in 1959, or alternatively they started shifting a zone like that video explains.

If we use the regular Zone System visualization rule then we should shift one zone, like the video says, or we may make an new interpretation of what we get in each zone.

In practice all that is mostly irrelevant, simply you should be aware about how detail is depicted with your film+processing at -3, -2 and +1, and if you have a shoulder at +3, +4 or +5, using the spot meter for each interesting area in the scene.

Zone System is very useful to conceptually understand that you may compress shadows and highlights to fit in the paper dynamic range, but any particular film+processing has different linearity (toe/shoulder) and dynamic range, so you should learn how the particular materials you use do behave.

Also it has to be noted that all this is more important for optic printing, once you scan and edit you bend curves like you want, as always: expose for the shadows and develop for the highlights, this is specially useful if shooting sheets and making a custom developement for each shot, for rolls you have to ensure you record the shadows you want, while not blowing highlights.
 
Last edited:

Bill Burk

Subscriber
Joined
Feb 9, 2010
Messages
9,312
Format
4x5 Format
138S,

Everything you wrote is factually correct.

Each story can lead to a thread in itself.

To the original question... Zone System tests establish Zone I as the exposure that gives 0.10 density and at four stops reduced exposure from meter reading.

So exactly as 138S says, that’s where the film starts responding with enough contrast to reveal dark detail in a print.

So why not place your shadow on Zone I? (Rhetorical question. Perhaps because you want detail to start being visible and for that you need some room to go darker).

No you don’t place shadow on Zone I. Even Minor White asked you to place your shadow on Zone II.

I suspect the change to ASA in 1960 caused the general advice to shift to “place shadow on Zone III”.

Barnbaum is charming and the storytelling is wonderful but the straight line starts much lower than he tells you.

But if you place shadow on Zone VI... Now you are at three stops greater exposure than minimum and I caution you ... you might have heard “shoot at half box speed”.

Rate the film speed lower and now you are (basically) placing shadow at Zone V, four stops greater exposure than required. If you want to enlarge, the print time will have to be four times (so what would be a 15 second print time is a minute).

Bottom line. You can do it but already placing shadows on Zone II is enough and Zone III is more than enough.
 

138S

Member
Joined
Dec 4, 2019
Messages
1,776
Location
Pyrenees
Format
Large Format
138S,
I suspect the change to ASA in 1960 caused the general advice to shift to “place shadow on Zone III”.

Yes... it's the same placing some shadows in Z-III or placing those shadows in Z-II and and rating film to the half :smile: Isn't it the same ?
 
Last edited:

Sirius Glass

Subscriber
Joined
Jan 18, 2007
Messages
50,364
Location
Southern California
Format
Multi Format
138S,

Everything you wrote is factually correct.

Each story can lead to a thread in itself.

To the original question... Zone System tests establish Zone I as the exposure that gives 0.10 density and at four stops reduced exposure from meter reading.

So exactly as 138S says, that’s where the film starts responding with enough contrast to reveal dark detail in a print.

So why not place your shadow on Zone I? (Rhetorical question. Perhaps because you want detail to start being visible and for that you need some room to go darker).

No you don’t place shadow on Zone I. Even Minor White asked you to place your shadow on Zone II.

I suspect the change to ASA in 1960 caused the general advice to shift to “place shadow on Zone III”.

Barnbaum is charming and the storytelling is wonderful but the straight line starts much lower than he tells you.

But if you place shadow on Zone VI... Now you are at three stops greater exposure than minimum and I caution you ... you might have heard “shoot at half box speed”.

Rate the film speed lower and now you are (basically) placing shadow at Zone V, four stops greater exposure than required. If you want to enlarge, the print time will have to be four times (so what would be a 15 second print time is a minute).

Bottom line. You can do it but already placing shadows on Zone II is enough and Zone III is more than enough.

On occasion will put a light shadow in Zone IV. If I put the darkest shadow that I want the detail to print, I usually will end up with a denser than usual negative and printing exposures typically take longer.
 
OP
OP
Hubigpielover

Hubigpielover

Member
Joined
Dec 24, 2016
Messages
405
Location
Thibodaux, La
Format
Multi Format
ZS is founded on previsualization...followed by metering exposing developing and printing on predetermined paper and paper development.

Slide film is an entirely other kettle of fish.


You’re right jtk, previsualization / visualization or whatever one would call it when you have an idea in your mind’s eye of how you want to have the picture turn out... is the great strength of the Zone System. The ZS can be used to get the right exposure and development for the situation... But it’s promise is that you can start with a preconceived notion of how the print will turn out, and you can deliberately expose and develop to set the stage for what you had in mind, and the print will almost naturally come out the way you expected.

I have a related little write-up in the resources. Go to post 15 for updated links...


https://www.photrio.com/forum/threads/divided-attention.127205/

I'll check it out thanks.
 

markbau

Member
Joined
Apr 16, 2009
Messages
867
Location
Australia
Format
Analog
I just watched Barnbaum's video, he is essentially repeating the sage advice that David Vestal had been giving for years "make sure you give your film plenty of exposure and be careful not to give your film too much development" His video does make the important point that what we are really talking about here is getting important areas of an image onto the straight line. Something else that hasn't been mentioned in this thread is the fact that many B&W workers have a yellow or red filter welded onto their lenses and we all know what that does to shadows. What cannot be emphasised enough is that mid-tones ultimately make or break an image, sure our eye is automatically drawn to highlights but I've never seen a decent print that had sickly mid-tones. Where people get into trouble is when they go overboard with reducing film development and end up with a neg that produces sickly mid-tones, (they then print with high contrast and then run into problems with highlights and shadows) it's all a balancing act.
 
Last edited:

Luis-F-S

Member
Joined
Sep 19, 2013
Messages
774
Location
Madisonville
Format
8x10 Format
Makes sense. Still trying to wrap my head around the zone system.

I'm in Madisonville, not too far from Thibodaux. Message me if you want to get together or talk about this further.
 

BerthaDeCool

Member
Joined
Jan 28, 2020
Messages
6
Location
Cape Cod, MA, US
Format
Large Format
I was taught Zone III for shadow with detail, Zone II for shadow with a sense of space, of something there, same with Zone VII and VIII on the other end of the scale.

As far as "getting it" there was a day in 1979 when it just clicked in my head. I'd been wasting time, over-thinking, scratching my head. It was like seeing the silhouette of two faces staring at each other and then seeing the candlestick in the middle. Once I saw it, once it clicked and made sense, I couldn't figure out how I hadn't seen it before. And I've been unable to forget it since, like riding a bicycle.

Funny story: One of my fellow students was getting weird results on his densitometer tests, nothing was making sense, readings weren't even close to anyone else's results.. something had to off on his damn camera's shutter speeds, his lens' damn f stops, could not for the life of him figure out what was wrong.
He'd bought a Kodak grey card at a local photo store, save a buck or two by buying one on display. By a window. Where it caught a fair amount of sun. It was off by over a half stop, a Zone V.75 card.
 

Deleted member 88956

If one wants to remain stuck in the notion that correct application of Zone System is to place shadows in whichever zone because what you get in shadows is all about Zone System, then be happy about it ... so long as one sees photography as a copy work.

If on the other hand, one actually wants to understand what can be accomplished with application of Zone System to drive creativity as one chooses, think through it again. No issues trying to follow an advice, place shadows wherever & whoever told you is correct and ... forget about trying to understand what happened in between. You may still be very happy with results and perhaps quite adequate an approach to enjoying the craft.

It's been said repeatedly in every work published on Zone System, even mentioned in this discussion: ZS starts with pre-visualization ... or what one wants in print. It's always been about making printing as easy as possible to enjoying the print in the end as one sees it, or saw it before making exposure. In principle, it has never had anything to do with how to get the shadows right, albeit it allows for just that, if that is the choice for a given scene.

ZS is far more about understanding correlation between exposure/development/printing and how one affects the next, thus how these interrelations can be used to get the desired result in the easiest possible way. Not about any placement of any detail on any zone. Same applies to any process of any kind: understand it and set yourself free to use it as desired.

Nobody will tell me whether I want shadows to be detailed or blacked out entirely, nor whether any other detail in any other zone is to be this or that. Otherwise this has nothing to do with being yourself and far more about being a sheep that may end up producing very fine wool, but has no idea how it happened or more importantly, why.

Try thinking outside the box, the only thing that will allow personal approach to any creative process to evolve. Break the rules to see what happens, counter conventions. In the end you may end up where you started, but you will know why.
 

138S

Member
Joined
Dec 4, 2019
Messages
1,776
Location
Pyrenees
Format
Large Format
On occasion will put a light shadow in Zone IV. If I put the darkest shadow that I want the detail to print, I usually will end up with a denser than usual negative and printing exposures typically take longer.

Yes... of course. You know, if wanting to print optically then complex scenes require an accurate metering to predict densities in the lights and in the shadows, so we have a criterion to decide exposure and/or development.

For rolls we may have very different scenes for the same development, instead with sheets we can adjust development for each individual sheet to place highlight densities where we want.

For complex scenes with sheets we may use compensation from reduced agitation, so highlights have an slower development from local bromide generation. It has been said that (in low agitation conditions) developer is exausted sooner in the highlights, but main effect is the restrainer effect from bromide generated by development. For low agitation conditions I use trays, as the sheet is horizontal then there is less risk of bromide drags as gravity does not help with the sheet horizontal.

Another way is EMA recipes from Steve Sherman, which work with film vertical with no risk of drags. Contrary to what has been stated an EMA negative is not necessarily low contrast, with EMA we may develop for any C.I. , low or high, with low agitation we produce an specific comensation in the highlights. We also may use compensating developer (Diafine), intermitent water bath or SLIMT technique.

We have additional tools:

> Pyro. The proportional stain works as local yellow contrast filter in the highlights for Variable Contras paper, so highlights are printed with an effective longer paper toe.

> Silver chloride paper: Lodima / Lupex, sporting a longer toe for the highlights.

In fact many praise the linearity of TMX/Y films, but not having a shoulder it's easier to reach very high densities in the highlights that are difficult to print optically (no problem with hybrid), to overcome that we may need compensation, Pyro+VC, Chloride paper, masking, burning...

...or we may use a shouldered film+processing. IMO a linear film delivers a more flexible negative, but it may require an additional effort to have a sound print if scene range is very wide.


Well... paper allows 6.5 stops dynamic range but our scene may have much more. Usually we have to specifically compress shadows and highlights to allow the mids the range we want in the paper. We may make those compression in the film capture, in the printing, or in both.
 
Last edited:

138S

Member
Joined
Dec 4, 2019
Messages
1,776
Location
Pyrenees
Format
Large Format
ZS is far more about understanding correlation between exposure/development/printing and how one affects the next, thus how these interrelations can be used to get the desired result in the easiest possible way. Not about any placement of any detail on any zone. Same applies to any process of any kind: understand it and set yourself free to use it as desired.

Let say my personal point of view about that.

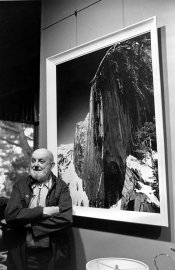
Ansel Adams recived visualization "divine illumination" :smile:)) while shooting the "Monolith, The Face of Half Dome, Yosemite Valley, California". He was using a pretty bad lens, an Adon glass...

020d47b1e6aa273ccbaf92b973b0043e.jpg

ZS core is the visualization technique, a high dynamic range scene does not fit in the dynamic range of paper, so you end placing "standard" 11 zones (0 to 10) totalling 11 stops dynamic range in a paper medium that sports 6.5 stops, so certain zones are compressed to allow the mids to have a natural gradation. This is common sense...

With the spot meter you know what scene zones will be compressen in the paper, Z-I, and Z-II are in the toe, Z-VII and Z-IX are in the shoulder, so they are compressed.

By adjusting exposure and development, and by taking advantage of film toe/shoulder we have the print as we visualized it. Of course we may make additional burn/dodge.


But several things changed since then:

> now we have some linear films that won't do the compressions in the capture, we have to do it in the printing.

> today we use Variable Contrast papers, so we may burn different areas in the print with a contrast filter, so we may adjust contrast locally !


Anyway ZS is core knowledge, we may use the specific recipe or not, but the important ZS thing is that paper has not the same Dynamic Range than the scene, so we have to visualize our print and then do what necessary to compress or to expand certain scene zones to allow shadows+mids+highlights fit in the paper range. Optic Printing may start before shutter release.
 

Deleted member 88956

Let say my personal point of view about that.

Ansel Adams recived visualization "divine illumination" :smile:)) while shooting the "Monolith, The Face of Half Dome, Yosemite Valley, California". He was using a pretty bad lens, an Adon glass...

View attachment 242889

ZS core is the visualization technique, a high dynamic range scene does not fit in the dynamic range of paper, so you end placing "standard" 11 zones (0 to 10) totalling 11 stops dynamic range in a paper medium that sports 6.5 stops, so certain zones are compressed to allow the mids to have a natural gradation. This is common sense...

With the spot meter you know what scene zones will be compressen in the paper, Z-I, and Z-II are in the toe, Z-VII and Z-IX are in the shoulder, so they are compressed.

By adjusting exposure and development, and by taking advantage of film toe/shoulder we have the print as we visualized it. Of course we may make additional burn/dodge.


But several things changed since then:

> now we have some linear films that won't do the compressions in the capture, we have to do it in the printing.

> today we use Variable Contrast papers, so we may burn different areas in the print with a contrast filter, so we may adjust contrast locally !


Anyway ZS is core knowledge, we may use the specific recipe or not, but the important ZS thing is that paper has not the same Dynamic Range than the scene, so we have to visualize our print and then do what necessary to compress or to expand certain scene zones to allow shadows+mids+highlights fit in the paper range. Optic Printing may start before shutter release.

Looks like we don't differ much. I was not getting into workings of ZS, just the fact it covers how each part of the process works towards final print. I will leave technicalities to the many publications written on the subject ( and you have covered good portion of it anyways).

My main point was ZS is not where to place shadows as some ZS rule or else, as many keep talking about, but how to expose to fit negative development and later printing, to get what we wanted before shot was taken.

The most difficult part of ZS application is learning how to see colors in front of us in printed grays in the end. It is this transition that demands most time, practice, and confidence . Exposure, development , printing are nothing in comparison, as all are pure technical operations requiring only application of proper instructions.

In other words, ZS inner workings are easy to learn and understand, visualizing correctly is the problem for many. Wrong seeing calls for wrong application of ZS technique and leads to disappointing results and frustration.
 

138S

Member
Joined
Dec 4, 2019
Messages
1,776
Location
Pyrenees
Format
Large Format
visualizing correctly is the problem for many.

Yes... also one has to learn the effects from filtration

Personally what I find difficult is obtaing depth sensation, perspetive an focus are involved, but also a natural gradation in the shadings allows the volume depiction, but I guess this is also a lot about illumination.
 
Joined
Sep 10, 2002
Messages
3,589
Location
Eugene, Oregon
Format
4x5 Format
I learned the Zone System from AA's books and from the Minor White et al. "New Zone System Manual." I did all that testing, etc., etc., but the most valuable part of the whole learning process for me was making Zone Rulers for all the different films and development schemes I had and printing them on my standard papers (Ilfobrom graded, Seagull G, Brilliant, Kodak Elite in those days). I carried the Zone Rulers around with me in the field until I got a good feeling for what exposure would result in what tone in the final print. It was similar to my training as a musician, learning intervals and solfege. After a while, it becomes second nature to see things in your mind's eye from a few meter readings. Knowing where to place a shadow to get the kind of black you want, when to develop more of less, when to use a filter, when to make a difficult-to-print negative because you want mid-tone separation and, most of all, when to pack up and not make a negative in the first place all come from an ability to imagine the final result from a few numbers you get from your light meter. That's what the ZS is for me; all the rest is just application.

Best,

Doremus
 

Bill Burk

Subscriber
Joined
Feb 9, 2010
Messages
9,312
Format
4x5 Format
Now if anyone wants to break the rules - remember how Ansel Adams feuded with William Mortensen. You could follow his teachings instead. Instead of Zone System you can try the “ring around” technique to explore overexposure/underdevelopment or underexposure/overdevelopment. Mortensen said it’s a waste of time to try to hit the middle perfectly when the corners are so much more interesting.

If you want a film shoulder, there are some films available that can give you soot and chalk. Most film doesn’t have a shoulder. Go for what Ansel hated the most, just to be experimental.
 

Sirius Glass

Subscriber
Joined
Jan 18, 2007
Messages
50,364
Location
Southern California
Format
Multi Format
The only part of the Zone System that I use it placing the darkest shadow details in Zone II or Zone III for negatives and highlights with details in Zone VII or Zone VIII for slides. The wide exposure latitude of modern negative film means that I do not have to vary the film development. The only place that I may need to work with in the darkroom is fitting all the exposure levels onto paper when the SBR is higher than 7.
 

DREW WILEY

Member
Joined
Jul 14, 2011
Messages
13,936
Format
8x10 Format
I haven't read all the replies. Good ole Bruce B. could indeed make a nice print at times, but he was stuck in the mud sometimes in terms of not utilizing the full potential of film, just darn stubborn as if his way of doing things was the only way. Place shadows on Zone IV? Then what do you do with all the sensitometric real estate below that, just throw it away?
Even Zone III placement seems absurd to me unless you're working with a film with an exceptionally short straight line like Pan F. If one has to be that paranoid of underexposure, why bother owning a light meter at all? The effect is that you risk blowing out the highlights, and get a "thick" negative hard to print, or else end up smashing tonality into mush using blatant compression ("minus') development. And not all films are the same. One needs to match their zone model to a specific film and developer regimen just like getting the right shoe size for a particular foot. Generic rules just won't get you far. Although I progressed past Zone ideology a long time ago, it is still a valuable model for conversation in instances like this one. Depending one what I'm doing, I might place shadow threshold on Zone 2, 1, or even 0, depending on what a specific film is actually capable of handling, very rarely Zone 3. If skating right at the edge of the ice rink on Zone 1 sounds too scary, then use 2. But 4? That's like shooting an arrow at a bullseye 50 yards in diameter blindfolded. Even the Zone System makes no sense unless it has plasticity and can be tailored to varying situations. Don't make it a religion, no matter who the guru is.
 

138S

Member
Joined
Dec 4, 2019
Messages
1,776
Location
Pyrenees
Format
Large Format
Mortensen said it’s a waste of time to try to hit the middle perfectly when the corners are so much more interesting.

well, perhaps hitting the middle it's the easier part, usually we just modiffy gradient, but compressing shadows and (specially) highlights like we want... this may not be that easy in optic printing.
 

DREW WILEY

Member
Joined
Jul 14, 2011
Messages
13,936
Format
8x10 Format
In black and white photography, knowing your printable endpoints in the scene are essential, and not just the middle. Studio photographers can easily adjust their lighting to keep everything within range. But outdoors, you need some method to get it all on the same piece of film, and the Zone System is one model for how to do this. I'm not fond of compression, which is one of the key features of the ZS, and rarely do it. There are other options. But in my opinion, the ZS is something worth learning to keep somewhere in your tool kit.
 
Last edited:
Photrio.com contains affiliate links to products. We may receive a commission for purchases made through these links.
To read our full affiliate disclosure statement please click Here.

PHOTRIO PARTNERS EQUALLY FUNDING OUR COMMUNITY:


Ilford ADOX Freestyle Photographic Stearman Press Weldon Color Lab Blue Moon Camera & Machine
Top Bottom