Hi all,
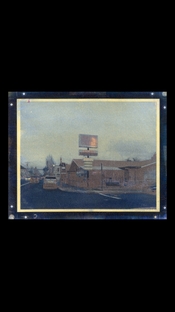
Beginner gum printer here and I’m having a lot of trouble…particularly with muddy midtones and then pigment not washing off.
It is likely my error in my process, but it’s so hard to pinpoint what it can be. I also want to note that I’m using the Bostick and Sullivan kit which has l’Aquarelle pigments (never heard of the brand).
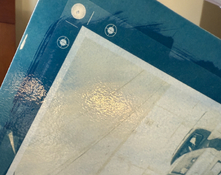
1. Pigment not washing off highlights/whites.
2. Really muddy and flaky shadows
Today I started thinking that maybe I am under-sizing or my pigments aren’t working well with my paper (Canson).
Appreciate any suggestions!
Beginner gum printer here and I’m having a lot of trouble…particularly with muddy midtones and then pigment not washing off.
It is likely my error in my process, but it’s so hard to pinpoint what it can be. I also want to note that I’m using the Bostick and Sullivan kit which has l’Aquarelle pigments (never heard of the brand).
1. Pigment not washing off highlights/whites.
2. Really muddy and flaky shadows
Today I started thinking that maybe I am under-sizing or my pigments aren’t working well with my paper (Canson).
Appreciate any suggestions!