- Joined
- Nov 21, 2009
- Messages
- 45
- Format
- Med. Format Pan
Hello All,
Let me start with a brief introduction to my photographic past.
In 1976 I was introduced to analog photography, in black and white. Soon came the challenge of making my own color prints as well. At that time, I only had a 35mm enlarger built by my father himself. With simple AMALOCO color filters in three primary colors, I was still able to get started easily and relatively inexpensively. Since 1980 I have mainly focused on black and white photography.
About six years ago I purchased a Cambo 4x5 monorail camera. A few years later followed by a Wista 45SP field camera. The biggest challenge quickly became mastering the use of camera movements.
A lot of information can still be found on Photrio and the LF-Forum on how to position the plane of sharp focus and controlling depth of field. Merklinger's articles were a rewarding addition. His animated diagrams nicely show how Scheimpflug Rule and Hinge Rule work together. For me, more was needed to truly understand how it works and what was happening.
All this gave me the idea of making a three-dimensional model with which I could see that it works and how it works. It ended up being a rewarding project but also time-consuming and complicated too.
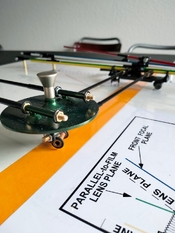
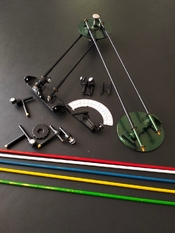
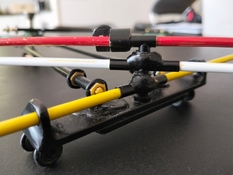
I will try to describe the characteristics and operation of the 3-D model as accurately as possible. The model is built to a scale of 1:10 and can be almost completely dismantled. Some of the parts can be seen in one of the photos.
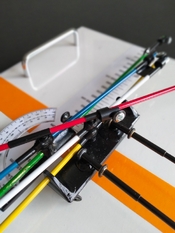
When designing the right half of the 3-D model, I was guided by the images of Harold Merklinger. The movements of the five coloured planes are simulated by a rod mechanism.
The left part of the 3-D model is a supporting rod mechanism that functions according to the principle of an old-fashioned drawing machine (US patent from 1901). This makes it possible to move the yellow Film Plane accurately and without rotation in both the vertical and horizontal directions. The movement of the yellow film plane, which is actually the focusing on the subject, is towards or away from the green parallel-to-film Lens Plane. At the same time, the Scheimpflug Line moves over both the white Lens Plane and the red Plane of Sharp Focus. This left part of the 3-D model is, as it were, the motor that drives the mechanical rod mechanism and rotates the Plane of Sharp Focus around the Hinge Line.
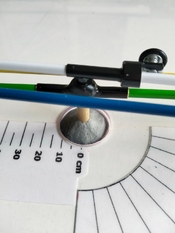
A characteristic feature of the 3-D model is that Lens Tilt (Alpha) can be adjusted by allowing the white Lens Plane and the blue Front Focal Plane to tilt simultaneously around the axis of the lens (Lens Axis Tilt), thereby determining the position of the Hinge Line in space. Alpha can be read with an accuracy of plus or minus 0.2 degrees.
The distance J is variable and depends on the degree of Lens Tilt (Alpha). J can be easily read on a scale and is a minimum of 50 cm and a maximum of 300 cm in the 3-D model.
The fixed distance between the Lens Plane and Front Focal Plane (f) is determined by the selected focal length of the lens. In the model, f=150 mm has been chosen.
The degree of rotation of the red Plane of Sharp Focus can be read on a protractor, also with an accuracy of approximately plus or minus 0.2 degrees.
Finally, the distance from the yellow film plane to the green Parallel-to-Film Lens Plane is measured with a caliper.
The functioning of the 3D model more than meets my expectations. I have compared the readings for the individual variables such as α (°), J (cm), φ (°) and A (mm) with the calculated values from the official Merklinger table.
I hope I have been able to explain in short what my intention was with the conception and creation of this 3-D model. It has indeed given me a better insight into working with the view camera because it fills a gap in the information I could find.
I am very curious how you experienced the whole learning process of focusing.


