Paper Negative Test
desertrat

Paper Negative Test

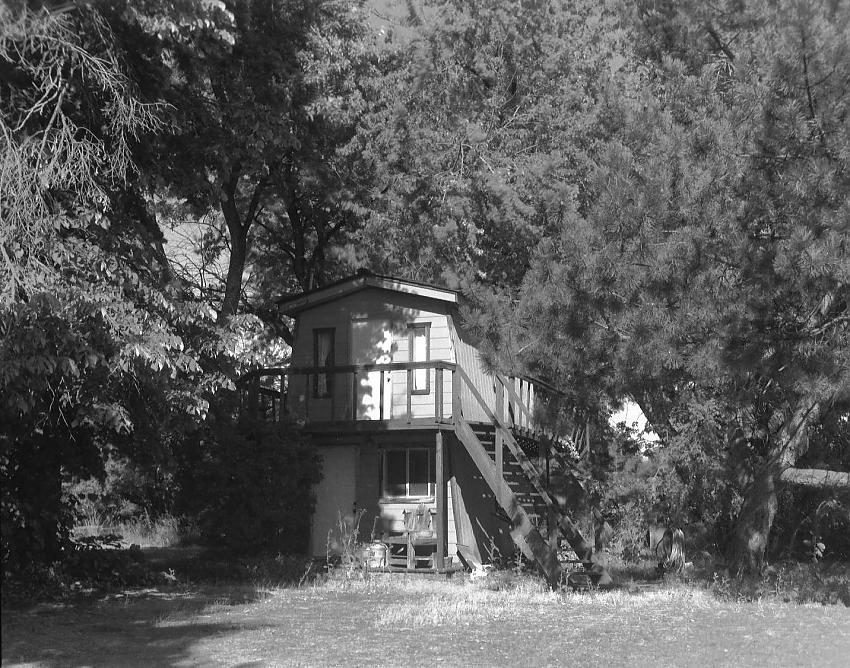
View of small workshop on our property. Paper negative contact printed onto paper print. Exposed negative with yellow filter on lens to tame contrast. This got contrast under control really well. Pre-flashed negative before exposure. Printed with same paper using enlarger light source and grade 2 filtration.

The print has a look all its own, different from using ortho-litho negatives, X-ray film negatives, or panchromatic film negatives. I haven't shot pan film for several years, mainly due to cost, plus I like to experiment. The midtones don't have very good separation, so these paper negatives might work better with other subjects. I was surprised at how well the yellow filter tamed the contrast of the negative.

The lens used for this shot is a brass rapid rectilinear, marked '8X10 Rapid Rectilinear Ralph J. Golsen Supply Co., Chicago', mounted in a brass Wollensak pneumatic shutter. Some previous owner had removed the right hand cylinder and the internal linkage to the slow shutter speeds, probably because they had become unreliable. Now it has T, B, and I, where I is the highest marked shutter speed at 1/100 but is probably closer to 1/50. Still very usable as is, and was really cheap at about $26 from the great auction site.

Used some front rise and the lens covered, but the upper corners are very soft even at f64. This lens is probably best used with very little movement, then the corners aren't bad at all at f64 for contact prints.
Location
Boise, ID, 4:00 PM local, clear sky
Equipment Used
8X10 Improved Seneca View, brass rapid rectilinear in brass Wollensak shutter
Exposure
40 sec @ f64
Film & Developer
Arista.EDU Ultra VC RC Glossy paper, D-72 1:2 scratch mixed at tray dilution
Paper & Developer
Arista.EDU Ultra VC RC Glossy paper, D-72 1:2 scratch mixed at tray dilution
Lens Filter
Negative exposed through Sunpak Y-2 (yellow)
Thanks! No development tricks. It went to completion in a little over a minute. My scanner scans prints darker and with more contrast than they appear to the naked eye. To offset that, I feed it prints that have been under exposed slightly in the enlarger, and that is usually the second to last print I make from a negative. My print was a little lighter and lower in contrast than the scan, but it looked good enough I didn't fiddle with brightness or contrast in Gimp (freeware image editor). When I scan a print, I get the whole scanner bed, not just the print, so I have to crop every image in Gimp.

My very first large format images were made on enlarging paper 10 years ago, because I had just won the camera on the great auction site, and hadn't bought any film yet. I forgot how fun it was. I didn't know then about shooting through a yellow filter or pre-flashing the negative, so I got blocked up chalky highlights and featureless black shadows. It was still a lot of fun though. I plan to buy some pearl surface paper to make the prints, because the glossy paper is good for negatives but when used for prints they look kind of plasticky and metallic when viewed at certain angles.
 
You got some impressive results there. I tried my first foray into paper negatives on Worldwide Pinhole Photography Day this spring and wasn't all that happy with the results, but I did at least establish a starting point for the next try if I ever get around to it. It looks as though you have refined your process quite well, thanks for sharing.
 

Media information

Category
Experimental Gallery
Added by
desertrat
Date added
View count
528
Comment count
3
Rating
0.00 star(s) 0 ratings

Image metadata

Filename
chalet_rr_print.jpeg
File size
148.3 KB
Dimensions
850px x 668px

Share this media

Photrio.com contains affiliate links to products. We may receive a commission for purchases made through these links.
To read our full affiliate disclosure statement please click Here.

PHOTRIO PARTNERS EQUALLY FUNDING OUR COMMUNITY:


Ilford ADOX Freestyle Photographic Stearman Press Weldon Color Lab Blue Moon Camera & Machine
Top Bottom