The entire process you've created is extremely interesting indeed. Really fantastic work, the nickel/dimethylglyoxime toning is a brilliant idea. I've got all the required chemicals here, I'll definitely be attempting this when I find some time.
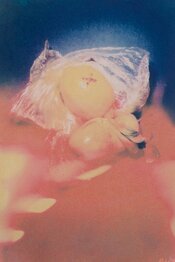
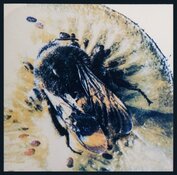
If I may, I offer my discovery of a yellow toning method for you to try that might be of use in your search for a cadmium replacement. Below is an example of how it looks before and after toning. Sorry for such a poor test subject, I used a failed print for this trial.
View attachment 421462View attachment 421463
This was achieved by putting the cyanotype print in a 0.3% w/v solution of Sodium phytate for around an hour. Which is probably rather longer than needed as it changes colour quite quickly. I've also not done any work on finding an optimal concentration of Sodium phytate, this was just a "feels like enough" type test. The yellow colour appears to be permanent, my initial tests from over 2 years ago are still the same colour as when I did them.